INSTALLATION
Removal / installation · Vehicles built from Jan 2006
| 1. INSTALL INSTRUMENT PANEL NO. 1 SAFETY PAD |

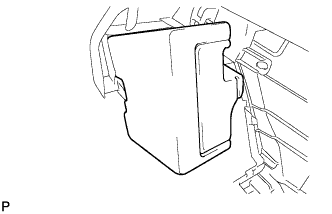  |
Apply butyl tape to install the instrument panel safety pad No. 1 onto the instrument panel lower (When installing a new one).
- Adhesive:
- Part No. 08850-00065, Butyl Tape Set or the equivalent
| 2. INSTALL INSTRUMENT PANEL NO. 2 SAFETY PAD |
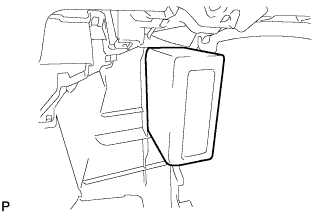 |
Apply butyl tape to install the instrument panel safety pad No. 2 onto the instrument panel lower (When installing a new one).
- Adhesive:
- Part No. 08850-00065, Butyl Tape Set or the equivalent
| 3. INSTALL INSTRUMENT CLUSTER FINISH PANEL SEAL |
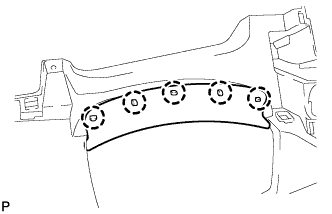 |
Engage the 5 claws and install the panel seal.
| 4. INSTALL INSTRUMENT PANEL HOLE COVER |
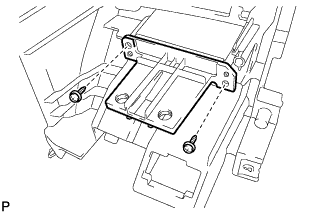 |
Install the instrument panel hole cover with the 2 <H> screws.
| 5. INSTALL STEREO JACK ADAPTER ASSEMBLY |
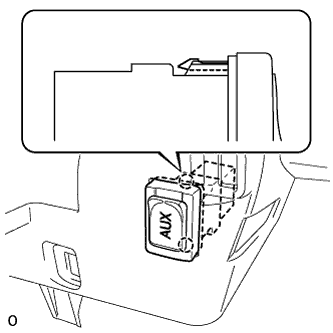 |
Engage the 2 claws and install the stereo jack adapter.
| 6. INSTALL HEADLIGHT LEVELING SWITCH |
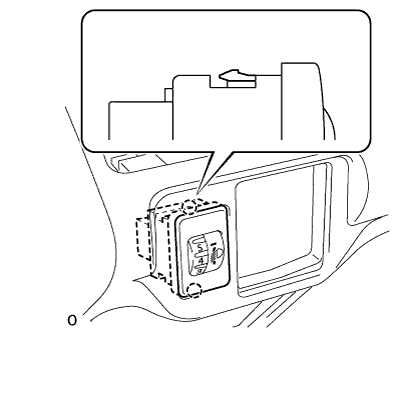 |
Engage the 2 claws and install the headlight leveling switch.
| 7. INSTALL OUTER MIRROR SWITCH ASSEMBLY |
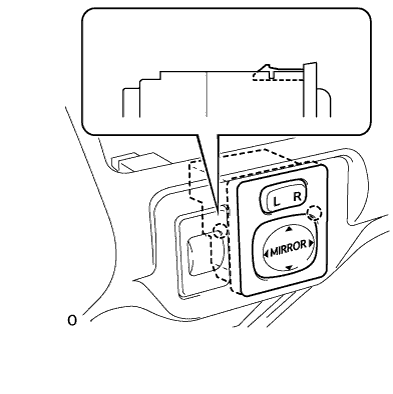 |
Engage the 2 claws and install the outer mirror switch.
| 8. INSTALL GLOVE COMPARTMENT DOOR STOPPER SUB-ASSEMBLY |
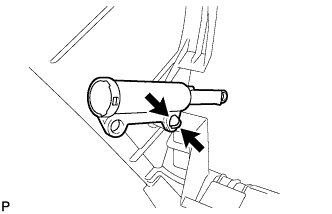 |
Engage the claw and install the glove compartment door stopper.
| 9. INSTALL INSTRUMENT PANEL CUP HOLDER SUB-ASSEMBLY LH |
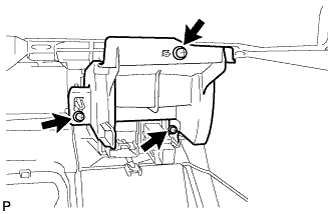 |
Install the instrument panel cup holder with the 3 <A> screws.
| 10. INSTALL INSTRUMENT PANEL CUP HOLDER SUB-ASSEMBLY RH |
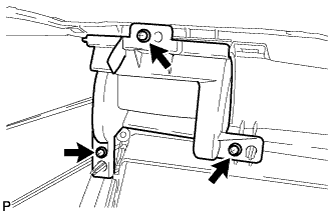 |
Install the instrument panel cup holder with the 3 <A> screws.
| 11. INSTALL LOWER INSTRUMENT PANEL SUB-ASSEMBLY |
Using a nipper, cut off both ends of the runner portion shown in the illustration (When installing a new one).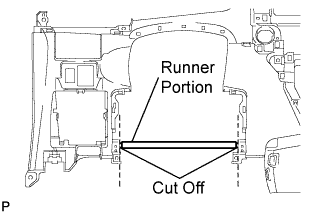
Install the lower instrument panel with the 6 <D> bolts, 2 <E> bolts, screw <G> and screw <H>.
- NOTICE:
- Do not excessively tighten the <D> bolts, as this, may damage the area not being tightened.
Connect the clamps and connectors.
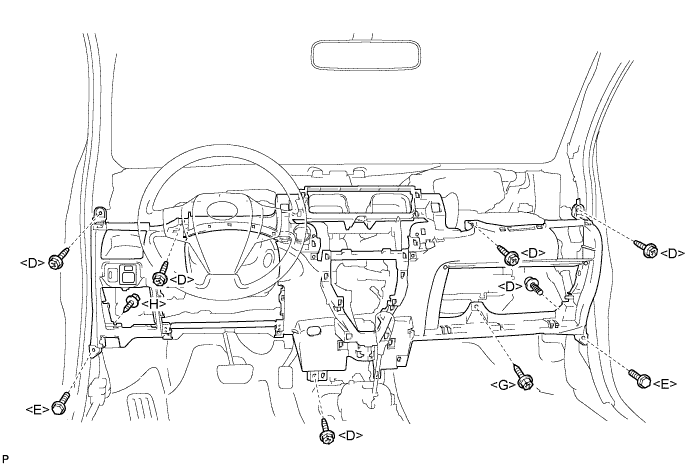
Engage the 2 claws and connect the DLC3 connector.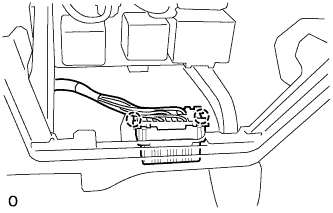
| 12. CONNECT HOOD LOCK CONTROL LEVER SUB-ASSEMBLY |
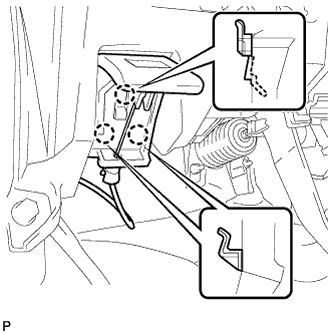 |
Engage the 3 claws to connect the control lever.
| 13. CONNECT ANTENNA CORD SUB-ASSEMBLY |
for LHD: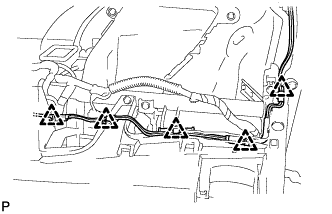
Connect the 5 antenna cord clamps.
for RHD: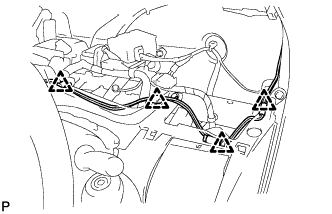
Connect the 4 antenna cord clamps.
| 14. INSTALL INSTRUMENT PANEL BOX |
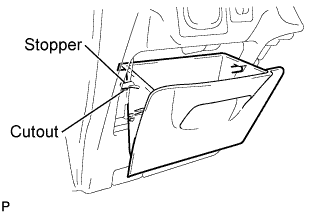 |
Insert the stopper of the instrument panel box from the cutout of the instrument panel lower.
Engage the 2 hinges with the instrument panel open.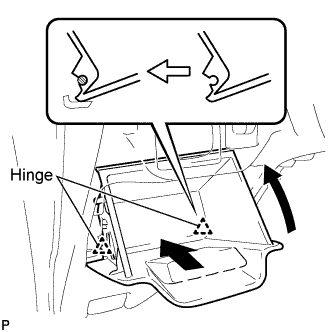
Close the instrument panel box.
| 15. INSTALL INSTRUMENT PANEL UNDER TRAY |
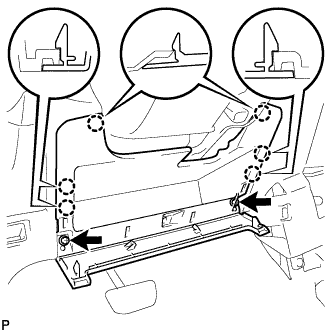 |
Engage the 6 claws and install the instrument panel under tray.
Install the 2 <A> screws.
Engage the 4 claws and install the instrument panel under tray.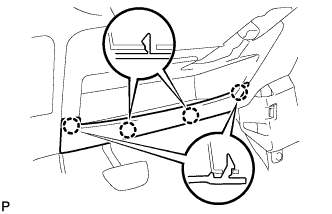
| 16. INSTALL INSTRUMENT PAD LOWER RH |
Engage the claw and 3 clips and install the instrument pad lower.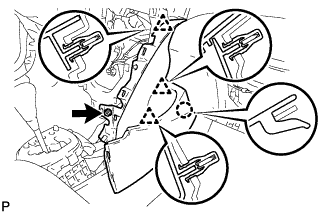
Install screw <I>.
| 17. INSTALL INSTRUMENT PAD LOWER LH |
Engage the claw and 3 clips and install the instrument pad lower.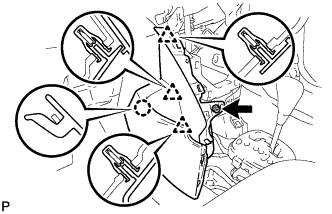
Install screw <I>.
| 18. INSTALL REAR CONSOLE BOX ASSEMBLY |
Engage the 4 claws and install the rear console box.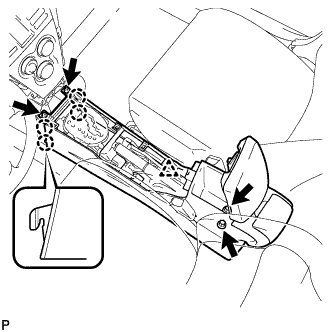
Install the 2 bolts and 2 screws.
Connect the clamp.
| 19. INSTALL CONSOLE BOX CARPET |
Install the console box carpet.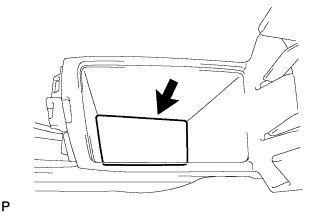
| 20. INSTALL CONSOLE UPPER REAR PANEL SUB-ASSEMBLY |
Connect the connector.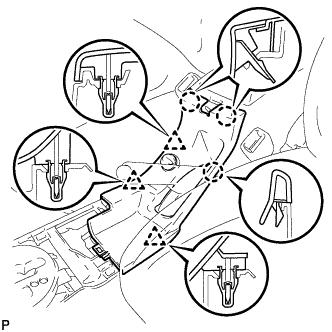
Engage the 3 clips and 3 claws and install the console upper rear panel.
| 21. INSTALL UPPER CONSOLE PANEL SUB-ASSEMBLY |
Engage the 5 clips and the claw and install the upper console panel.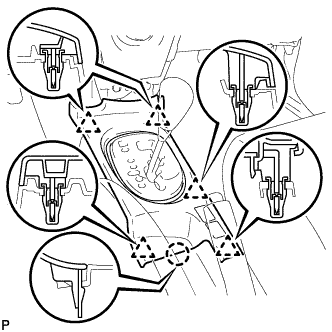
| 22. INSTALL SHIFT LEVER KNOB SUB-ASSEMBLY (for Manual Transaxle) |
Install the shift lever knob.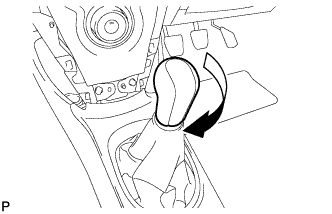
| 23. INSTALL COWL SIDE TRIM BOARD RH |
Engage the stud bolt and the claw and install the cowl side trim board.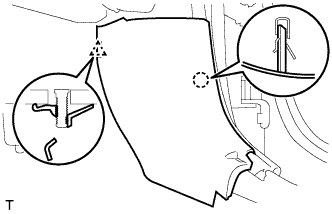
| 24. INSTALL COWL SIDE TRIM BOARD LH |
- HINT:
- Use the same procedure as for the RH side.
| 25. INSTALL FRONT DOOR SCUFF PLATE RH |
Engage the 11 claws and install the front door scuff plate.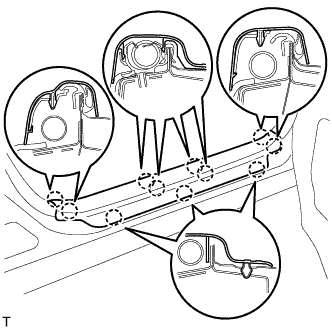
| 26. INSTALL FRONT DOOR SCUFF PLATE LH |
- HINT:
- Use the same procedure as for the RH side.
| 27. INSTALL UPPER INSTRUMENT PANEL SUB-ASSEMBLY |
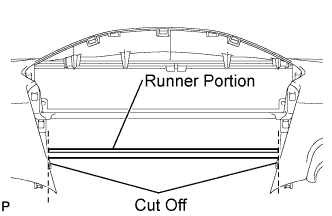 |
Using a nipper, cut off both ends of the runner portion shown in the illustration (When installing a new one).
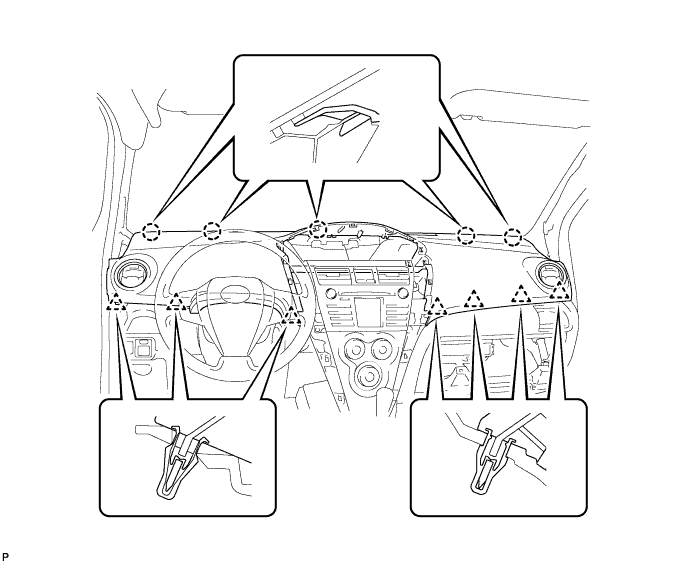
Engage the 5 claws at the front side of the instrument panel.
Engage the 7 clips at the rear side of the instrument panel.
Install the upper instrument panel with the 2 <C> bolts and the 2 <B> screws.
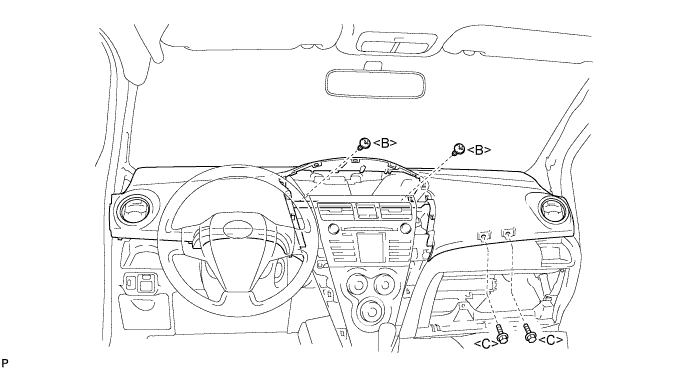
- Torque:
- 20 N*m{ 204 kgf*cm , 15 ft.*lbf } for bolt <C>
Connect the passenger airbag connector and clamp.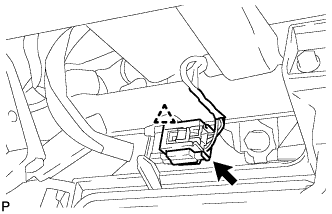
| 28. INSTALL GLOVE COMPARTMENT DOOR ASSEMBLY |
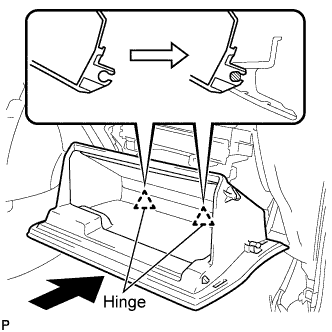 |
Engage the claws of the hinge portions by pushing the glove compartment door in the horizontal direction to install the glove compartment door assembly.
- NOTICE:
- Engage the claw by pushing it in the horizontal direction, otherwise, installation failure caused by excessive play around the hinge portion will result.
Slightly flex the upper portion of the glove compartment door assembly to engage the stopper.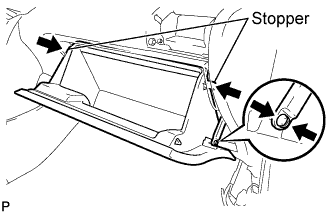
Install the glove compartment door stopper onto the glove compartment door.
| 29. INSTALL FRONT PILLAR GARNISH RH |
w/ Curtain Shield Airbag: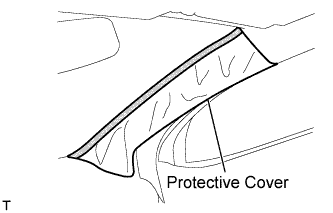
Remove the piece of cloth or nylon.
Install the 3 clamps.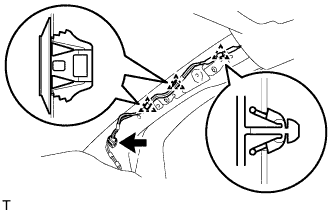
Connect the antenna connector.
w/ Curtain Shield Airbag: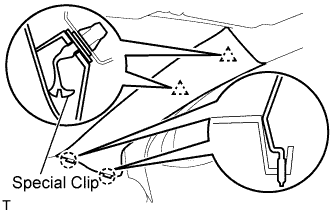
Install a new special clip and the clip onto the front pillar garnish.
Engage the 2 clips and the 2 claws and install the front pillar garnish.
w/o Curtain Shield Airbag: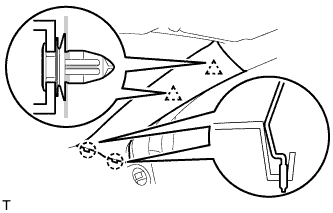
Engage the 2 clips and the 2 claws and install the front pillar garnish.
| 30. INSTALL FRONT PILLAR GARNISH LH |
w/ Curtain Shield Airbag: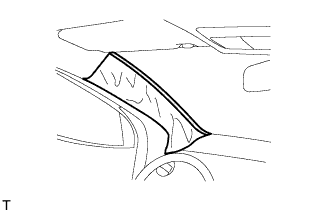
Remove the piece of cloth or nylon.
Install the 4 clamps.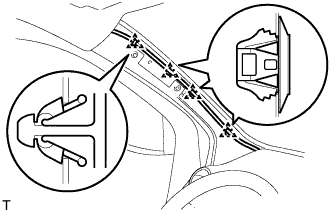
w/ Curtain Shield Airbag: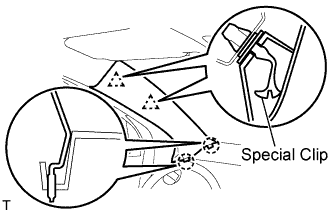
Install a new special clip and the clip onto the front pillar garnish.
Engage the 2 clips and the 2 claws and install the front pillar garnish.
w/o Curtain Shield Airbag: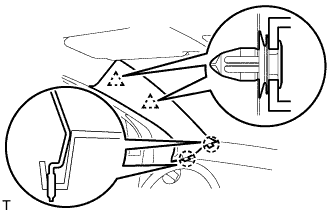
Engage the 2 clips and the 2 claws and install the front pillar garnish.
| 31. INSTALL FRONT DOOR OPENING TRIM WEATHERSTRIP RH |
Install the front door opening trim weatherstrip.
| 32. INSTALL FRONT DOOR OPENING TRIM WEATHERSTRIP LH |
Install the front door opening trim weatherstrip.
| 33. CONNECT AIR INLET DAMPER CONTROL CABLE SUB-ASSEMBLY |
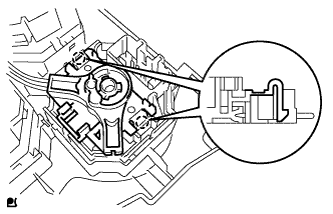 |
Engage the 2 claws and connect the air inlet damper control cable.
| 34. CONNECT DEFROSTER DAMPER CONTROL CABLE SUB-ASSEMBLY |
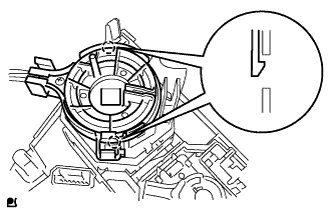 |
Engage the 2 claws and connect the defroster damper control cable.
| 35. CONNECT AIR MIX DAMPER CONTROL CABLE SUB-ASSEMBLY |
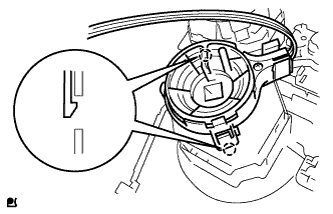 |
Engage the 2 claws and connect the air mix control cable clamp.
Connect the air mix damper control cable to the clamp.
| 36. INSTALL AIR CONDITIONING PANEL ASSEMBLY |
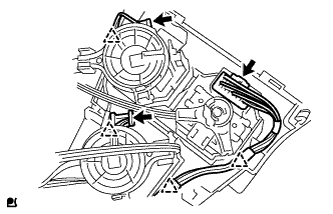 |
Connect the 3 connectors and the 4 clamps.
Engage the 4 clips and 2 claws and install the air conditioning panel.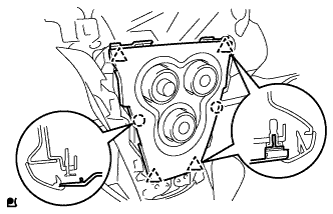
| 37. INSTALL STEREO OPENING COVER (w/o Radio Receiver) |
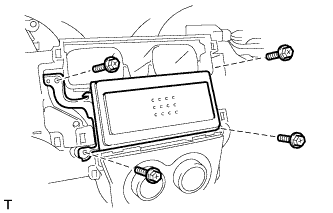 |
Install the stereo opening cover with the 4 screws.
| 38. INSTALL RADIO RECEIVER ASSEMBLY |
Connect the plug.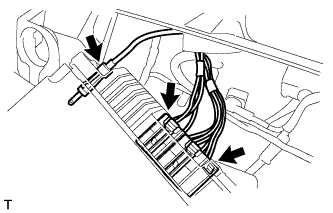
Connect the 2 radio connectors.
Align the 2 bosses of the instrument panel with the hole in the radio bracket.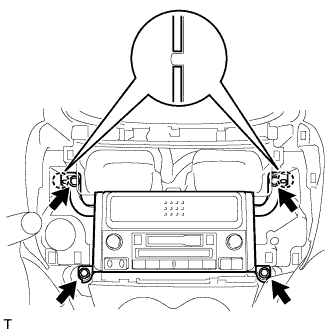
Install the radio receiver with the 4 bolts.
| 39. INSTALL INSTRUMENT CLUSTER FINISH PANEL CENTER SUB-ASSEMBLY |
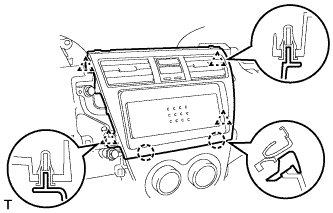 |
Engage the 2 claws and 4 clips and install the instrument cluster finish panel center.
| 40. INSTALL COMBINATION METER ASSEMBLY |
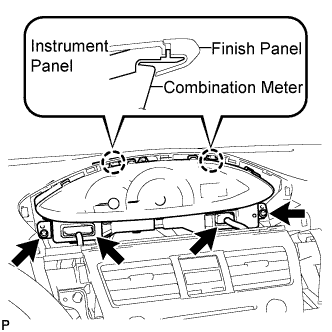 |
Install the combination meter assembly with the 2 screws.
- NOTICE:
- Install the combination meter so that the rib of the combination meter is held between the instrument panel and the instrument cluster finish panel.
Connect the 2 connectors.
| 41. INSTALL INSTRUMENT CLUSTER FINISH PANEL |
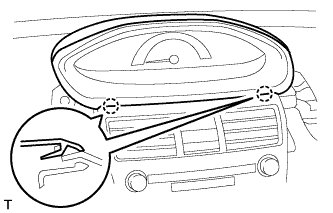 |
Fit the 2 claws of the instrument cluster finish panel into the upper instrument cluster finish panel center.
Engage the 5 claws and 5 clips and install the instrument cluster finish panel.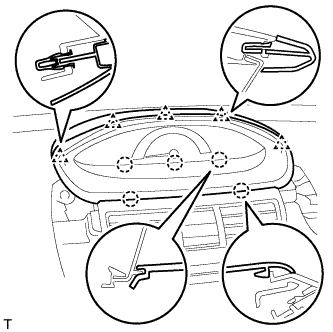
| 42. INSTALL INSTRUMENT PANEL FINISH PANEL END RH |
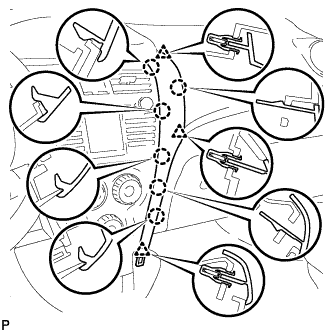 |
Engage the 6 claws and 3 clips and install the instrument panel finish panel end RH.
| 43. INSTALL INSTRUMENT PANEL FINISH PANEL END LH |
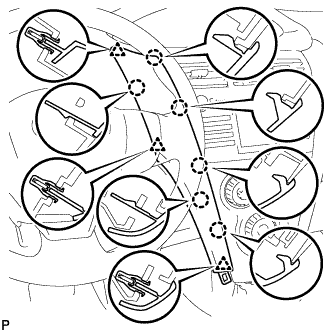 |
Engage the 6 claws and 3 clips and install the instrument panel finish panel end LH.
| 44. INSTALL INSTRUMENT PANEL FINISH PANEL LOWER CENTER |
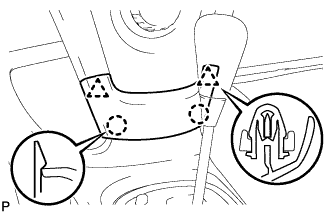 |
Engage the 2 claws and 2 clips and install the instrument panel finish panel lower center.
| 45. INSTALL INSTRUMENT PANEL CUP HOLDER SPRING RH |
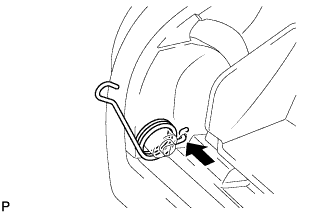 |
Install the spring.
| 46. INSTALL INSTRUMENT PANEL CUP HOLDER RH |
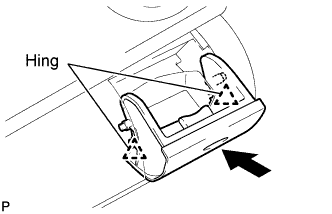 |
Install the 2 hinges of the cup holder one at a time.
Engage the spring with the instrument panel cup holder.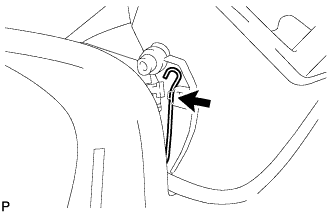
Flex both sides of the cup holder and engage the 2 stoppers.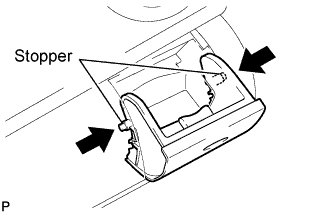
Close the instrument panel cup holder.
| 47. INSTALL INSTRUMENT PANEL CUP HOLDER SPRING LH |
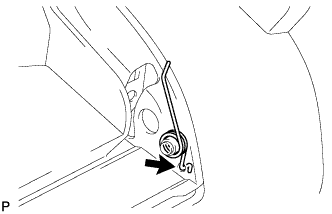 |
Install the spring.
| 48. INSTALL INSTRUMENT PANEL CUP HOLDER LH |
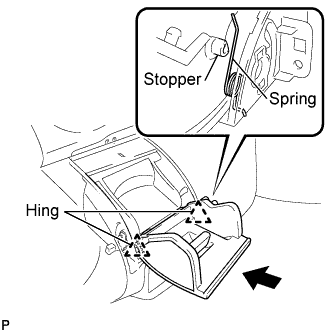 |
Install the 2 hinges of the cup holder one at a time.
- HINT:
- Make sure that the spring is set in the position shown in the illustration.
Flex both sides of the cup holder and engage the 2 stoppers.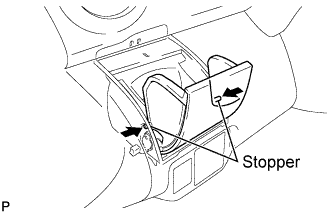
Close the instrument panel cup holder.
| 49. CONNECT CABLE TO NEGATIVE BATTERY TERMINAL |
- Torque:
- 5.4 N*m{ 55 kgf*cm , 48 in.*lbf }
| 50. CHECK SRS WARNING LIGHT |
| 51. INSTALL STEREO OPENING COVER (w/o Radio Receiver) |