REMOVAL
Removal / installation · Vehicles built from Nov 2006
| 1. REMOVE FRONT BUMPER COVER |

Apply protective tape as shown in the illustration.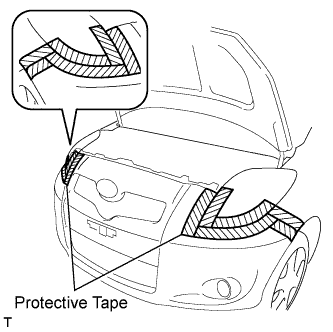

Remove the 5 screws and the 3 bolts.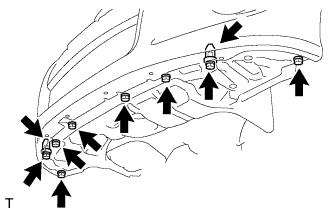
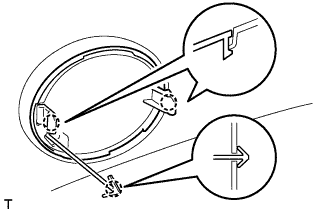
Remove the 2 screw grommets.
Remove the 7 clips.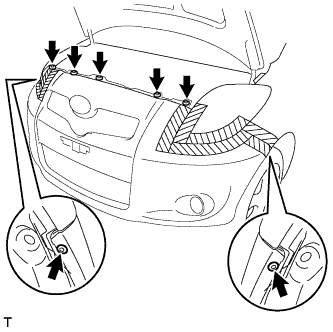
Using a screwdriver with its tip wrapped in protective tape, disengage the 6 claws and remove the front bumper cover.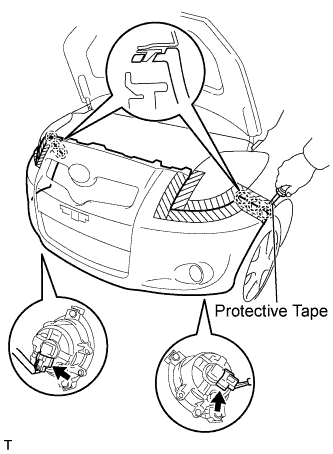
Disconnect the 2 fog light connectors.
Remove the 2 clips, the 2 spring nuts and the screw grommet.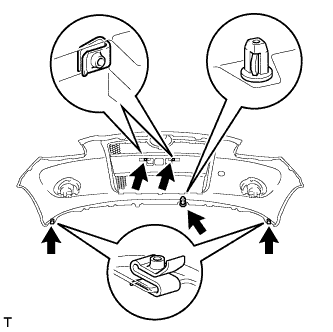
| 2. REMOVE HEADLIGHT ASSEMBLY LH |
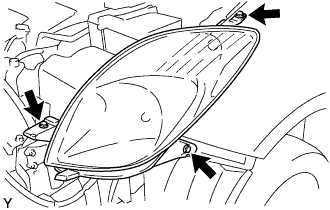 |
Remove the 3 screws.
w/ Headlight leveling:
Disconnect the 4 connectors, then remove the headlight.
w/o Headlight leveling:
Disconnect the 3 connectors, then remove the headlight.
| 3. REMOVE HEADLIGHT ASSEMBLY RH |
- HINT:
- Use the same procedure as for the LH side.
| 4. REMOVE FRONT BUMPER SIDE RETAINER LH |
Remove the screw.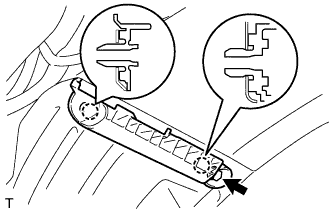
Using a clip remover, disengage the 2 claws and remove the front bumper side retainer.
| 5. REMOVE FRONT BUMPER SIDE RETAINER RH |
- HINT:
- Use the same procedure as for the LH side.
| 6. REMOVE RADIATOR SUPPORT UPPER ABSORBER |
Using a screwdriver, disengage the 6 claws and remove the radiator support upper absorber.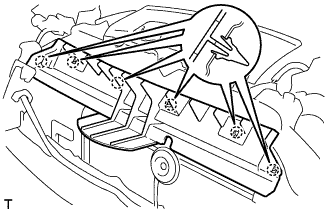
| 7. REMOVE ENGINE UNDER COVER LH |
Remove the 2 screws, the 2 bolts and the engine under cover.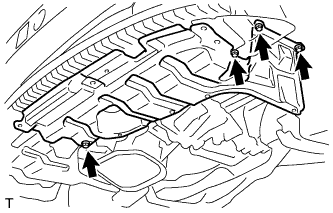
| 8. REMOVE ENGINE UNDER COVER RH |
Remove the screw, the 2 bolts and the engine under cover.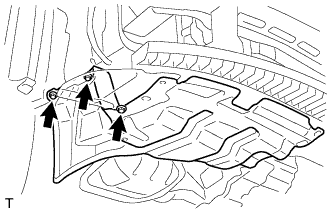
| 9. REMOVE FRONT BUMPER LOWER ABSORBER |
Using a screwdriver, remove the 6 clips.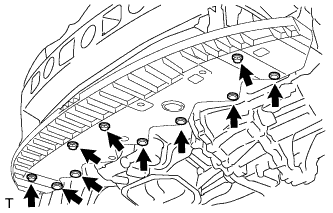
Remove the 4 bolts.
Disengage the 3 claws and remove the front bumper lower absorber.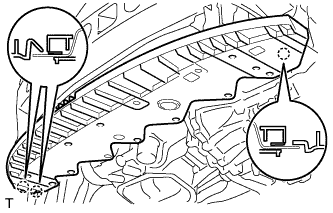
| 10. REMOVE THERMISTOR ASSEMBLY (w/ Air Conditioning System) |
Remove the clamp.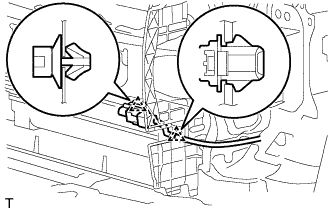
Remove the clamp and the thermistor.
| 11. REMOVE RADIATOR SIDE AIR SEAL LH |
Disengage the 3 claws and remove the radiator side air seal.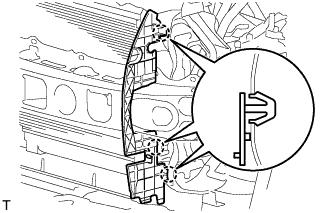
| 12. REMOVE RADIATOR SIDE AIR SEAL RH |
- HINT:
- Use the same procedure as for the LH side.
| 13. REMOVE FRONT BUMPER REINFORCEMENT SUB-ASSEMBLY |
Using a clip remover, remove the 7 clamps.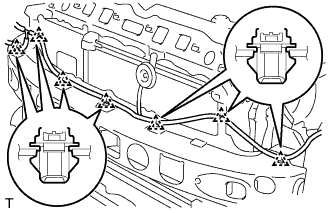
Remove the 4 nuts, the 6 bolts and the front bumper reinforcement.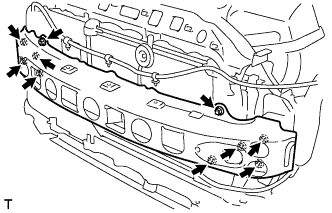
| 14. REMOVE FRONT BUMPER STONE DEFLECTOR BRACKET LH |
Remove the 2 nuts and the front bumper stone deflector bracket.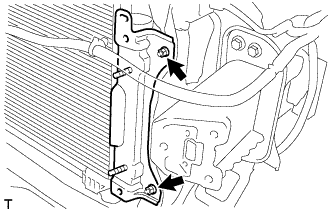
| 15. REMOVE FRONT BUMPER STONE DEFLECTOR BRACKET RH |
- HINT:
- Use the same procedure as for the LH side.
| 16. REMOVE WINDSHIELD WASHER JAR ASSEMBLY |
Remove the 2 bolts and the windshield washer jar.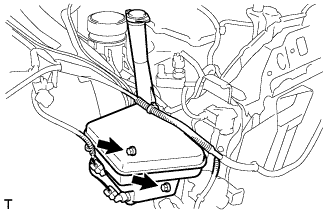
| 17. REMOVE FRONT BUMPER ARM SUB-ASSEMBLY LH |
Remove the 4 bolts and the front bumper arm.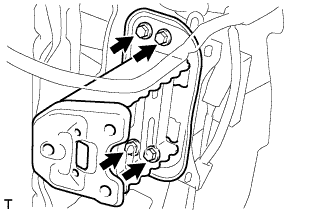
| 18. REMOVE FRONT BUMPER ARM SUB-ASSEMBLY RH |
- HINT:
- Use the same procedure as for the LH side.
| 19. REMOVE RADIATOR GRILLE EMBLEM |
| 20. REMOVE RADIATOR GRILLE |
Using a screwdriver, disengage the 14 claws and remove the radiator grille.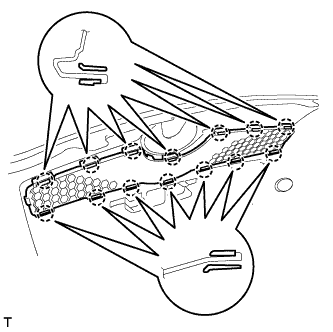
| 21. REMOVE RADIATOR LOWER GRILLE |
Using a screwdriver, disengage the 10 claws and remove the radiator lower grille.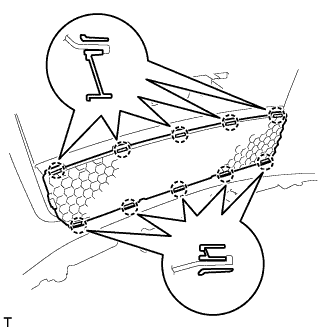
| 22. REMOVE FOG LIGHT ASSEMBLY LH |
Remove the screw and the fog light.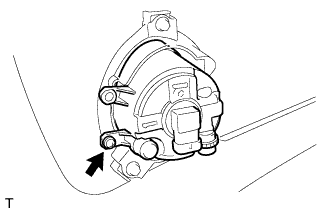
| 23. REMOVE FOG LIGHT ASSEMBLY RH |
- HINT:
- Use the same procedure as for the LH side.
| 24. REMOVE FOG LIGHT MOUNTING BRACKET LH |
Remove the 3 bolts and the fog light mounting bracket.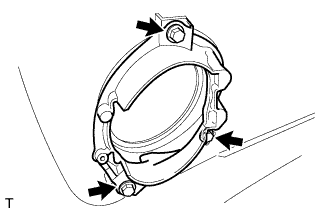
Remove the 3 spring nuts.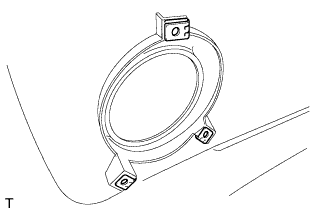
| 25. REMOVE FOG LIGHT MOUNTING BRACKET RH |
- HINT:
- Use the same procedure as for the LH side.
| 26. REMOVE FRONT BUMPER HOLE COVER |
Disengage the 3 claws and remove the front bumper hole cover.