INSTALLATION
Removal / installation · Vehicles built from Jan 2006
Versions by build date: Aug 2005 – Dec 2005 from Jan 2006
| 1.
INSTALL EXHAUST PIPE ASSEMBLY TAIL |
 |
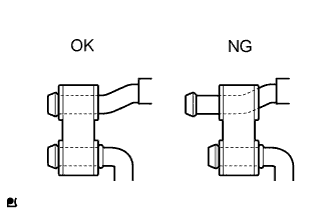
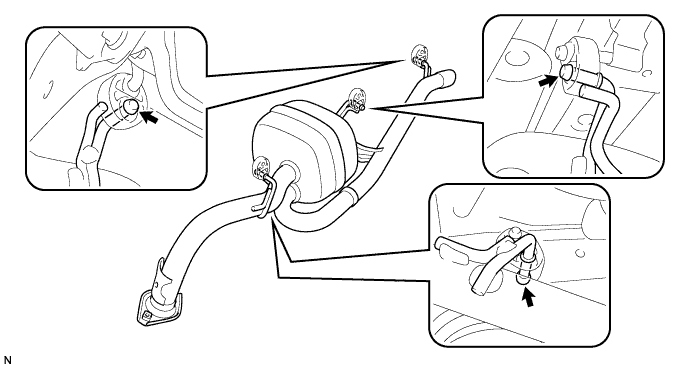
Check the No. 4 exhaust pipe supports.
- NOTICE:
- Install No. 4 exhaust pipe support onto the pipe retaining support.
Install the 2 No. 4 exhaust pipe supports and the exhaust tail pipe assembly. (for Hatchback)
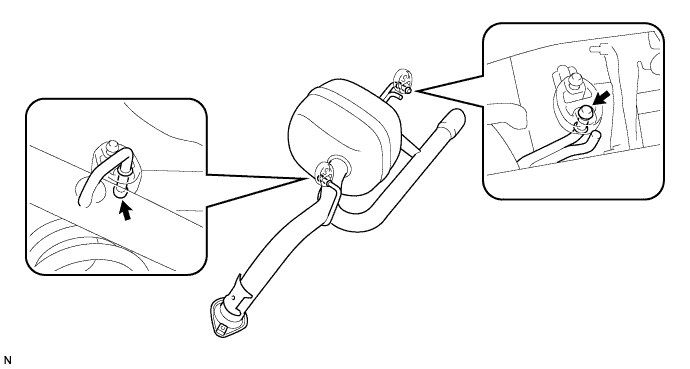

Install the 3 No. 4 exhaust pipe supports and the exhaust tail pipe assembly. (for Sedan)
| 2.
INSTALL EXHAUST PIPE ASSEMBLY FRONT |
|
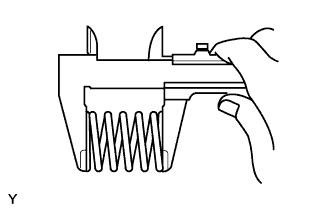
Using vernier calipers, measure the free length of the compression spring.
- Minimum length (Front side):
- 40.5 mm (1.594 in.)
- Minimum length (Rear side):
- 38.5 (1.516 in.)
If the length is not as specified, replace the compression spring.
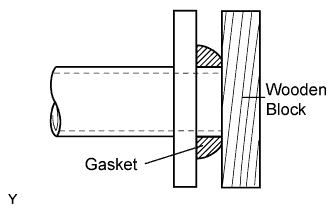
- Using a plastic hammer and a wooden block, tap in a new exhaust pipe gasket until its surface is flush with the exhaust manifold.
- NOTICE:
- Install the exhaust pipe gasket in the correct direction.
- Do not damage the outer surface of the exhaust pipe gasket.
- Do not reuse the exhaust pipe gasket.
- Do not push in the gasket with the exhaust pipe when connecting it.
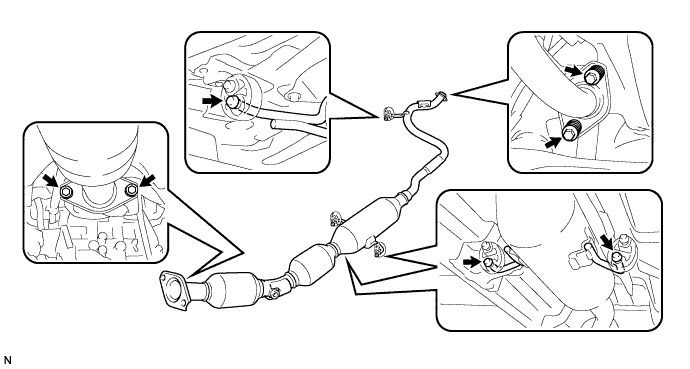
Install the 3 No. 4 exhaust pipe supports.
Install the exhaust front pipe assembly and a new exhaust pipe gasket with the 4 compression springs and 4 bolts.
-
Torque:
- 43 N*m{
439 kgf*cm
, 32 ft.*lbf
}
| 3.
INSTALL HEATED OXYGEN SENSOR
|
|
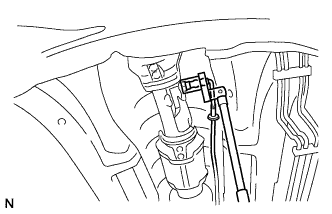
Using SST, install the sensor onto the front exhaust pipe.
- SST
- 09224-00010
-
Torque:
- 44 N*m{
449 kgf*cm
, 32 ft.*lbf
}
Pass the sensor connector through the floor panel and install the grommet.
Connect the sensor connector.
| 4.
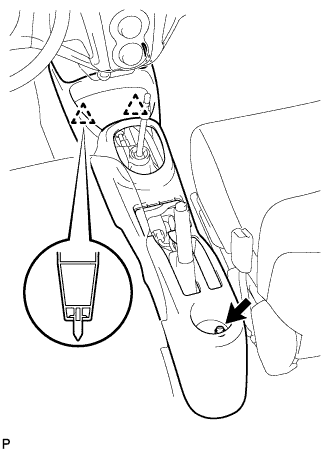
INSTALL CONSOLE BOX ASSEMBLY REAR (for Hatchback)
|
|
Engage the 2 clips and install the console box with the bolt.
| 5.
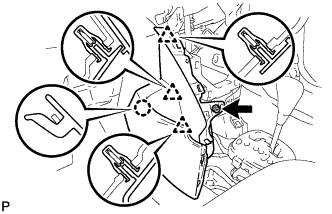
INSTALL INSTRUMENT PAD LOWER LH (for Sedan)
|
|
- Engage the claw and 3 clips and install the instrument pad lower.
Install screw <I>.
| 6.
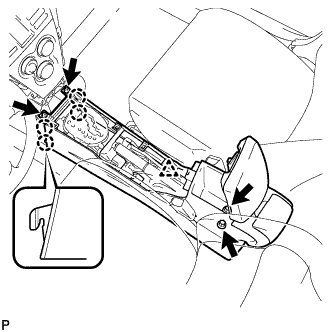
INSTALL CONSOLE BOX ASSEMBLY REAR (for Sedan)
|
|
- Engage the 4 claws and install the rear console box.
Install the 2 bolts and 2 screws.
Connect the clamp.
| 7.
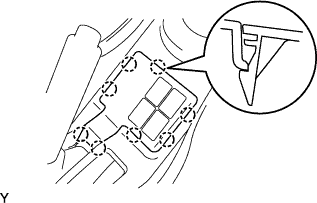
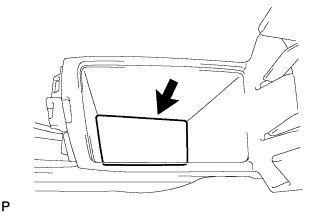
INSTALL CONSOLE BOX REAR COVER (for Hatchback)
|
|
Engage the 8 claws to install the console box rear cover.
| 8.
INSTALL CONSOLE BOX CARPET (for Sedan)
|
|
- Install the console box carpet.
| 9.
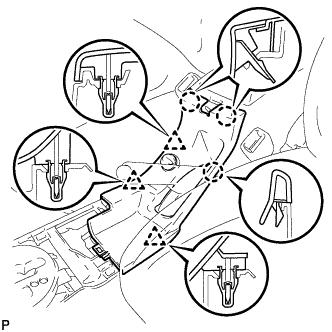
INSTALL CONSOLE PANEL SUB-ASSEMBLY UPPER (for Sedan)
|
|
- Connect the connector.
Engage the 3 clips and 3 claws and install the console upper rear panel.
| 10.
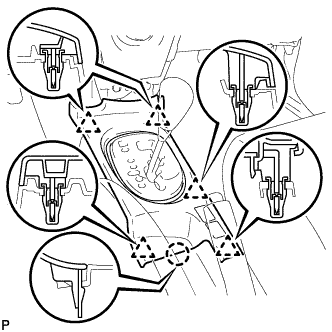
INSTALL CONSOLE UPPER REAR PANEL SUB-ASSEMBLY (for Sedan)
|
|
- Engage the 5 clips and the claw and install the upper console panel.
| 11.
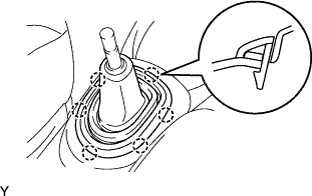
INSTALL SHIFTING HOLE COVER SUB-ASSEMBLY (for Hatchback)
|
|
Engage the 6 claws to install the shifting hole cover.
| 12.
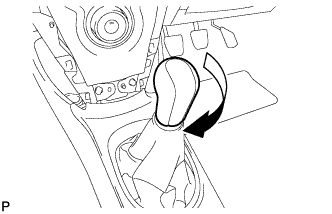
INSTALL SHIFT LEVER KNOB SUB-ASSEMBLY (for Manual Transaxle) |
|
| 13.
INSTALL SHIFT LEVER KNOB SUB-ASSEMBLY (for Manual Transaxle)
|
|
- Install the shift lever knob.
| 14.
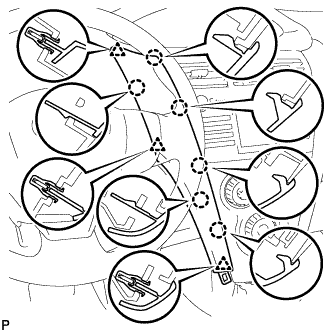
INSTALL INSTRUMENT PANEL FINISH PANEL END LH (for Sedan)
|
|
Engage the 6 claws and 3 clips and install the instrument panel finish panel end LH.
| 15.
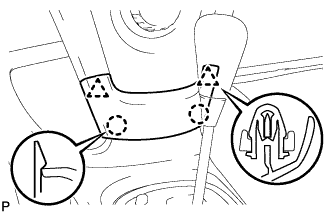
INSTALL INSTRUMENT PANEL FINISH PANEL LOWER CENTER (for Sedan)
|
|
Engage the 2 claws and 2 clips and install the instrument panel finish panel lower center.
| 16.
CONNECT CABLE TO NEGATIVE BATTERY TERMINAL |
|
-
Torque:
- 5.4 N*m{
55 kgf*cm
, 48 in.*lbf
}
| 17.
CHECK FOR EXHAUST GAS LEAKAGE |
|