REMOVAL
Removal / installation · Vehicles built from Nov 2005
| 1. DISCONNECT CABLE FROM NEGATIVE BATTERY TERMINAL |
| 2. DRAIN BRAKE FLUID |

- NOTICE:
- Immediately wash off any brake fluid that comes into contact with any painted surfaces.
| 3. REMOVE FRONT WIPER ARM HEAD CAP |
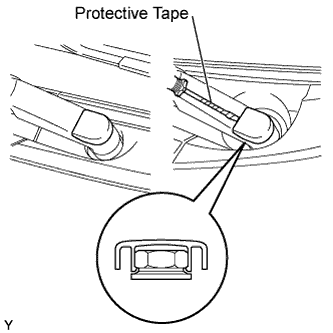  |
Using a screwdriver with its tip wrapped in protective tape, disengage the claw and remove the 2 front wiper arm head caps.
| 4. REMOVE FRONT WIPER ARM AND BLADE ASSEMBLY LH |
Operate the wiper, then stop the windshield wiper motor in the automatic stop position.
Remove the nut and front wiper arm.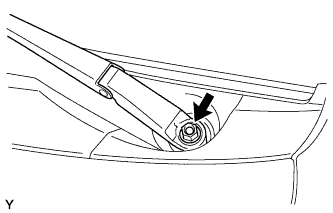
| 5. REMOVE FRONT WIPER ARM AND BLADE ASSEMBLY RH |
- HINT:
- Use the same procedure as for the LH side.
| 6. REMOVE HOOD TO COWL TOP SEAL |
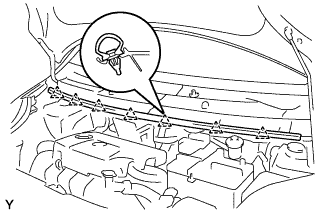 |
Disengage the 7 clips and remove the hood to cowl top seal.
| 7. REMOVE COWL TOP VENTILATOR LOUVER SUB-ASSEMBLY |
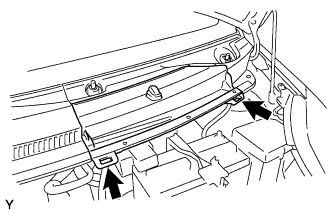 |
Disengage the 2 hooks and remove cowl top ventilator louver center No. 1.
Disconnect the washer hose.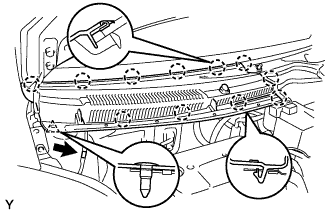
Disengage the 11 claws and clip.
Disconnect the washer hose and remove the cowl top ventilator louver sub-assembly.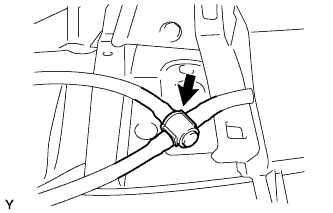
| 8. REMOVE COWL TOP VENTILATOR LOUVER LH |
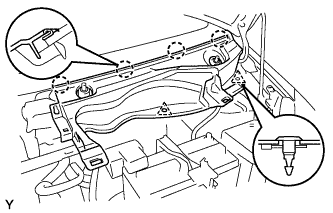 |
Remove the 2 clips.
Disengage the 4 claws and remove the cowl top ventilator louver LH.
| 9. REMOVE FRONT WIPER MOTOR AND LINK |
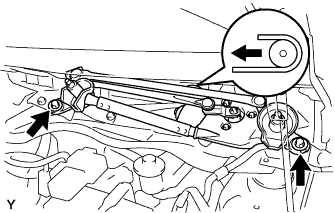 |
Remove the 2 bolts.
Slide the wiper link. Disengage the meshing of the rubber pin, then disconnect the connector and remove the front wiper motor and link.
| 10. REMOVE NO. 2 COWL TO REGISTER DUCT SUB-ASSEMBLY |
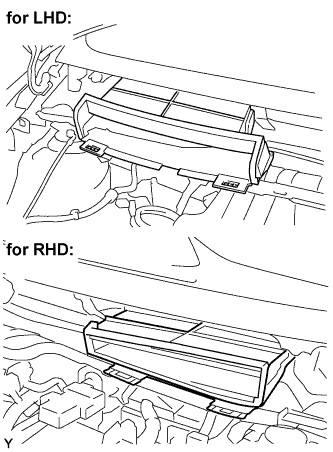 |
Disengage the claws, and remove cowl to resister duct No. 2.
| 11. REMOVE COWL TOP PANEL OUTER |
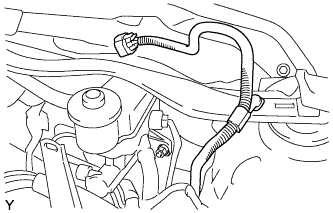 |
Disengage the clamp, and separate the wiper motor connector.
Remove the 9 bolts and the cowl top panel outer.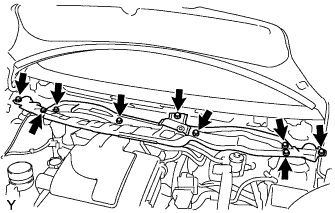
| 12. REMOVE BATTERY |
| 13. REMOVE BATTERY TRAY |
| 14. REMOVE BATTERY CARRIER |
| 15. SEPARATE BRAKE TUBE (w/o VSC) |
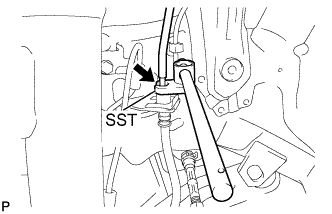 |
Using SST, separate the brake tube from the front flexible hose.
- SST
- 09023-00100
Using SST, separate the 2 brake tubes from the brake tube No. 1 way.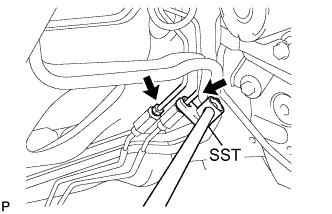
- SST
- 09023-00100
- NOTICE:
- To avoid breakage of the brake tube on the body side, hold the brake tube No. 1 way and remove the brake tube.
Using SST, separate the 2 brake tubes from the brake master cylinder.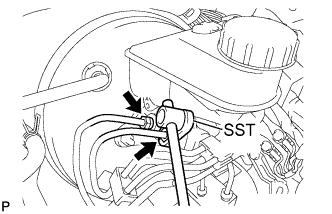
- SST
- 09023-00100
Using SST, separate the 6 brake tubes from the brake actuator.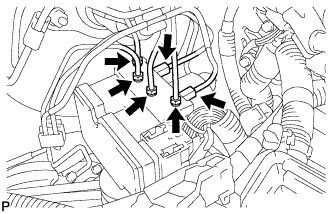
- SST
- 09023-00100
Use tags or labels to identify the place to reconnect each brake tube.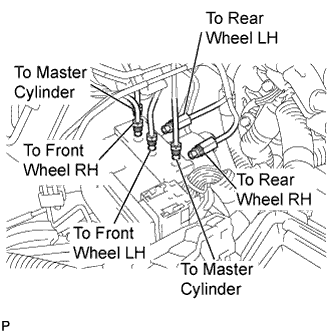
Disconnect the brake tube clamp.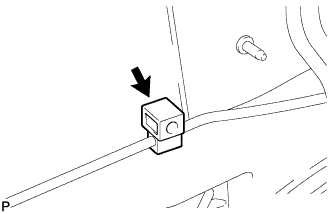
| 16. REMOVE BRAKE ACTUATOR (w/o VSC) |
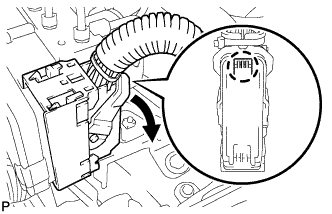 |
While pressing the claw, move the lock lever in the direction of the arrow to release the lock and disconnect the actuator connector from the actuator.
Remove the 3 bolts and the actuator with bracket.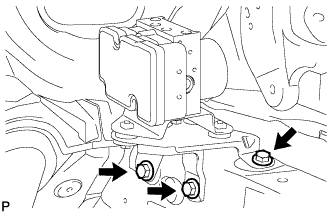
| 17. SEPARATE BRAKE TUBE (w/ VSC) |
|
|
Using SST, separate the brake tube from the front flexible hose.
- SST
- 09023-00100
Using SST, separate the 2 brake tubes from the brake tube No. 1 way.
- SST
- 09023-00100
- NOTICE:
- To avoid breakage of the brake tube on the body side, hold the brake tube No. 1 way and remove the brake tube.
Using SST, separate the 2 brake tubes from the brake master cylinder.
- SST
- 09023-38200
Using SST, separate the 6 brake tubes from the brake actuator.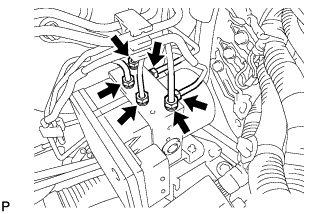
- SST
- 09023-00100
09023-38200
Use tags or labels to identify the place to reconnect each brake tube.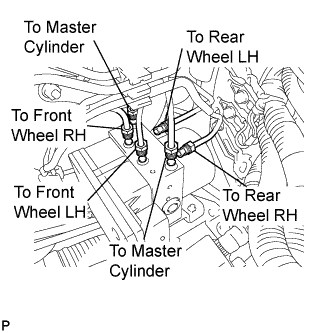
Disconnect the brake tube clamp.
| 18. REMOVE ABS AND TRACTION ACTUATOR (w/ VSC) |
|
|
While pressing the claw, move the lock lever in the direction of the arrow to release the lock and disconnect the actuator connector from the actuator.
Remove the 3 bolts and the actuator with bracket.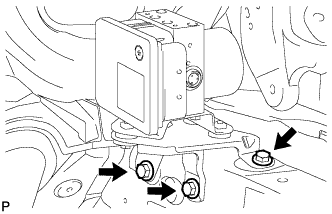
| 19. DISCONNECT CLUTCH RESERVOIR TUBE (for Manual Transaxle) |
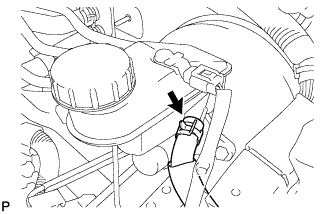 |
Slide the clip and disconnect the reservoir tube.
| 20. REMOVE BRAKE MASTER CYLINDER |
- NOTICE:
- Remove the brake master cylinder after depressing the brake pedal several times and bleeding the vacuum pressure from inside the brake booster.
Disconnect the brake fluid level warning switch connector.
Remove the 2 nuts and remove the brake master cylinder.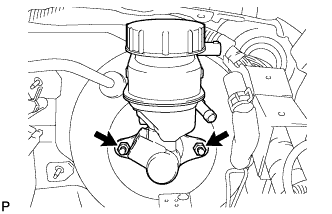
Remove the O-ring from the brake master cylinder.
| 21. REMOVE INSTRUMENT PANEL NO. 1 UNDER COVER SUB-ASSEMBLY |
Remove the 2 screws.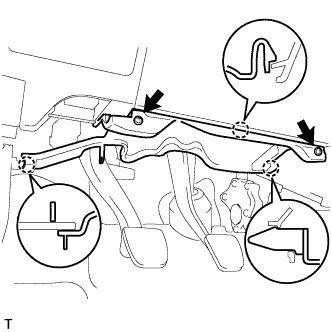
Disengage the 3 claws and remove the instrument panel under cover.
| 22. REMOVE INSTRUMENT PANEL UNDER TRAY (w/o Driver Side Knee Airbag) |
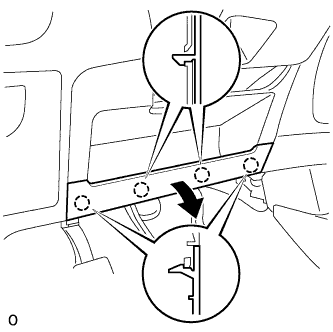 |
Disengage the 4 claws and open the instrument panel under tray.
Remove the 2 <A> screws.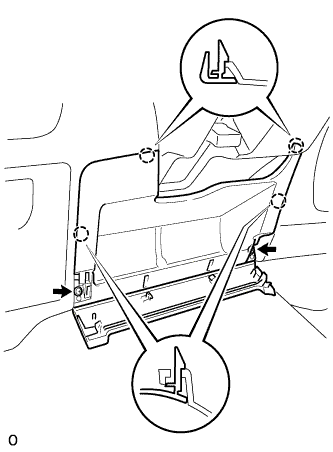
Disengage the 4 claws and remove the instrument panel under tray.
| 23. REMOVE STEERING COLUMN COVER (w/ Driver Side Knee Airbag) |
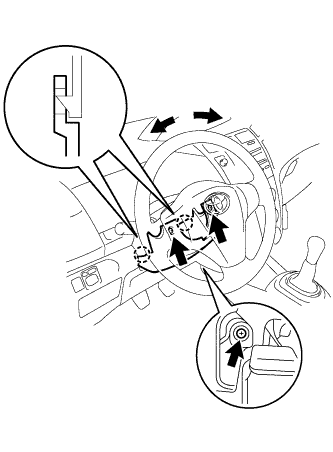 |
Turn the steering wheel 90 degrees in both directions and remove the 2 screws.
Remove the screw from the lower portion of the steering cover lower.
Disengage the 2 claws and remove the steering column cover lower.
| 24. REMOVE DRIVER SIDE KNEE AIRBAG ASSEMBLY (w/ Driver Side Knee Airbag) |
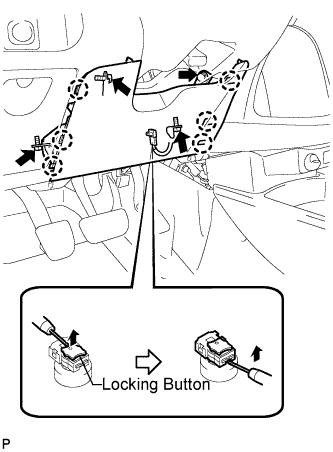 |
Remove the 4 screws.
Disengage the 6 claws and remove the driver side knee airbag assembly.
Using a thin-bladed screwdriver, release the locking button.
Using a thin-bladed screwdriver, disconnect the airbag connector and remove the instrument panel wire.
| 25. SEPARATE BRAKE MASTER CYLINDER PUSH ROD CLEVIS |
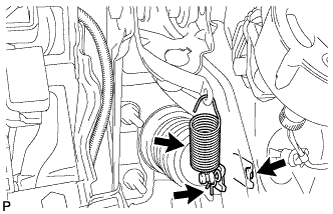 |
Remove the brake pedal return spring.
Remove the clip and the push rod pin and separate the push rod clevis from the brake pedal.
| 26. DISCONNECT CHECK VALVE TO CONNECTOR TUBE HOSE (for 1KR-FE) |
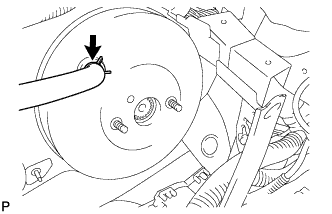 |
Slide the clip and disconnect the hose.
| 27. REMOVE HOSE TO HOSE NO. 2 TUBE (for 2SZ-FE) |
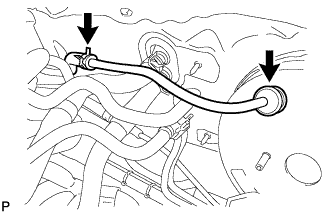 |
Slide the clip and disconnect the union to connector tube hose.
Remove the No. 2 tube from the brake booster.
| 28. REMOVE VACUUM RESERVOIR TO BRAKE BOOSTER HOSE (for 1ND-TV) |
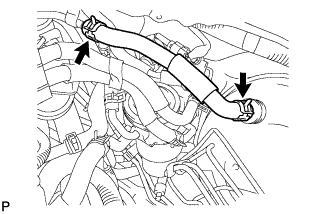 |
Slide the 2 clips and remove the hose.
| 29. SEPARATE FUEL FILTER ASSEMBLY (for 1ND-TV) |
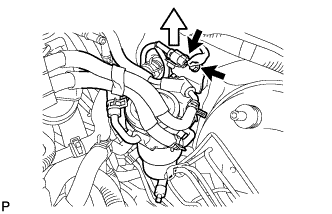 |
Disconnect the connector.
Remove the bolt.
Pull the fuel filter upward to separate it from the bracket.
| 30. REMOVE BRAKE BOOSTER |
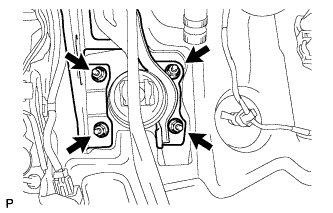 |
Remove the 4 nuts and remove the brake booster.
Remove the gasket from the brake booster.
Loosen the push rod lock nut and remove the push rod clevis.
| 31. REMOVE VACUUM RESERVOIR VACUUM CHECK VALVE ASSEMBLY (for 1KR-FE and 1ND-TV) |
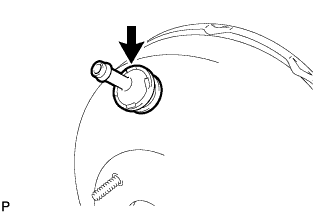 |
Remove the vacuum check valve from the brake booster.
| 32. REMOVE CHECK VALVE GROMMET |
Remove the grommet from the brake booster.