REMOVAL
Removal / installation · Vehicles built from Jan 2006
| 1. DISCONNECT CABLE FROM NEGATIVE BATTERY TERMINAL |
| 2. DRAIN BRAKE FLUID |

- NOTICE:
- Immediately wash off any brake fluid that comes into contact with any painted surfaces.
| 3. REMOVE FRONT WIPER ARM HEAD CAP |
Using a screwdriver with its tip wrapped in protective tape, disengage the claw and remove the 2 front wiper arm head caps.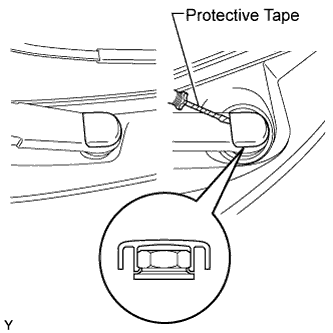

| 4. REMOVE FRONT WIPER ARM AND BLADE ASSEMBLY LH |
Operate the wiper, then stop the windshield wiper motor in the automatic stop position.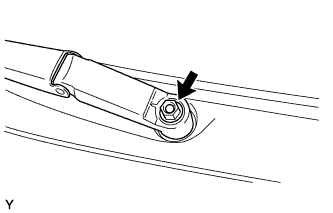
Remove the nut and front wiper arm.
| 5. REMOVE FRONT WIPER ARM AND BLADE ASSEMBLY RH |
- HINT:
- Use the same procedure as for the LH side.
| 6. REMOVE COWL SIDE VENTILATOR SUB-ASSEMBLY LH |
Using a screwdriver with its tip wrapped in protective tape, disengage the 3 claws and remove the cowl side ventilator sub-assembly LH.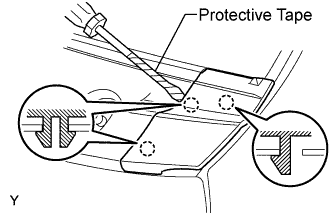
| 7. REMOVE COWL SIDE VENTILATOR SUB-ASSEMBLY RH |
- HINT:
- Use the same procedure as for the LH side.
| 8. REMOVE COWL TOP VENTILATOR LOUVER SUB-ASSEMBLY |
Disengage the 3 clips, the 4 claws and the 8 hooks.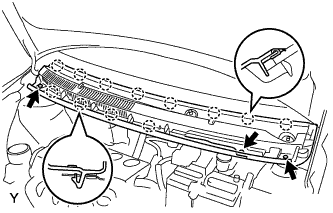
Remove the cowl top ventilator louver sub-assembly.
Disconnect the washer hoses.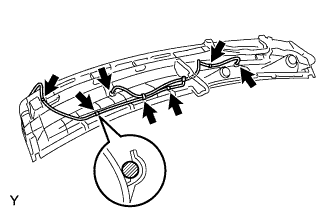
Disengage the 5 hooks.
| 9. REMOVE FRONT WIPER MOTOR AND LINK |
Remove the 2 bolts.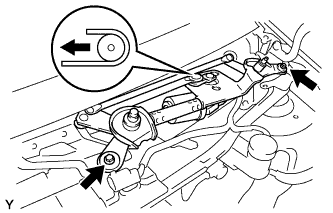
Slide the wiper link. Disengage the meshing of the rubber pin, then disconnect the connector and remove the front wiper motor and link.
| 10. REMOVE FRONT AIR SHUTTER SEAL |
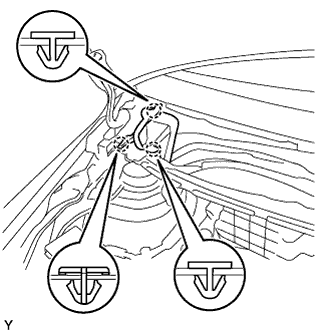 |
Disengage the 3 claws and remove the front air shutter seal.
| 11. REMOVE COWL TOP PANEL OUTER |
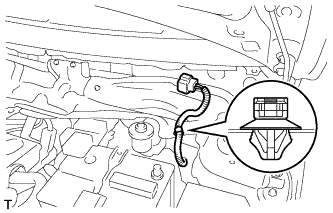 |
Disengage the wire harness clamp.
Remove the 2 bolts and remove the cowl top to cowl inner brace.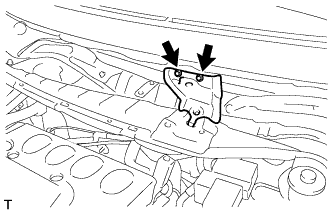
Remove the 8 bolts and remove the cowl top panel outer.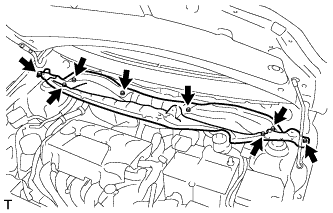
| 12. REMOVE INSTRUMENT PANEL UNDER TRAY |
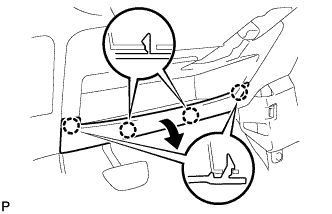 |
Disengage the 4 claws and open the instrument panel under tray.
Remove the 2 <A> screws.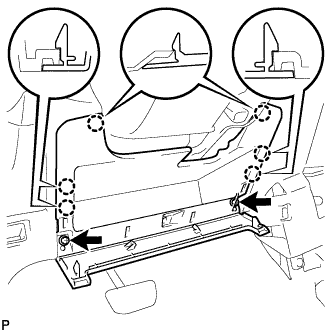
Disengage the 6 claws and remove the instrument panel under tray.
| 13. REMOVE BATTERY |
| 14. REMOVE BATTERY TRAY |
| 15. REMOVE BATTERY CARRIER |
| 16. REMOVE BRAKE ACTUATOR (w/ ABS) |
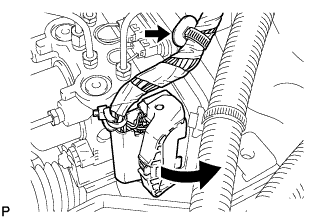 |
Remove the clip and disconnect the wire harness.
Move the lock lever in the direction indicated by the arrow to release the lock and disconnect the brake actuator connector from the actuator.
Using SST, separate the brake tube from the front flexible hose.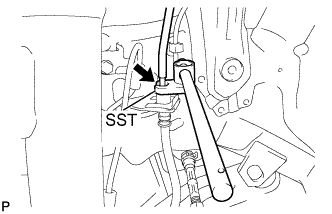
- SST
- 09023-00100
Using SST, separate the 2 brake tubes from the brake tube No. 1 way.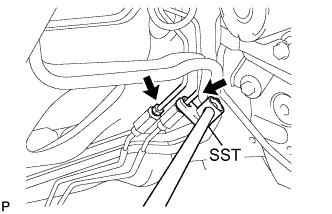
- SST
- 09023-00100
Using SST, separate the 2 brake tubes from the brake master cylinder.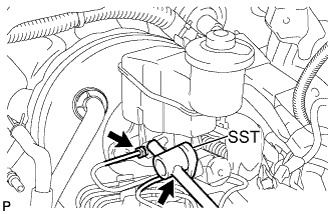
- SST
- 09023-00100
Using SST, separate the 6 brake tubes from the brake actuator.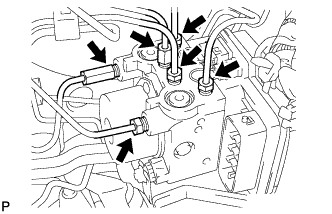
- SST
- 09023-00100
Use tags or labels to identify the place to reconnect each brake tube.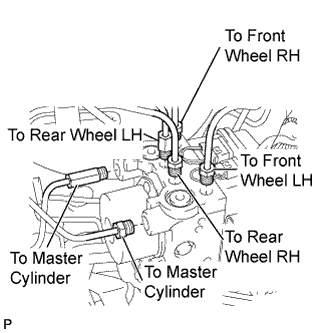
Disconnect the brake tube clamp.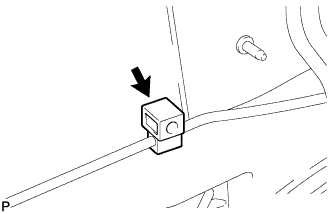
Remove the 3 bolts and the actuator with bracket.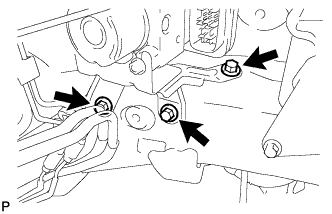
| 17. DISCONNECT CLUTCH RESERVOIR TUBE (for Manual Transaxle) |
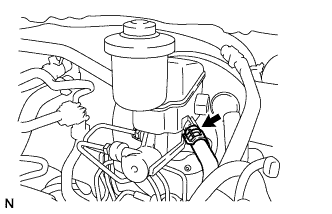 |
Slide the clip and disconnect the reservoir tube.
| 18. REMOVE BRAKE MASTER CYLINDER |
- NOTICE:
- Remove the brake master cylinder after depressing the brake pedal several times and bleeding the vacuum pressure from inside the brake booster.
Disconnect the brake fluid level warning switch connector.
w/o ABS:
Using SST, separate the 3 brake tubes from the brake tube way.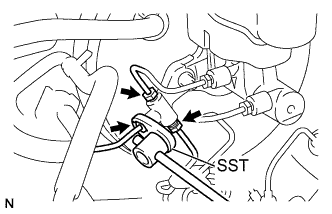
- SST
- 09023-00100
Using SST, separate the 2 brake tubes from the brake master cylinder.
- SST
- 09023-00100
w/ ABS: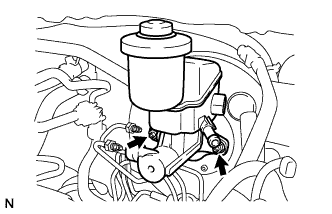
Remove the 2 nuts and remove the brake master cylinder.
w/o ABS: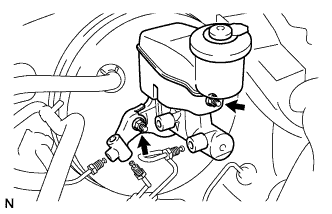
Remove the 2 nuts and brake tube way and remove the brake master cylinder.
Remove the O-ring from the brake master cylinder.
| 19. SEPARATE BRAKE MASTER CYLINDER PUSH ROD CLEVIS |
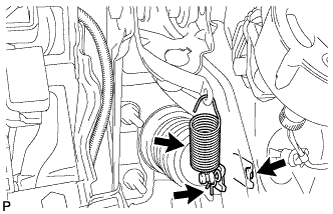 |
Remove the brake pedal return spring.
Remove the clip and the push rod pin and separate the push rod clevis from the brake pedal.
| 20. REMOVE BRAKE BOOSTER |
w/o ABS:
Using SST, separate the 2 brake tubes from the brake tube No. 1 way.
- SST
- 09023-00100
Using SST, remove the brake tube assembly from the proportioning valve.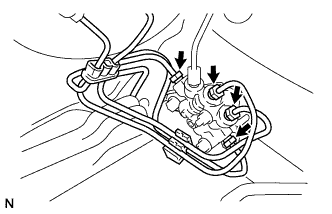
- SST
- 09023-00100
Slide the clip and disconnect the vacuum hose from the check valve.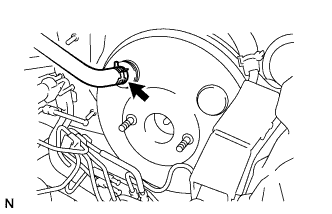
Remove the 4 nuts and remove the brake booster.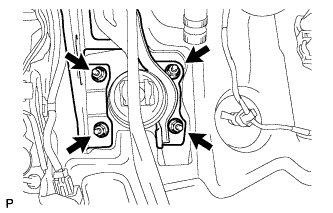
Remove the gasket from the brake booster.
Loosen the push rod lock nut and remove the push rod clevis.
| 21. REMOVE BRAKE VACUUM CHECK VALVE ASSEMBLY |
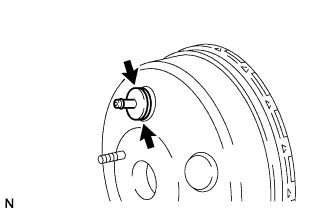 |
Remove the vacuum check valve from the brake booster.
Remove the grommet from the brake booster.