INSTALLATION
Removal / installation · Vehicles built from Aug 2005
| 1. INSTALL PROPORTIONING VALVE |

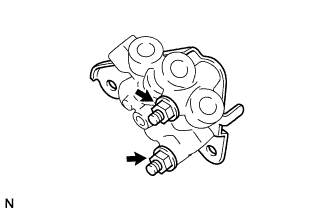  |
Install the proportioning valve onto the proportioning valve bracket with the 2 nuts.
- Torque:
- 5.4 N*m{ 55 kgf*cm , 48 in.*lbf }
Install the 2 bolts onto the proportioning valve bracket in the sequence shown in the illustration.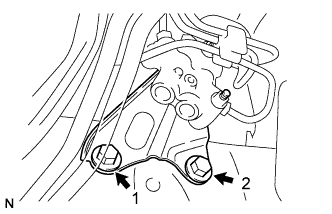
- Torque:
- 19 N*m{ 194 kgf*cm , 14 ft.*lbf }
Using SST, install the 5 brake tubes into the proportioning valve.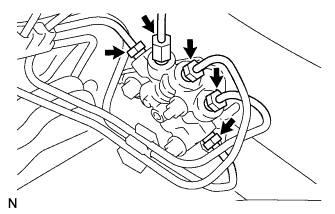
- SST
- 09023-00100
- Torque:
- for use without SST:
- 15 N*m{ 155 kgf*cm , 11 ft.*lbf }
- for use with SST:
- 14 N*m{ 143 kgf*cm , 10 ft.*lbf }
- HINT:
- Use a torque wrench with a fulcrum length of 300 mm (11.81 in.).
- This torque value is effective when SST is parallel to a torque wrench.
- Use a torque wrench with a fulcrum length of 300 mm (11.81 in.).
| 2. FILL RESERVOIR WITH BRAKE FLUID |
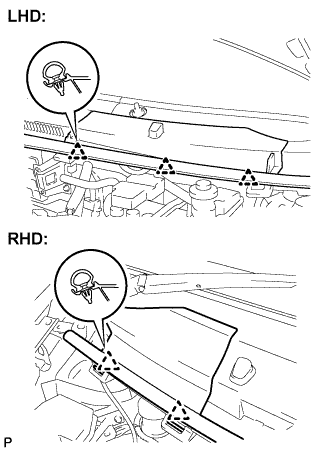 |
LHD:
Disengage the 3 clips and separate the hood to cowl top seal.
Remove the cowl top ventilator louver.
RHD:
Disengage the 2 clips and separate the hood to cowl top seal.
Remove the cowl top ventilator louver.
Set the brake fluid can upside down on the reservoir.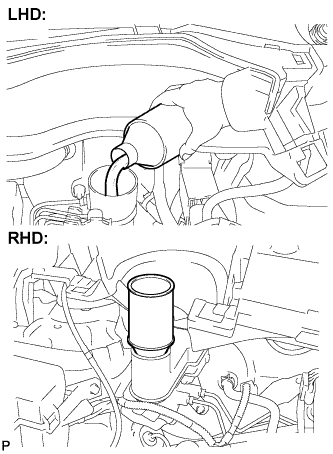
- Fluid:
- SAE J1703 or FMVSS No. 116 DOT3
- SAE J1704 or FMVSS No. 116 DOT4
| 3. BLEED MASTER CYLINDER |
- HINT:
- If the master cylinder has been disassembled or if the reservoir becomes empty, bleed the air from the master cylinder.
Using SST, disconnect the brake tubes from the master cylinder.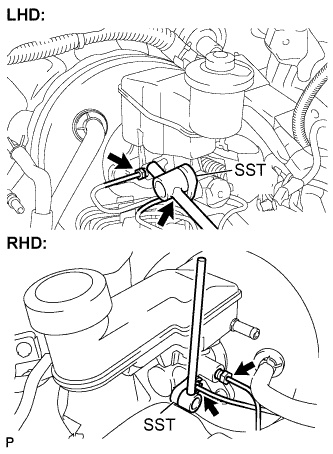
- SST
- 09023-00100
Slowly depress the brake pedal and hold it there (Step A).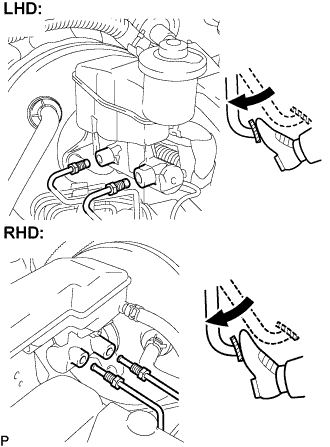
Block the outer holes with your fingers, and release the brake pedal (Step B).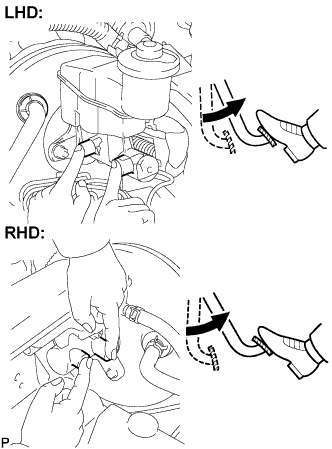
Repeat steps A and B 3 or 4 times.
Using SST, connect the brake tubes to the master cylinder.
- SST
- 09023-00100
- Torque:
- for use without SST:
- 15 N*m{ 155 kgf*cm , 11 ft.*lbf }
- for use with SST:
- 14 N*m{ 143 kgf*cm , 10 ft.*lbf }
- HINT:
- Use a torque wrench with a fulcrum length of 300 mm (11.81 in.).
- This torque value is effective when SST is parallel to a torque wrench.
- Use a torque wrench with a fulcrum length of 300 mm (11.81 in.).
| 4. BLEED BRAKE LINE |
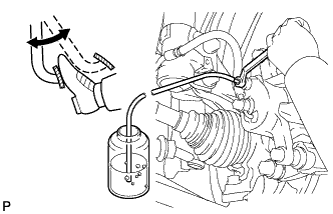 |
Connect the vinyl tube to the bleeder plug.
Depress the brake pedal several times, then loosen the bleeder plug with the pedal depressed (Step C).
At the point where the fluid stops coming out, tighten the bleeder plug, then release the brake pedal (Step D).
Repeat steps C and D until all the air in the fluid is completely bled out.
Tighten the bleeder plug.
- Torque:
- Front Disc and Rear Drum Brake:
- 8.3 N*m{ 85 kgf*cm , 73 in.*lbf }
- Rear Disc Brake:
- 11 N*m{ 112 kgf*cm , 8 ft.*lbf }
Repeat the above procedure to bleed the air out of the brake line for each wheel.
| 5. CHECK FLUID LEVEL IN RESERVOIR |
Check the fluid level and add fluid if necessary.
- Fluid:
- SAE J1703 or FMVSS No. 116 DOT3
- SAE J1704 or FMVSS No. 116 DOT4
| 6. CHECK FOR BRAKE FLUID LEAKAGE |