Removal / installation · Vehicles built from Nov 2005
1.
INSTALL TRANSMISSION CONTROL CABLE ASSEMBLY
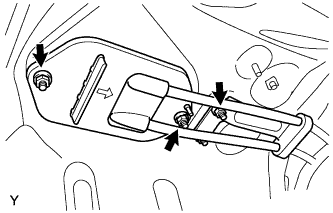
Install the transmission control cable with the 3 nuts.
Torque:
5.0 N*m{
51 kgf*cm
, 44 in.*lbf
}
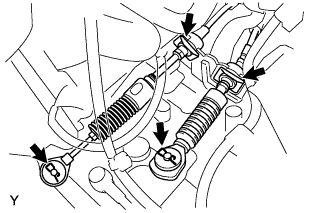
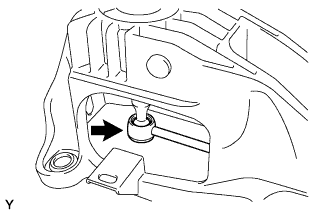
Connect the 2 cables and install the 2 clips.
Install the 2 new clips onto the control cable bracket.
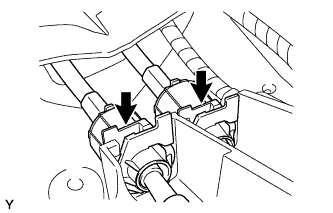
Securely push the control cable into the grooved part of the shift lever with the protrusion of the control cable facing upward.
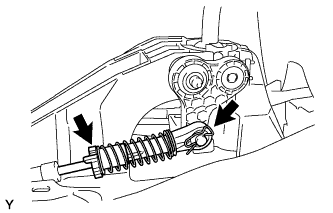
Connect the control select cable to the shift lever with the clip.
NOTICE:
Connect the control select cable so that the adjusting mechanism lock of the control select cable is installed on the left side of the vehicle.
Do not apply excessive load to the shift lever.
Connect the control shift cable to the shift lever.
2.
INSTALL FLOOR SHIFT SHIFT LEVER ASSEMBLY
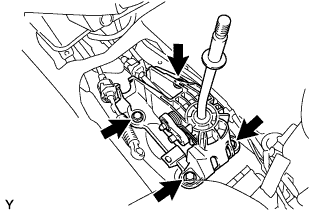
Install the floor shift shift lever with the 4 bolts.
Torque:
12 N*m{
122 kgf*cm
, 8.9 ft.*lbf
}
3.
ADJUST TRANSMISSION CONTROL SELECT CABLE
NOTICE:
Make sure that the transmission and the shift lever are in the neutral positions before adjusting the select cable.
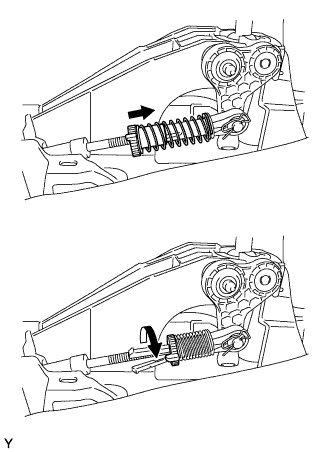
Push the protrusion of the select cable toward the rear of the vehicle, turn the protrusion in the direction indicated by the arrow shown in the illustration and lock it.
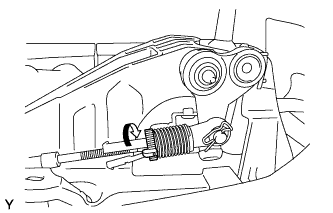
Turn the protrusion of the select cable in the direction indicated by the arrow shown in the illustration and release the lock.
4.
INSTALL BATTERY CARRIER
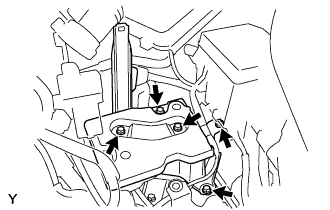
Install the battery carrier with the 5 bolts.
Torque:
17 N*m{
175 kgf*cm
, 13 ft.*lbf
}
5.
INSTALL BATTERY TRAY
6.
INSTALL BATTERY
7.
INSTALL BATTERY HOLD DOWN CLAMP
8.
INSTALL AIR CLEANER ASSEMBLY
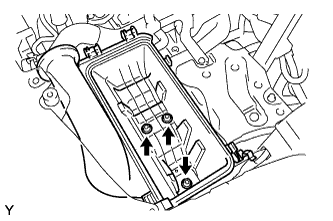
Install the air cleaner case sub-assembly with air cleaner inlet with the 3 bolts.
Torque:
7.8 N*m{
80 kgf*cm
, 69 in.*lbf
}
9.
CONNECT AIR CLEANER HOSE NO.1
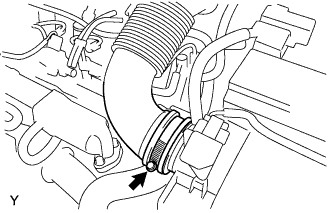
Connect air cleaner hose No. 1 with the clamp.
Torque:
6.0 N*m{
61 kgf*cm
, 53 in.*lbf
}
10.
INSTALL REAR CONSOLE BOX ASSEMBLY
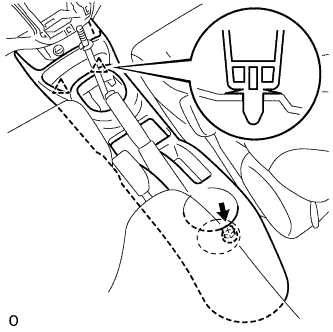
Engage the 2 clips and install the console box rear.
Install bolt <F>.
11.
INSTALL REAR CONSOLE BOX COVER
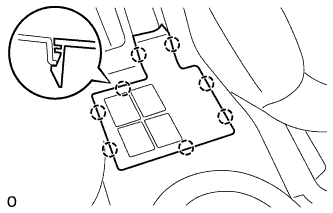
Engage the 8 claws and install the console box rear cover.