Removal / installation · Vehicles built from Nov 2006
1.
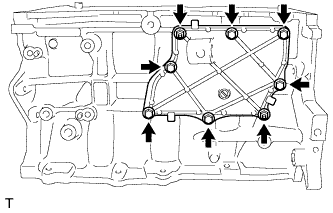
REMOVE NO. 1 VENTILATION CASE
Remove the 6 bolts and 2 nuts.
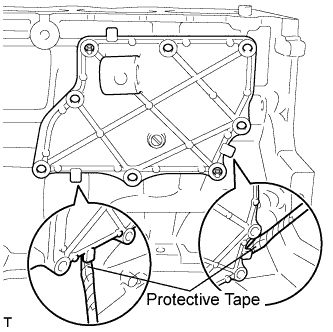
Remove the No. 1 ventilation case by prying between the No. 1 ventilation case and cylinder block with a screwdriver as shown the illustration.
NOTICE:
Be careful not to damage the contact surfaces of the cylinder block and No. 1 ventilation case.
HINT:
Tape the screwdriver tip before use.
2.
REMOVE PISTON SUB-ASSEMBLY WITH CONNECTING ROD
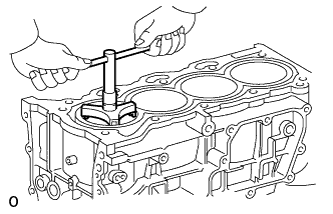
Using a ridge reamer, remove all carbon from the top of the cylinder.
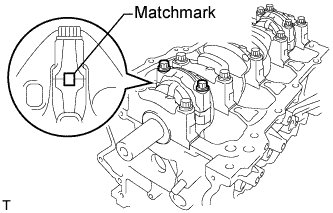
Check that the matchmarks on the connecting rod and cap are aligned to ensure correct reassembly.
HINT:
The matchmarks on the connecting rods and caps are provided to ensure correct reassembly.
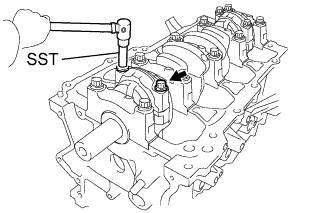
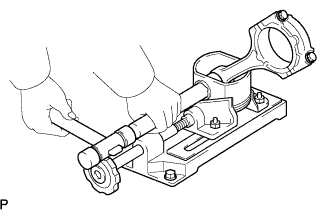
Using SST, uniformly loosen the 2 bolts.
SST
09205-16010
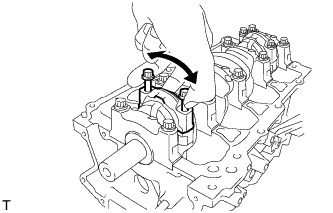
Using the 2 loose connecting rod cap bolts, remove the connecting rod cap and lower bearing by wiggling the connecting rod cap right and left.
HINT:
Keep the lower bearing inserted in the connecting rod cap.
Push the piston, connecting rod assembly and upper bearing through the top of the cylinder block.
HINT:
Keep the bearing, connecting rod and cap together.
Arrange the piston and connecting rod assemblies in the correct order.
3.
REMOVE CONNECTING ROD BEARING
Remove the connecting rod bearings.
HINT:
Arrange the removed parts in the correct order.
4.
REMOVE PISTON RING SET
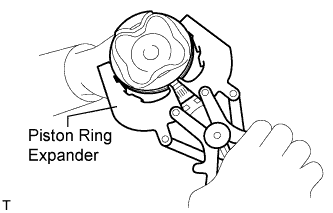
Using a piston ring expander, remove the 2 compression rings.
Remove the oil ring rail and oil ring expander by hand.
HINT:
Arrange the removed parts in the correct order.
5.
REMOVE PISTON PIN HOLE SNAP RING
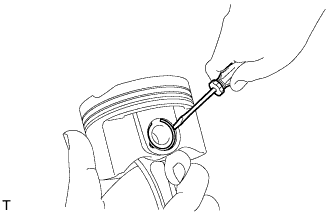
Using a screwdriver, pry out the 2 snap rings.
6.
REMOVE PISTON SUB-ASSEMBLY WITH PIN
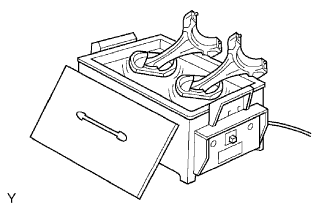
Gradually heat each piston to between 80 and 90°C (176 to 194°F).
Using a plastic hammer and brass bar, lightly tap out the piston pin and remove the connecting rod.
HINT:
The piston and pin are a matched set.
Arrange the pistons, pins, rings, connecting rods and bearings in the correct order.
7.
REMOVE CRANKSHAFT
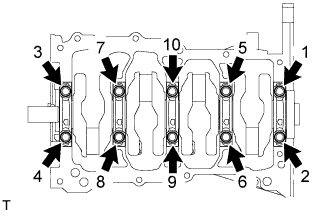
Uniformly loosen and remove the 10 main bearing cap bolts in the sequence shown in the illustration.
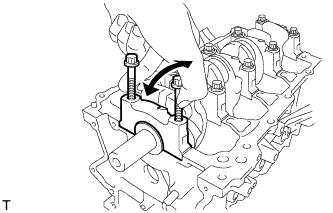
Use 2 loose main bearing cap bolts to remove the 5 main bearing caps and 5 lower bearings.
NOTICE:
Insert the bolts into the caps in turn. Ease the cap out by gently pulling up and applying force toward the front and back sides of the cylinder block, as shown in the illustration. Take care not to damage the contact surfaces of the cap and cylinder block.
HINT:
Keep the lower bearing and main bearing cap together.
Arrange the main bearing caps in the correct order.
Lift out the crankshaft.
8.
REMOVE UPPER CRANKSHAFT THRUST WASHER
Remove the upper crankshaft thrust washers from the cylinder block.
9.
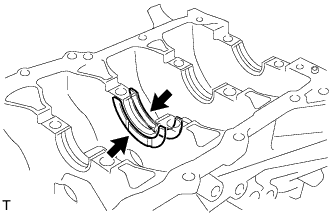
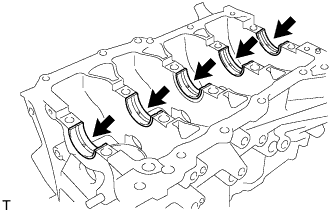
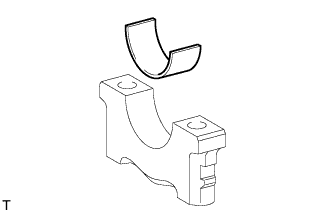
REMOVE CRANKSHAFT BEARING
Remove the 5 upper main bearings from the cylinder block.
HINT:
Arrange the bearings in the correct order.
Remove the 5 lower main bearings from the 5 main bearing caps.
HINT:
Arrange the bearings in the correct order.
10.
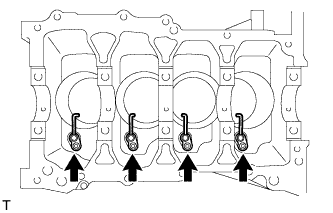
REMOVE NO. 1 OIL NOZZLE SUB-ASSEMBLY
Using a socket hexagon wrench 5, remove the bolts and oil nozzles.
11.
CLEAN CYLINDER BLOCK
NOTICE:
If the cylinder is washed at high temperatures, the cylinder liner will stick out beyond the cylinder block. Always wash the cylinder block at a temperature of 45°C (113°F) or less.