Home › RESTRAINTS › SUPPLEMENTAL RESTRAINT SYSTEM › AIRBAG SYSTEM

AIRBAG SYSTEM > DIAGNOSIS SYSTEM

for Preparation Click here


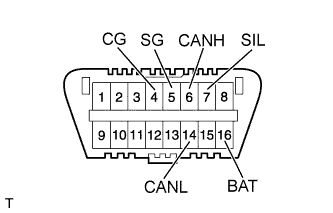
CHECK DLC3


    H100769E16
  1. The ECU uses ISO 15765-4 for communication. The terminal arrangement of the DLC3 complies with ISO 15031-3 and matches the ISO 15765-4 format.

    Symbols (Terminal No.)
    Terminal Description
    Condition
    Specified Condition
    SIL (7) - SG (5)
    Bus "+" line
    During transmission
    Pulse generation
    CG (4) - Body ground
    Chassis ground
    Always
    Below 1 Ω
    SG (5) - Body ground
    Signal ground
    Always
    Below 1 Ω
    BAT (16) - Body ground
    Battery positive
    Always
    11 to 14 V
    CANH (6) - CANL (14)
    CAN bus line
    Ignition switch off*
    54 to 69 Ω
    CANH (6) - CG (4)
    HIGH-level CAN bus line
    Ignition switch off*
    200Ω or higher
    CANL (14) - CG (4)
    LOW-level CAN bus line
    Ignition switch off*
    200Ω or higher
    CANH (6) - BAT (16)
    HIGH-level CAN bus line
    Ignition switch off*
    6 kΩ or higher
    CANL (14) - BAT (16)
    LOW-level CAN bus line
    Ignition switch off*
    6 kΩ or higher

    NOTICE:
    *: Before measuring the resistance, leave the vehicle as is for at least 1 minute and do not operate the ignition switch, any other switches or the doors.

    If the result is not as specified, the DLC3 may have a malfunction. Repair or replace the harness and connector.

    HINT:
    Connect the cable of the intelligent tester to the DLC3, turn the ignition switch to ON and attempt to use the tester. If the display indicates that a communication error has occurred, there is a problem either with the vehicle or with the tester.
    1. If communication is normal when the tester is connected to another vehicle, inspect the DLC3 of the original vehicle.
    2. If communication is still not possible when the tester is connected to another vehicle, the problem is probably in the tester itself. Consult the Service Department listed in the tester's instruction manual.
SYMPTOM SIMULATION

HINT:
The most difficult case in troubleshooting is when no symptoms occur. In such cases, a thorough customer problem analysis must be carried out. Then the same or similar conditions and environment in which the problem occurred in the customer's vehicle should be simulated. No matter how experienced or skilled a technician may be, if he proceeds to troubleshoot without confirming the problem symptoms, he will likely overlook something important and make a wrong guess at some points in the repair operation.
This leads to a standstill in troubleshooting.


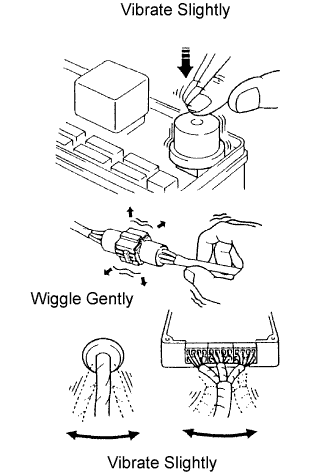
    H100146E01
  1. Simulation method: When vibration seems to be the major cause

    HINT:
    Perform this method only during the primary check period (for approximately 6 seconds after the ignition switch is turned to ON).


    1. Use your finger to slightly vibrate the part of the sensor considered to be the problem cause, and check whether the malfunction recurs.

      HINT:
      Wiggling the relays too strongly may result in open relays.

    2. Gently wiggle the connector.

    3. Slightly shake the wire harness vertically and horizontally.
      The connector joint and fulcrum of the vibration are the major areas to be checked thoroughly.


FUNCTION OF SRS WARNING LIGHT
  1. Primary check

    1. Turn the ignition switch off. Wait for at least 2 seconds, then turn the ignition switch to ON. The SRS warning light comes on for approximately 6 seconds and the SRS airbag system diagnosis (including the seat belt pretensioner) is performed.

      HINT:
      If any malfunctions are detected during the primary check, the SRS warning light remains on even after the primary check period has elapsed.

  2. Constant check

    1. After the primary check, the center airbag sensor assembly constantly monitors the SRS airbag system for trouble.

      HINT:
      If any malfunctions are detected during the constant check, the center airbag sensor assembly functions as follows:
      1. The SRS warning light comes on.
      2. The SRS warning light goes off, and then comes on again. This blinking pattern indicates a source voltage drop. The SRS warning light goes off 10 seconds after the source voltage returns to normal.

  3. Review

    1. When the airbag system is normal:
      The SRS warning light comes on only during the primary check period (for approximately 6 seconds after the ignition switch is turned to ON).

    2. When the airbag system malfunctions:

      1. The SRS warning light blinks after the primary check period has elapsed.
      2. The SRS warning light goes off after the primary check, but comes on again during the constant check.
      3. The SRS warning light remains off even after the ignition switch is turned from off to ON. However, if malfunctions such as an open circuit have occurred in the wire harness between the meter and ECU, the warning light comes on 10 seconds after the ignition switch is turned to ON.

      HINT:
      The center airbag sensor assembly keeps the SRS warning light on if any malfunctions have been detected in the airbag system.


FUNCTION OF PASSENGER AIRBAG ON/OFF INDICATOR


  1. Initial check

    1. Turn the ignition switch to ON.

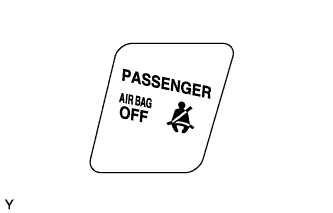
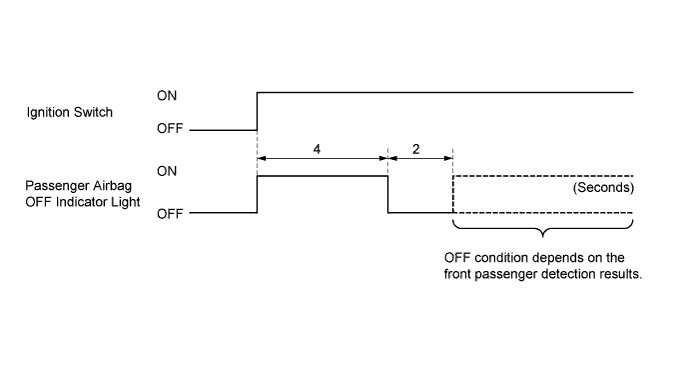
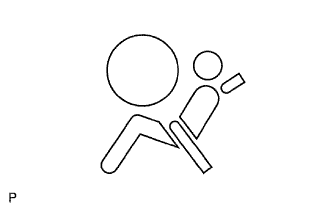
    2. The passenger airbag OFF indicator (OFF) comes on for approximately 4 seconds, then goes off for approximately 2 seconds.


    3. Approximately 6 seconds after the ignition switch is turned to ON, the passenger airbag OFF indicator operates in accordance with the conditions listed below.

      Airbag Cut-OFF Switch Position
      OFF Indicator
      ON
      OFF
      OFF
      ON

      HINT:
      The passenger airbag OFF indicator operates as shown in the timing chart below in order to check the indicator light circuit.


      H100160E01


SRS WARNING LIGHT CHECK


    C093955E01
  1. Turn the ignition switch to ON, and check that the SRS warning light comes on for approximately 6 seconds (primary check).

  2. Check that the SRS warning light goes off approximately 6 seconds after the ignition switch is turned to ON (constant check).

    HINT:
    When any of the following symptoms occur, refer to the Problem Symptoms Table.
    1. The SRS warning light comes on occasionally, after the primary check period has elapsed.
    2. Even when the SRS warning light comes on, no DTCs are set.
    3. Even when the ignition switch is turned from the off to ON, the SRS warning light remains off.


PASSENGER AIRBAG OFF INDICATOR CHECK
H100931
  1. Turn the ignition switch to ON.

  2. Check that the passenger airbag OFF indicator (OFF) comes on for approximately 4 seconds, then goes off for approximately 2 seconds.

    HINT:
    Refer to the table in the previous step regarding the passenger airbag OFF indicator when approximately 6 seconds have elapsed after the ignition switch is turned to ON.


ACTIVATION PREVENTION MECHANISM
  1. FUNCTION OF ACTIVATION PREVENTION MECHANISM

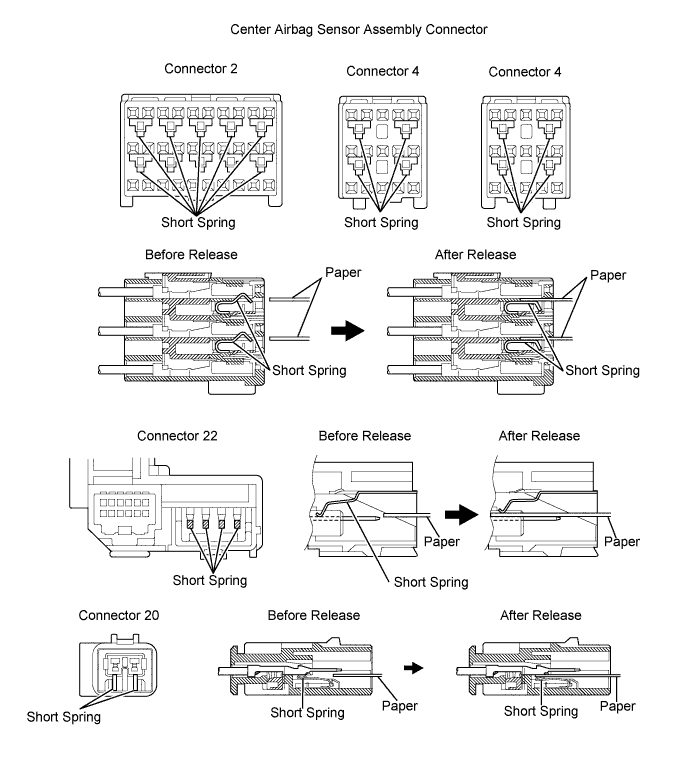
    1. An activation prevention mechanism is built into the connector (on the center airbag sensor assembly side) of the airbag system squib circuit to prevent accidental airbag activation.

    2. This mechanism closes the circuit when the connector is disconnected by bringing the short spring into contact with the terminals and shutting off external electricity to prevent accidental airbag activation.


  2. RELEASE METHOD OF ACTIVATION PREVENTION MECHANISM

    1. To release the activation prevention mechanism, insert a piece of paper, with the same thickness as the male terminal (approximately 0.5 mm [0.020 in.]), between the terminals and the short spring to break the connection.


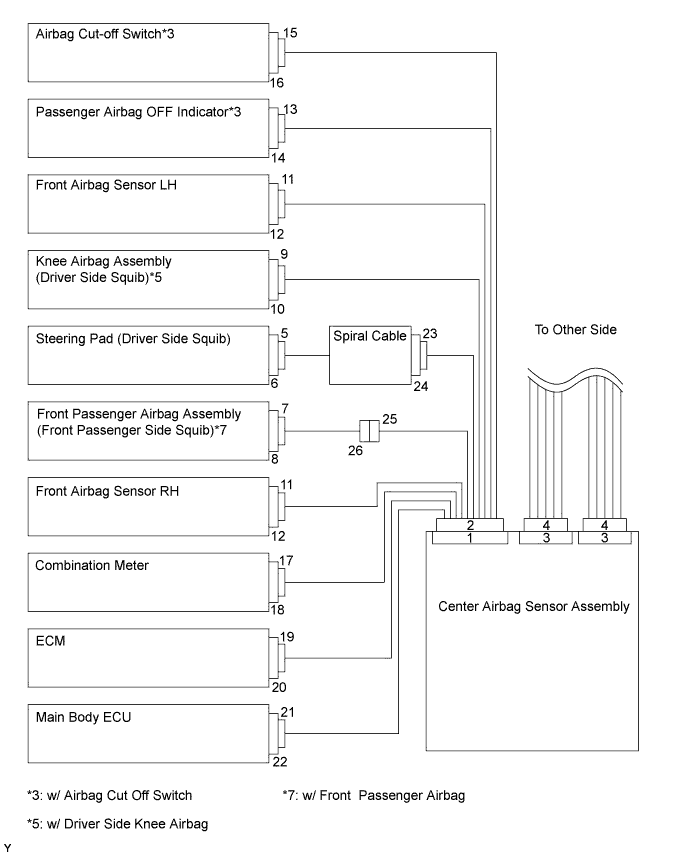
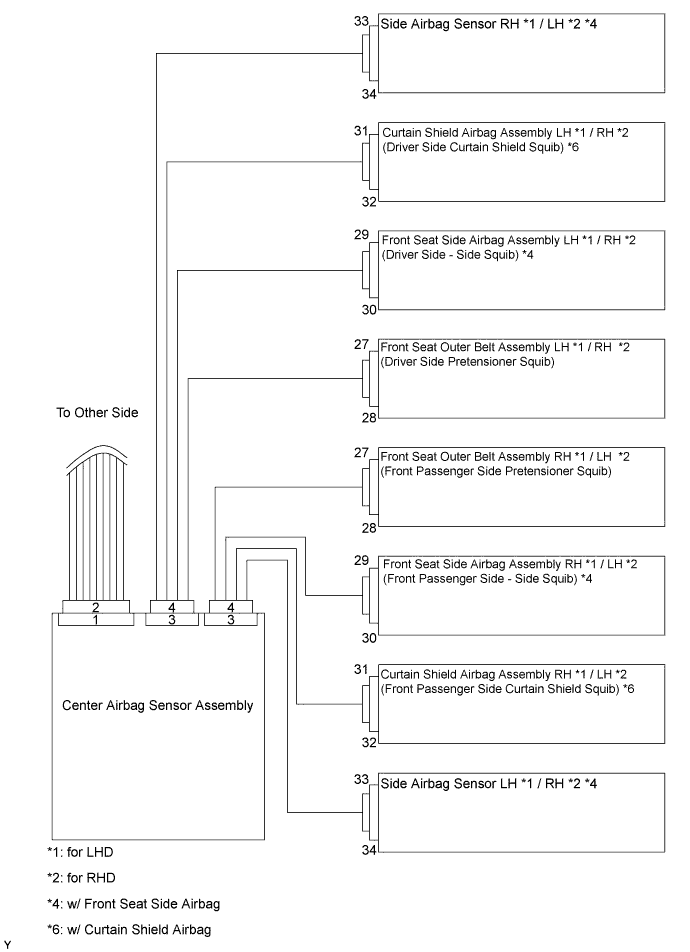
    2. Refer to the illustrations on the next 3 pages concerning connectors to utilize the activation prevention mechanism and its release method.

      CAUTION:
      Never release the activation prevention mechanism on the squib connector even when inspecting with the squib disconnected.

      NOTICE:
      1. Do not release the activation prevention mechanism unless specifically directed to do so by the troubleshooting procedure.
      2. To prevent the terminal and the short spring from being damaged, always use a piece of paper that is the same thickness as the male terminal.


      H100939E05


      H100940E05


      H102118E01