 |
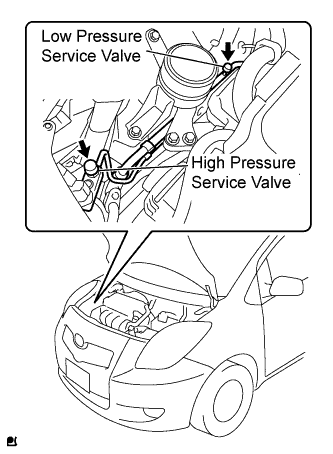
Remove the caps from the service valves on the refrigerant line.
CONDENSER (for Hatchback) > REMOVAL |
| 1. DISCHARGE REFRIGERANT FROM REFRIGERATION SYSTEM |
Start up the engine.
Switch A/C ON.
Turn the blower switch to ON.
Operate the cooler compressor with an engine speed of approximately 1,000 rpm for 5 to 6 minutes to circulate the refrigerant and collect the remaining compressor oil from each component, in the cooler compressor.
Stop the engine.
|
Remove the caps from the service valves on the refrigerant line.
Connect the Freon collection/recycling device to discharge the refrigerant gas remaining in the refrigeration system.
| 2. REMOVE FRONT BUMPER COVER |
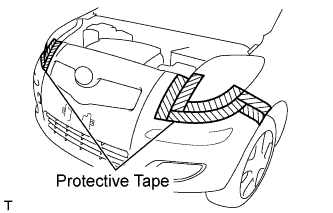 |
Apply protective tape as shown in the illustration.
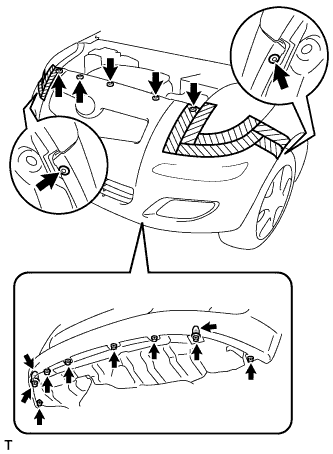 |
Remove the 8 screws.
Remove the 2 screw grommets.
Remove the 7 clips.
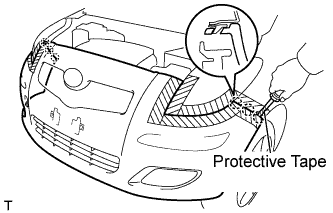 |
Using a screwdriver with its tip wrapped in protective tape, disengage the 6 claws and remove the front bumper cover.
Disconnect the 2 connectors.
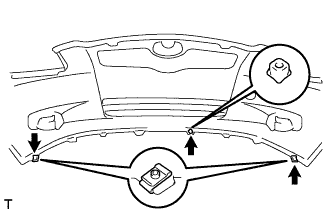 |
Remove the 2 clips and the screw grommet.
| 3. REMOVE RADIATOR SUPPORT ABSORBER UPPER |
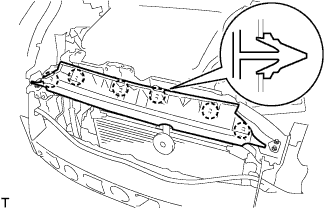 |
Disengage the 6 claws and remove the radiator support absorber upper.
| 4. REMOVE NO. 1 COOLER COVER |
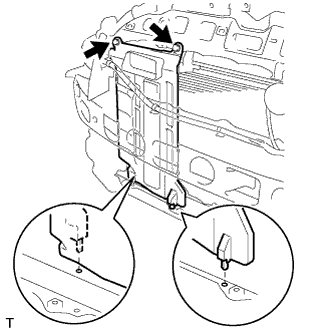 |
Remove the 2 clips and cooler cover No. 1.
| 5. SEPARATE HOOD LOCK ASSEMBLY |
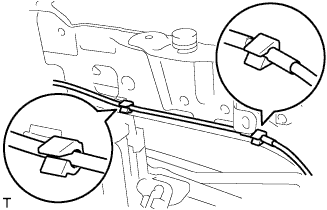 |
Separate the hood lock control cable assembly from the 2 clamps.
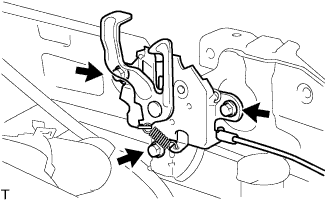 |
Remove the 3 bolts and remove the hood lock assembly.
| 6. REMOVE RADIATOR SUPPORT SUB-ASSEMBLY UPPER |
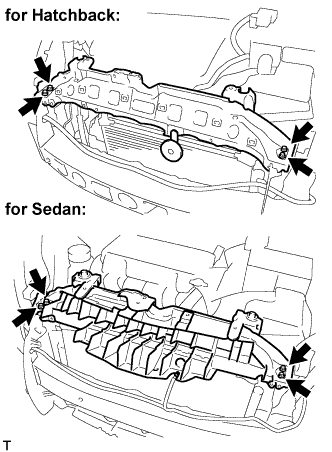 |
Separate the horn assembly connector.
Remove the 4 bolts and remove the radiator support sub-assembly upper.
| 7. DISCONNECT NO. 1 COOLER REFRIGERANT DISCHARGE HOSE |
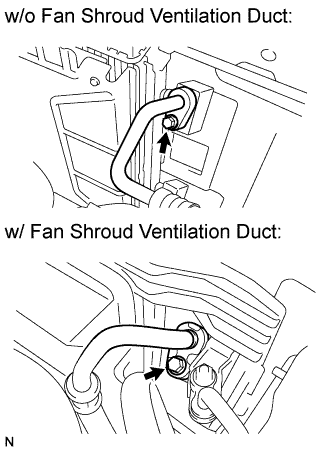 |
Remove the bolt and disconnect the discharge hose from the cooler condenser.
Remove the O-ring from the discharge hose.
| 8. REMOVE FAN SHROUD VENTILATION DUCT ASSEMBLY (w/ Fan Shroud Ventilation Duct) |
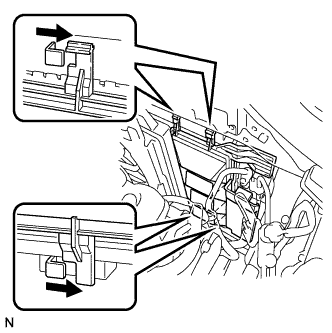 |
Disengage the 4 claws and remove the fan shroud ventilation duct from the vehicle.
| 9. DISCONNECT LIQUID TUBE SUB-ASSEMBLY A (w/o Fan Shroud Ventilation Duct) |
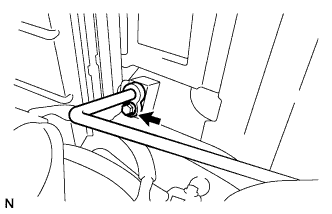 |
Remove the bolt and disconnect the liquid tube from the cooler condenser.
Remove the O-ring from the liquid tube.
| 10. DISCONNECT LIQUID TUBE SUB-ASSEMBLY B (w/ Fan Shroud Ventilation Duct) |
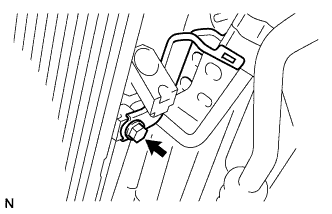 |
Remove the bolt and separate the liquid tube bracket.
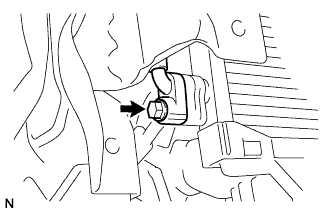 |
Remove the bolt and disconnect the liquid tube from the cooler condenser.
Remove the O-ring from the liquid tube.
| 11. REMOVE CONDENSER |
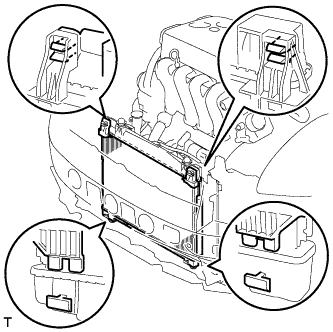 |
Disengage the 2 claws and remove the condenser from the vehicle.