RADIO ANTENNA CORD (for Sedan) > REMOVAL |
| 1. REMOVE ROOF HEADLINING ASSEMBLY |
| 2. REMOVE INSTRUMENT CLUSTER CENTER FINISH PANEL SUB-ASSEMBLY (except Integrated with Panel) |
|
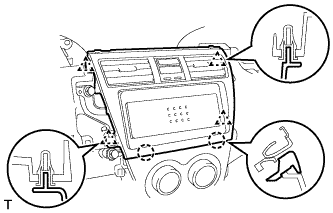
Disengage the 2 claws and 4 clips and remove the instrument cluster panel center.
| 3. REMOVE RADIO RECEIVER ASSEMBLY (except Integrated with Panel) |
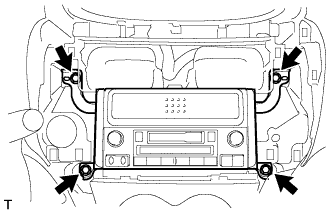 |
Remove the 4 bolts and the radio receiver.
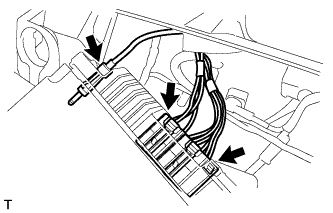 |
Disconnect the plug.
Disconnect the 2 radio connectors.
| 4. REMOVE RADIO RECEIVER ASSEMBLY (for Integrated with Panel) |
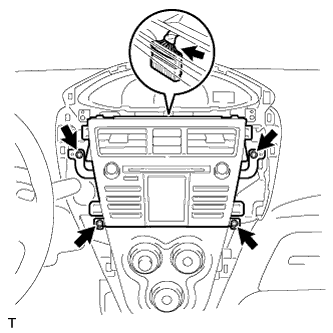 |
Disconnect the hazard warning signal switch connector.
Remove the 4 bolts.
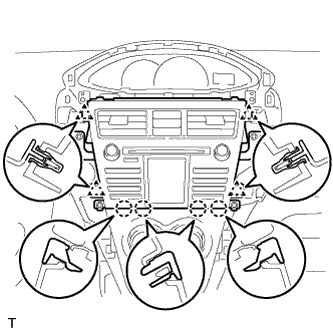 |
Disengage the 4 clips and the 4 claws and remove the radio receiver.
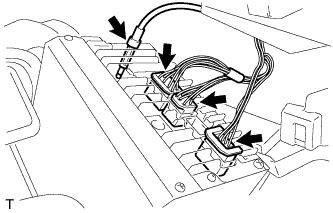 |
Disconnect the plug.
Disconnect the 3 radio connectors.
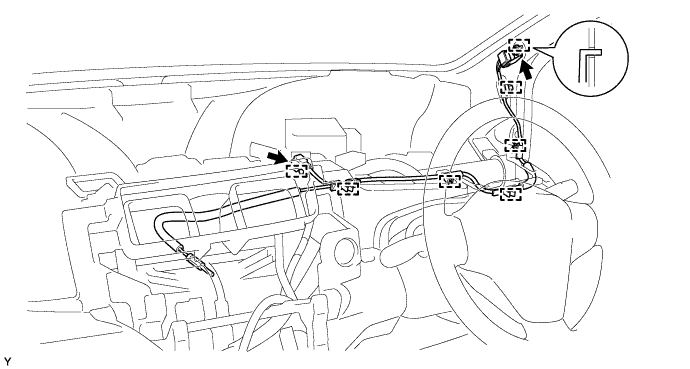
| 5. REMOVE ANTENNA CORD SUB-ASSEMBLY |
for LHD:
Remove the bolt, the hook and the bracket.
Using a clip remover, remove the clamp.
Disconnect the antenna amplifier connector.
Remove the 5 clamps and the antenna cord.
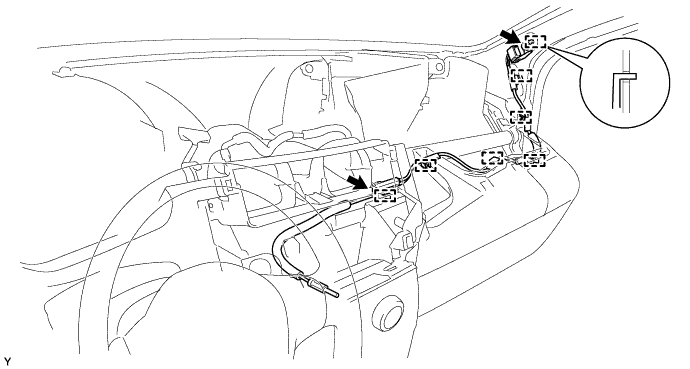
for RHD:
Remove the bolt, the hook and the bracket.
Using a clip remover, remove the clamp.
Disconnect the antenna amplifier connector.
Remove the 4 clamps and the antenna cord.
| 6. REMOVE NO. 2 ANTENNA CORD SUB-ASSEMBLY |
w/ Curtain Shield Airbag:
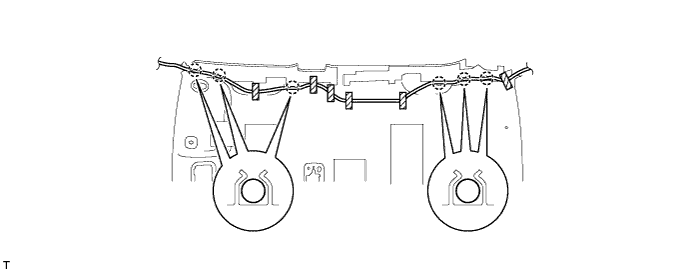
Remove the 8 pieces of tape.
Remove the No. 2 antenna cord from the 4 claws of the front and rear side real spacers.
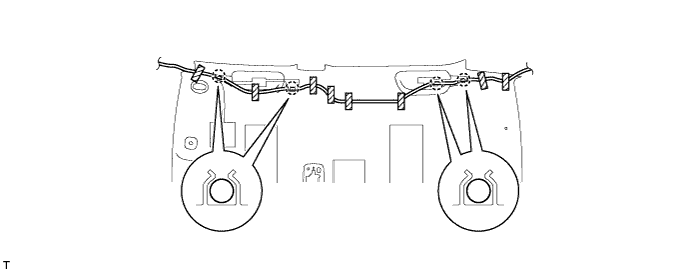
w/ Curtain Shield Airbag:
Remove the 6 pieces of tape.
Remove the No. 2 antenna cord from the 6 claws of the front and rear side real spacers.