TRANSMISSION CONTROL CABLE ASSEMBLY (for Sedan) > REMOVAL |
| 1. REMOVE BATTERY |
Disconnect the cable from the battery terminal.
Loosen the nut and remove the battery clamp.
Remove the battery.
| 2. REMOVE BATTERY TRAY |
| 3. REMOVE INSTRUMENT PANEL FINISH PANEL LOWER CENTER |
|
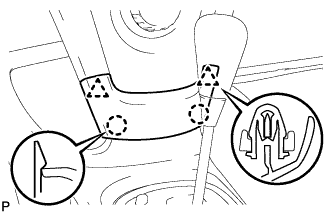
Disengage the 2 claws and 2 clips and remove the instrument panel finish panel lower center.
| 4. REMOVE UPPER CONSOLE PANEL SUB-ASSEMBLY |
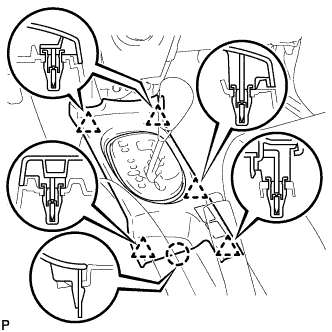 |
Shift the shift lever into the N position.
Disengage the 5 clips and the claw and remove the upper console panel.
| 5. REMOVE CONSOLE UPPER REAR PANEL SUB-ASSEMBLY |
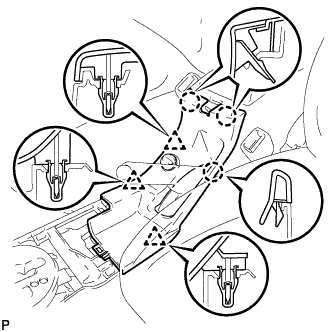 |
Disengage the 3 clips and 3 claws.
Disconnect the connector and remove the console upper rear panel.
| 6. REMOVE CONSOLE BOX CARPET |
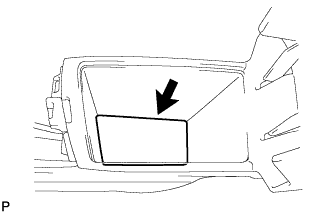 |
Remove the console box carpet.
| 7. REMOVE REAR CONSOLE BOX ASSEMBLY |
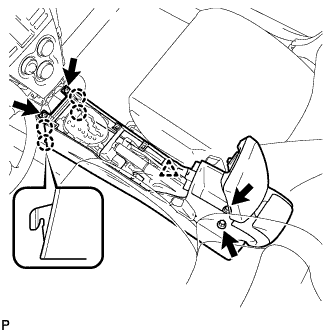 |
Disconnect the clamp.
Remove the 2 bolts and 2 screws.
Disengage the 4 claws and remove the rear console box.
| 8. SEPARATE OXYGEN SENSOR CONNECTOR |
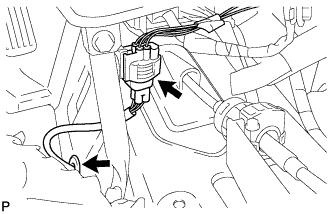 |
Pull back the floor carpet and disconnect the oxygen sensor connector.
Remove the grommet and put the oxygen sensor connector outside of the vehicle.
| 9. REMOVE AIR CLEANER ASSEMBLY |
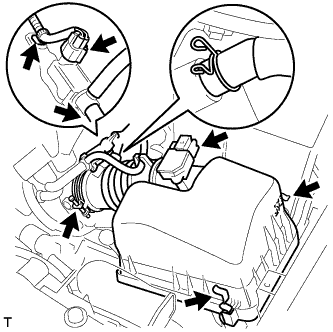 |
Separate the intake air flow meter connector and wire harness clamp.
Separate the fuel vapor feed hose and fuel vapor feed hose No. 1 from the vacuum switching valve assembly.
Separate the vacuum switching valve connector and wire harness clamp.
Separate the ventilation hose from the air cleaner hose.
Release the air cleaner cap sub-assembly with air cleaner hose No. 1.
Loosen the air cleaner hose clamp on the throttle body side and remove the air cleaner cap and air cleaner hose.
Remove the air cleaner element.
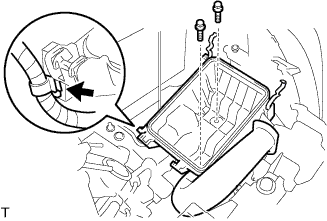 |
Separate the wire harness clamp from the air cleaner case.
Remove the 2 bolts and remove the air cleaner case with air cleaner inlet No. 1.
| 10. REMOVE AIR CLEANER BRACKET |
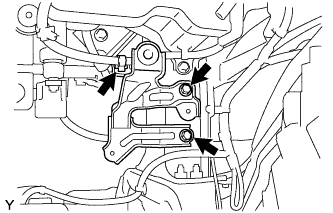 |
Separate the wire harness clamp from the air cleaner bracket.
Remove the 2 bolts and remove the air cleaner bracket.
| 11. REMOVE EXHAUST PIPE ASSEMBLY FRONT |
Remove the 4 bolts and 4 compression springs.
Remove exhaust pipe support No. 4 and the exhaust front pipe assembly.
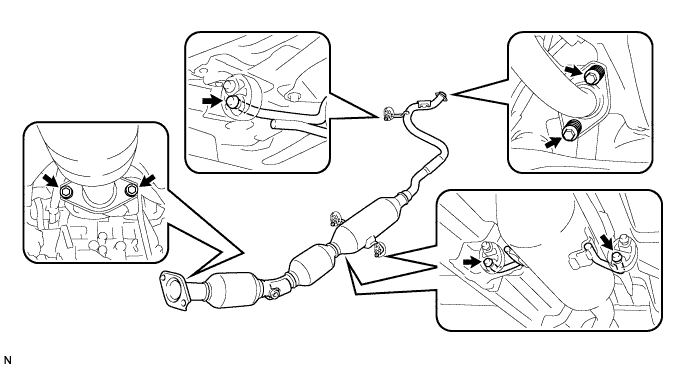
Remove the 2 exhaust pipe gaskets.
| 12. REMOVE FRONT FLOOR HEAT INSULATOR NO.1 |
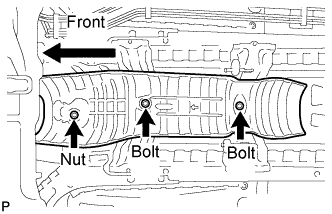 |
Remove the 2 bolts and the nut and remove floor heat insulator No. 1.
| 13. REMOVE TRANSMISSION CONTROL CABLE ASSEMBLY |
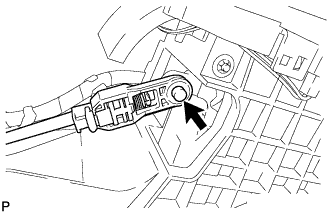 |
Disconnect the control cable from the shift lever.
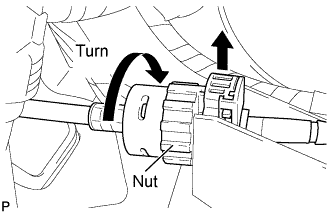 |
Turn the nut and separate the control cable from the shift lever retainer.
Disconnect the control cable from the control cable support.
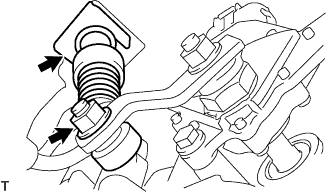 |
Remove the nut and disconnect the control cable from the control shaft lever.
Remove the clip and separate the control cable from the control cable bracket.
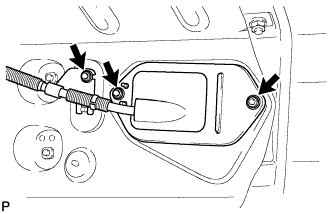 |
Remove the 3 nuts and remove the control cable.