FLOOR SHIFT ASSEMBLY (for Sedan) > INSTALLATION |
| 1. INSTALL FLOOR SHIFT ASSEMBLY |
|
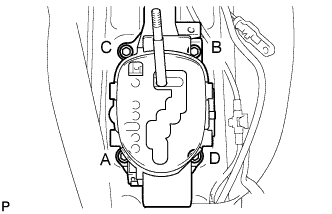
Provisionally install the shift lever with the 4 bolts.
Tighten the 4 bolts in order, from A to D.
Install the shift lock control computer connector and indicator light connector.
| 2. CONNECT TRANSMISSION CONTROL CABLE ASSEMBLY |
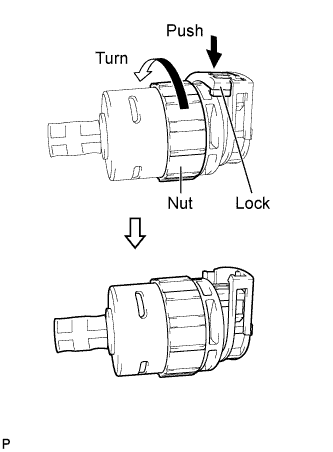 |
Turn the nut of the control cable and push in the lock.
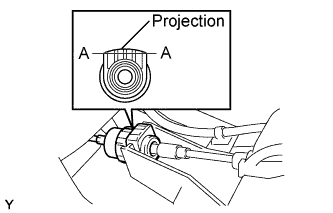 |
Install the control cable onto the shift lever retainer.
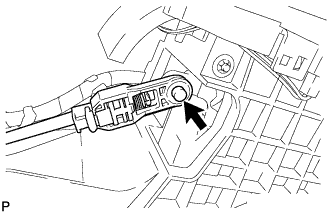 |
Connect the control cable to the shift lever.
| 3. CONNECT CABLE TO NEGATIVE BATTERY TERMINAL |
| 4. INSPECT SHIFT LEVER POSITION |
When shifting the lever from P to the R position with the ignition switch on (IG) and the brake pedal depressed, make sure that the shift lever moves smoothly and moves correctly into position.
Start the engine and make sure that the vehicle moves forward when shifting the lever from N to the D position and moves rearward when shifting the lever to the R position.
If the operation cannot be performed as specified, inspect the park/neutral position switch assembly and check the shift lever assembly installation condition.
| 5. ADJUST SHIFT LEVER POSITION |
Shift the shift lever to the N position.
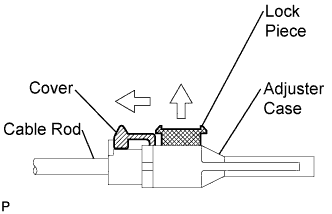 |
Slide the adjuster case cover in the direction shown in the illustration and pull out the lock piece.
Gently pull the cable rod toward the rear of the vehicle by hand to pull the cable taut.
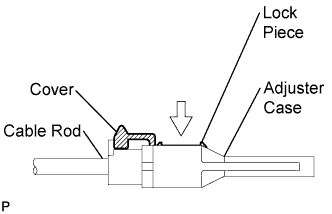 |
Press the lock piece into the adjuster case and lock it.
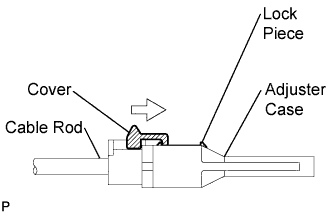 |
Slide the cover in the direction shown in the illustration.
Inspect the operation after the adjustment.
| 6. INSTALL REAR CONSOLE BOX ASSEMBLY |
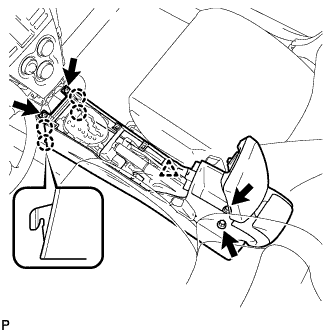 |
Engage the 4 claws and install the rear console box.
Install the 2 bolts and 2 screws.
Connect the clamp.
| 7. INSTALL CONSOLE BOX CARPET |
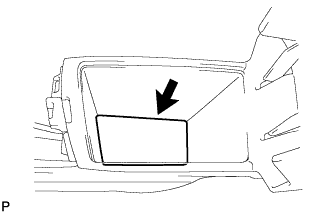 |
Install the console box carpet.
| 8. INSTALL CONSOLE UPPER REAR PANEL SUB-ASSEMBLY |
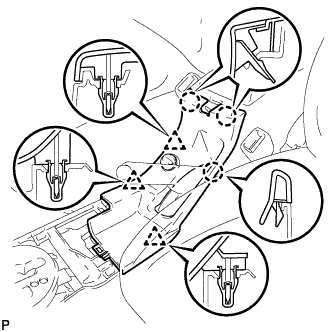 |
Connect the connector.
Engage the 3 clips and 3 claws and install the console upper rear panel.
| 9. INSTALL UPPER CONSOLE PANEL SUB-ASSEMBLY |
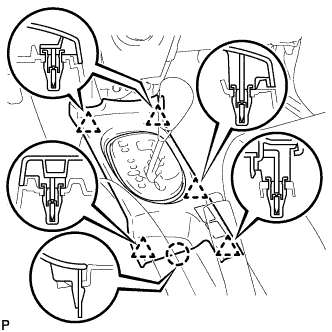 |
Engage the 5 clips and the claw and install the upper console panel.
| 10. INSTALL INSTRUMENT PANEL FINISH PANEL LOWER CENTER |
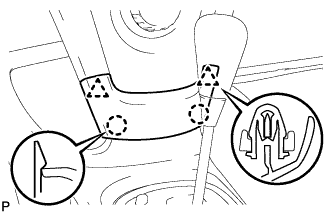 |
Engage the 2 claws and 2 clips and install the instrument panel finish panel lower center.
| 11. INSTALL SHIFT LEVER KNOB SUB-ASSEMBLY |
Install the shift lever knob sub-assembly onto the shift lever.