INTERMEDIATE SHAFT > DISASSEMBLY |
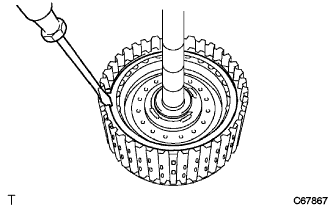
| 1. REMOVE REVERSE CLUTCH DISC |
|
Using a screwdriver, remove the snap ring.
Remove the flange, 2 discs and 2 plates.
| 2. REMOVE DIRECT CLUTCH DISC |
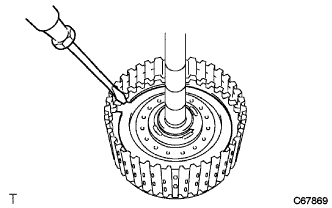 |
Using a screwdriver, remove the snap ring.
Remove the direct clutch flange, 3 plates and 3 rear clutch flanges.
| 3. REMOVE DIRECT CLUTCH RETURN SPRING SUB-ASSEMBLY |
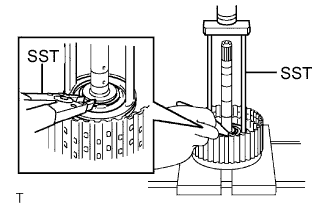 |
Using SST and a press, remove the snap ring.
Remove the direct clutch return spring sub-assembly from the intermediate shaft.
| 4. REMOVE DIRECT CLUTCH PISTON SUB-ASSEMBLY |
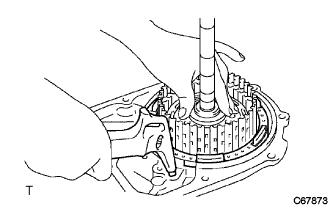 |
Install the intermediate shaft onto the transaxle rear cover.
Apply compressed air (392 kPa, 4.0 kgf/cm2, 57 psi) to the oil hole shown in the illustration and remove the direct clutch piston from the intermediate shaft.
| 5. REMOVE DIRECT CLUTCH DRUM SUB-ASSEMBLY |
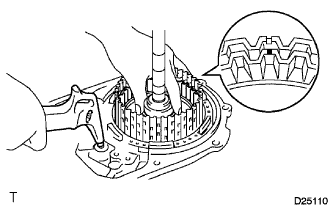 |
Install the intermediate shaft onto the transaxle rear cover.
Put a matchmark on the direct clutch drum in the same position as the cutout of the intermediate shaft assembly.
Apply compressed air (392 kPa, 4.0 kgf/cm2, 57 psi) to the oil hole shown in the illustration and remove the direct clutch drum from the intermediate shaft.
| 6. REMOVE DIRECT CLUTCH PISTON O-RING |
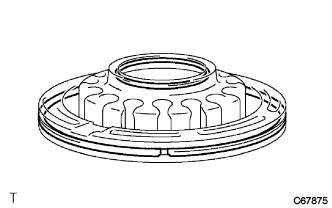 |
Using a screwdriver, remove the 2 piston O-rings from the direct clutch piston.
| 7. REMOVE DIRECT CLUTCH DRUM O-RING |
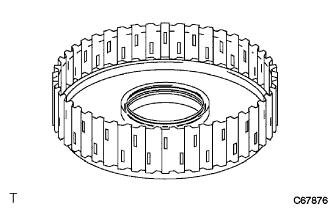 |
Using a screwdriver, remove the direct clutch drum O-ring from the direct clutch drum.