REAR DOOR (for Hatchback with Power Window) > DISASSEMBLY |
| 1. DISCONNECT CABLE FROM NEGATIVE BATTERY TERMINAL |
| 2. REMOVE REAR DOOR TRIM BOARD SUB-ASSEMBLY |
|
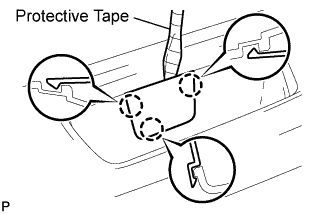
Using a screwdriver with its tip wrapped in protective tape, disengage the 3 claws and remove the rear door armrest plug.
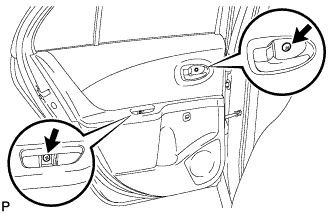 |
Remove the 2 screws.
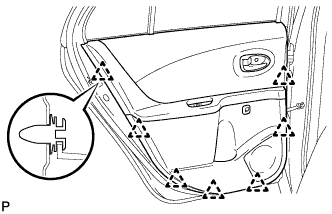 |
Disengage the 7 clips.
Disconnect the connector.
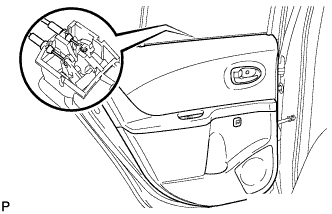 |
Disconnect the rear door lock remote control cable and rear door inside locking cable and remove the rear door trim board.
| 3. REMOVE REAR DOOR INSIDE HANDLE SUB-ASSEMBLY |
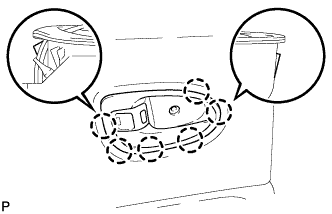 |
Disengage the 6 claws and remove the rear door inside handle.
| 4. REMOVE REAR DOOR GLASS WEATHERSTRIP INNER |
Remove the rear door glass weatherstrip inner from the rear door trim board.
| 5. REMOVE POWER WINDOW REGULATOR SWITCH ASSEMBLY REAR |
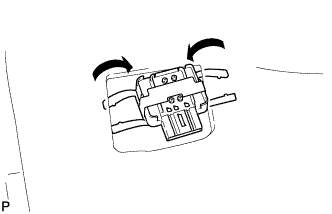 |
Disengage the set plate and remove the power window regulator switch.
| 6. REMOVE REAR SPEAKER ASSEMBLY (w/ Rear Speaker) |
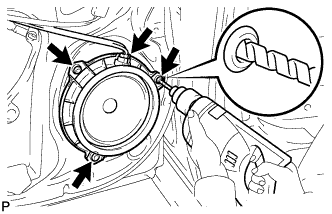 |
Disconnect the connector.
Drill out the 3 rivet heads using a drill with a bit diameter of less than 4 mm (0.16 in.), and remove the rear speaker assembly from the rear door panel.
Operate the drill around the rivet head circumference and cut out the flange.
After drilling out the flange, continue drilling to push out the shards on the drill.
Using a vacuum cleaner, remove the rivet fragments and shavings from the inside of the door.
| 7. REMOVE REAR DOOR SERVICE HOLE COVER |
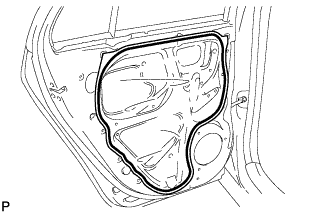 |
w/ Rear speaker:
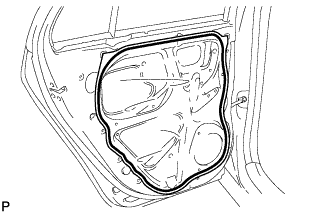
Disconnect the connectors and clamps, then remove the rear door service hole cover.
 |
w/o Rear speaker:
Disconnect the connectors and clamps, then remove the rear door service hole cover.
| 8. REMOVE REAR DOOR CHECK ASSEMBLY |
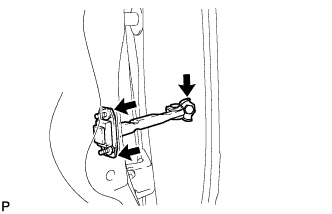 |
Remove the 3 bolts, then remove the rear door check.
| 9. REMOVE REAR DOOR WEATHERSTRIP |
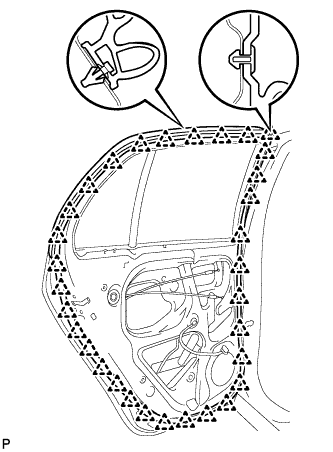 |
Disengage the 32 clips and remove the rear door weatherstrip.
| 10. REMOVE REAR DOOR BELT MOULDING |
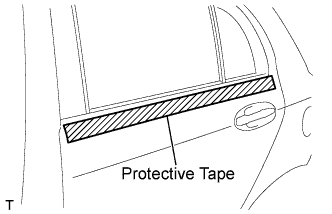 |
Apply protective tape to the door panel in the area around the rear door belt moulding.
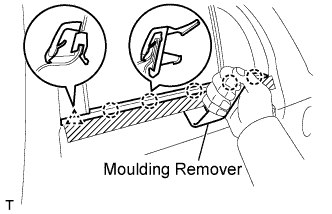 |
Using a moulding remover, disengage the 5 claws and the clip and remove the rear door belt moulding.
| 11. REMOVE REAR DOOR GLASS RUN |
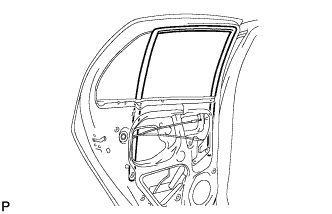 |
Remove the rear door glass run.
| 12. REMOVE REAR DOOR WINDOW DIVISION BAR SUB-ASSEMBLY |
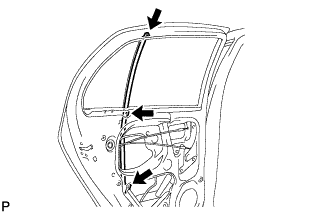 |
Remove the 2 bolts and screw and rear door window division bar.
| 13. REMOVE REAR DOOR QUARTER WINDOW WEATHERSTRIP |
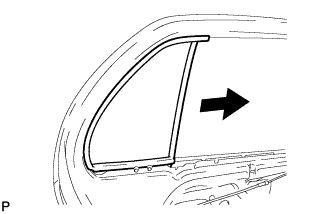 |
Slide the rear door quarter window weatherstrip, in the direction indicated by the arrow in the illustration, to remove it.
Remove the rear door quarter window glass from the rear door quarter window weatherstrip.
| 14. REMOVE REAR DOOR GLASS SUB-ASSEMBLY |
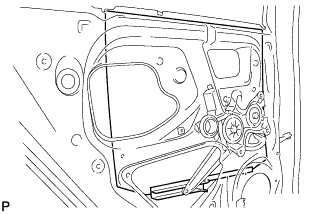 |
Remove the rear door glass from the rear door window regulator.
| 15. REMOVE REAR DOOR WINDOW REGULATOR SUB-ASSEMBLY |
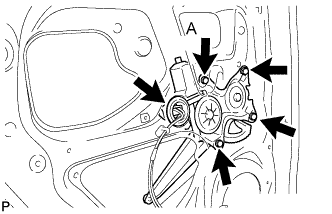 |
Disconnect the connector.
Loosen bolt A.
Remove the 3 bolts, then remove the rear door window regulator.
| 16. REMOVE POWER WINDOW REGULATOR MOTOR ASSEMBLY REAR |
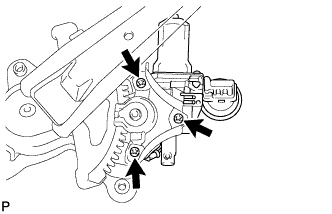 |
Using "TORX" socket wrench T25, remove the 3 screws and power window regulator motor.
| 17. REMOVE REAR DOOR LOCK ASSEMBLY |
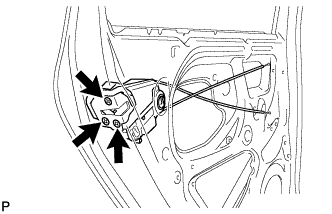 |
Using "TORX" socket wrench T30, remove the 3 screws.
Move the rear door lock downward, remove the outside handle frame release plate and remove the rear door lock.
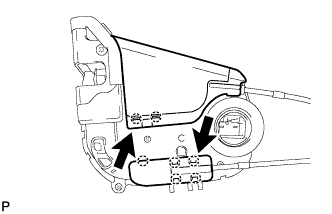 |
Open the 2 covers.
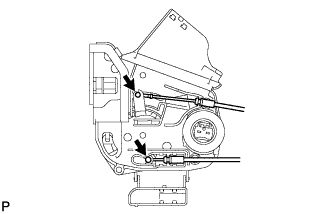 |
Disconnect the rear door lock remote control cable and rear door inside locking cable.
Remove the door lock wire harness seal.
| 18. REMOVE REAR DOOR OUTSIDE HANDLE COVER |
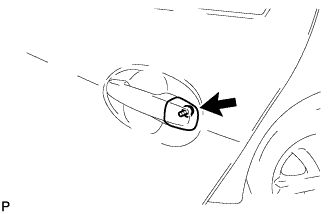 |
Using "TORX" socket wrench T30, remove the screw and rear door outside handle cover.
| 19. REMOVE REAR DOOR OUTSIDE HANDLE ASSEMBLY |
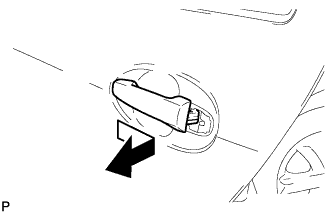 |
Remove the handle by sliding and pulling it in the direction indicated by the arrow mark in the illustration.
| 20. REMOVE REAR DOOR OUTSIDE HANDLE PAD REAR |
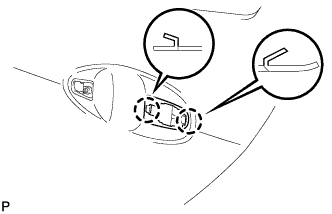 |
Disengage the 2 claws and remove the rear door outside handle pad rear.
| 21. REMOVE REAR DOOR OUTSIDE HANDLE PAD FRONT |
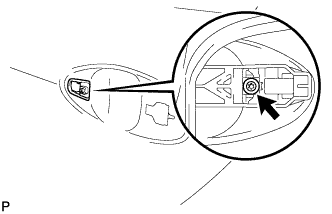 |
Using "TORX" socket wrench T30, loosen the screw.
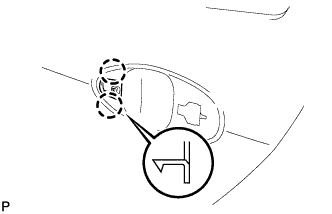 |
Disengage the 2 claws and remove the rear door outside handle pad front.
| 22. REMOVE REAR DOOR OUTSIDE HANDLE FRAME SUB-ASSEMBLY |
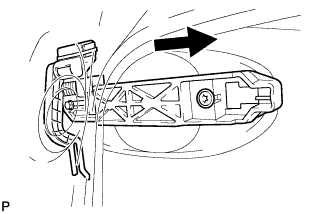 |
Slide the outside handle frame to remove it.