 |
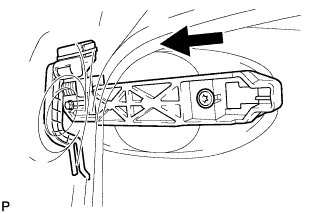
Slide the outside handle frame to install it.
REAR DOOR (for Hatchback with Power Window) > REASSEMBLY |
| 1. INSTALL REAR DOOR OUTSIDE HANDLE FRAME SUB-ASSEMBLY |
Apply MP grease to the sliding areas of the rear door outside handle frame.
|
Slide the outside handle frame to install it.
| 2. INSTALL REAR DOOR OUTSIDE HANDLE PAD FRONT |
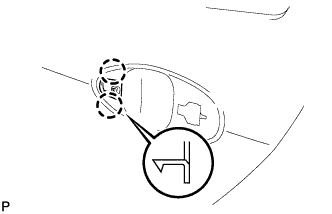 |
Engage the 2 claws and install the rear door outside handle pad front.
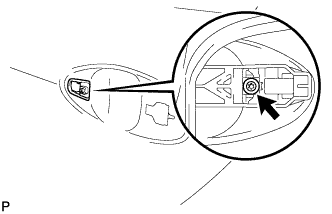 |
Using "TORX" socket wrench T30, tighten the screw.
| 3. INSTALL REAR DOOR OUTSIDE HANDLE PAD REAR |
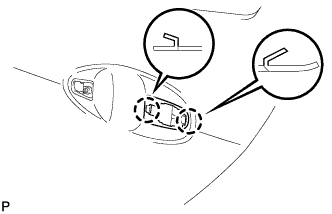 |
Engage the 2 claws and install the rear door outside handle pad rear.
| 4. INSTALL REAR DOOR OUTSIDE HANDLE ASSEMBLY |
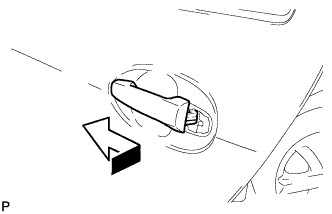 |
Pushing the rear door outside handle in the direction of the arrow mark shown in the illustration, install the rear door outside handle.
| 5. INSTALL REAR DOOR LOCK ASSEMBLY |
Apply MP grease to the sliding and rotating areas of the front door lock.
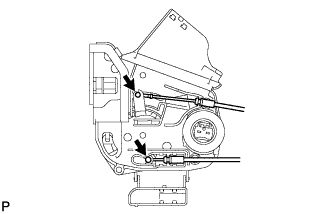 |
Connect the rear door lock remote control cable and rear door inside locking cable.
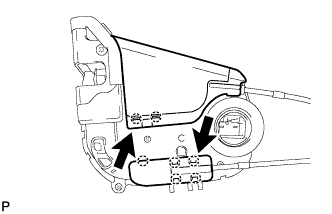 |
Close the 2 covers.
Insert the door lock into the outside handle frame release plate, then set it onto the door panel.
Make sure that the outside handle frame link is securely engaged with the door lock.
Apply adhesive to the threads of the screws.
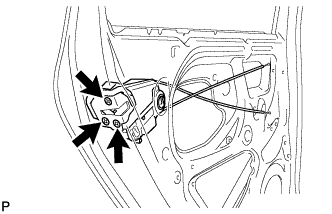 |
Using "TORX" socket wrench T30, install the rear door lock with the 3 screws.
| 6. INSTALL REAR DOOR OUTSIDE HANDLE COVER |
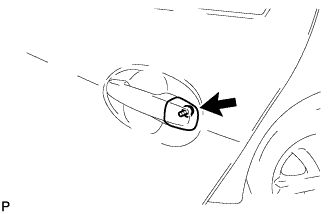 |
Using "TORX" socket wrench T30, install the rear door outside handle cover with the screw.
| 7. INSTALL POWER WINDOW REGULATOR MOTOR ASSEMBLY REAR |
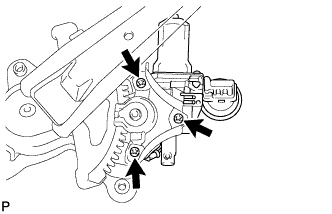 |
Apply MP grease to the sliding and rotating areas of the regulator motor.
Using "TORX" socket wrench T25, install the power window regulator motor with the 3 screws.
| 8. INSTALL REAR DOOR WINDOW REGULATOR SUB-ASSEMBLY |
Apply MP grease to the sliding and rotating areas of the rear door window regulator.
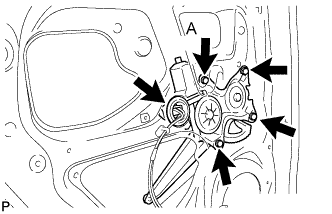 |
Loosely screw bolt A onto the rear door window regulator.
Insert the rear door window regulator into the door panel. Use bolt A to hang the rear door window regulator on the door panel.
Install the rear door window regulator with the 4 bolts, and tighten bolt A.
Connect the connector.
| 9. INSTALL REAR DOOR GLASS SUB-ASSEMBLY |
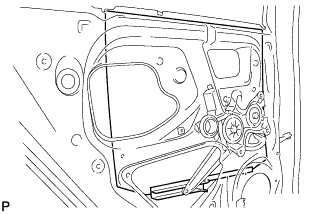 |
Install the rear door glass onto the rear door window regulator.
| 10. INSTALL REAR DOOR QUARTER WINDOW WEATHERSTRIP |
Install the rear door quarter window glass onto the rear door quarter window weatherstrip.
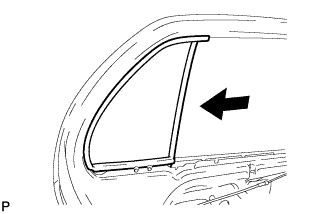 |
Slide the rear door quarter window weatherstrip, in the direction indicated by the arrow in the illustration, to install it.
| 11. INSTALL REAR DOOR WINDOW DIVISION BAR SUB-ASSEMBLY |
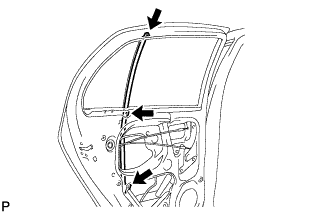 |
Install the rear door window division bar with the 2 bolts and screw.
| 12. INSTALL REAR DOOR GLASS RUN |
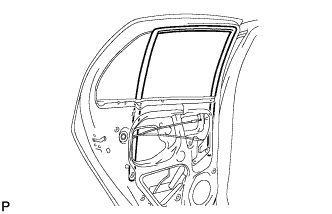 |
Install the rear door glass run.
| 13. INSTALL REAR DOOR BELT MOULDING |
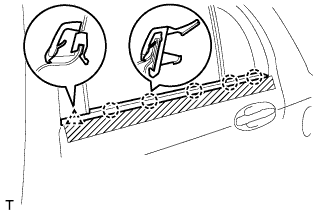 |
Engage the 5 claws and the clip and install a new rear door belt moulding.
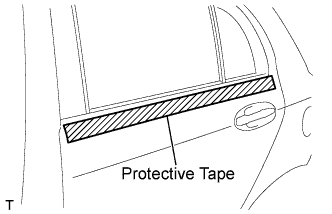 |
Remove the protective tape.
| 14. INSTALL REAR DOOR WEATHERSTRIP |
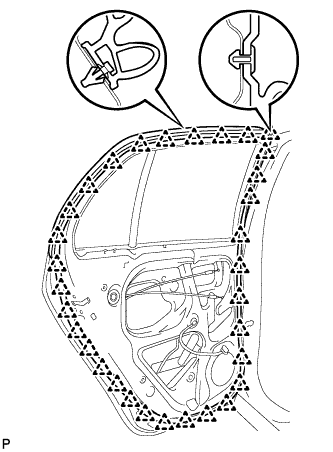 |
Engage the 32 clips and install the rear door weatherstrip.
| 15. INSTALL REAR DOOR CHECK ASSEMBLY |
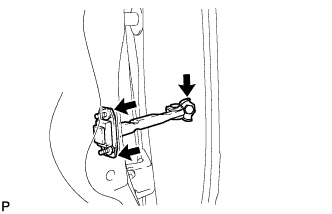 |
Apply MP grease to the sliding areas of the door check.
Install the rear door check onto the door panel with the 2 bolts.
Apply adhesive to the threads of the bolt.
Install the rear door check onto the body panel with the bolt.
| 16. INSTALL REAR DOOR SERVICE HOLE COVER |
 |
w/ Rear speaker:
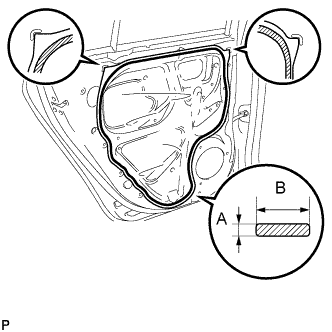
Apply butyl tape to the door panel, then install the rear door service hole cover as shown in the illustration.
| Area | Dimension |
| A | 2.0 mm (0.079 in.) or more |
| B | 6.0 mm (0.236 in.) or more |
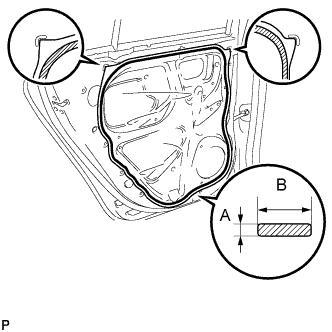 |
w/o Rear speaker:
Apply butyl tape to the door panel, then install the rear door service hole cover as shown in the illustration.
| Area | Dimension |
| A | 2.0 mm (0.079 in.) or more |
| B | 6.0 mm (0.236 in.) or more |
| 17. INSTALL REAR SPEAKER ASSEMBLY (w/ Rear Speaker) |
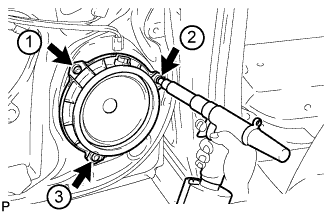 |
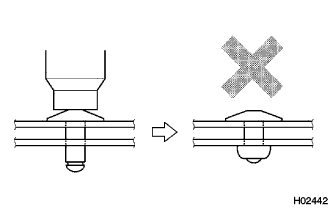
Using an air riveter or hand riveter, install the front No. 1 speaker assembly onto the front door panel with 3 new strike rivets.
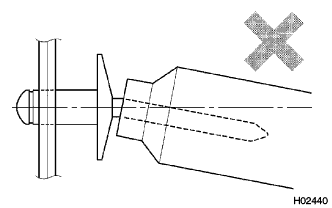 |
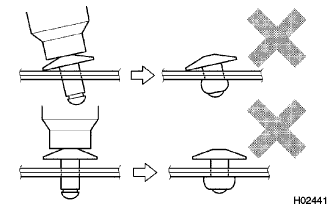 |
 |
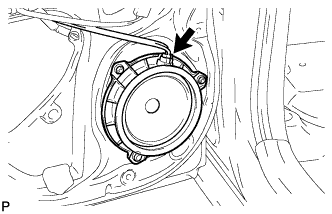 |
Connect the connector.
| 18. INSTALL POWER WINDOW REGULATOR SWITCH ASSEMBLY REAR |
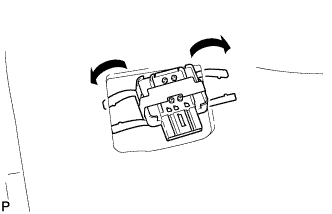 |
Engage the set plate and install the power window regulator switch.
| 19. INSTALL REAR DOOR GLASS WEATHERSTRIP INNER |
Install the rear door glass weatherstrip inner onto the rear door trim board.
| 20. INSTALL REAR DOOR INSIDE HANDLE SUB-ASSEMBLY |
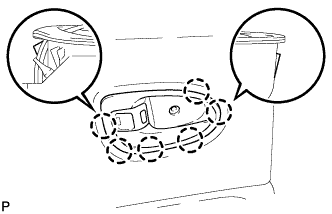 |
Engage the 6 claws and install the rear door inside handle.
| 21. INSTALL REAR DOOR TRIM BOARD SUB-ASSEMBLY |
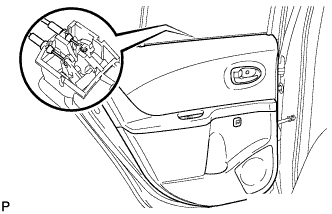 |
Connect the rear door lock remote control cable and rear door inside locking cable.
Connect the connector.
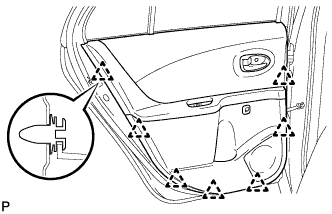 |
Engage the 7 clips and install the rear door trim board.
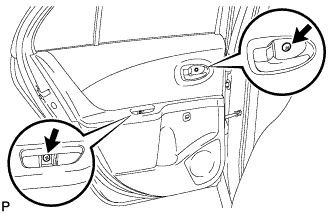 |
Tighten the 2 screws.
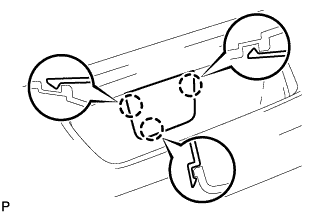 |
Engage the 3 claws and install the rear door armrest plug.
| 22. CONNECT CABLE TO NEGATIVE BATTERY TERMINAL |