BACK DOOR (for Hatchback) > DISASSEMBLY |
| 1. REMOVE CENTER STOP LIGHT COVER |
|
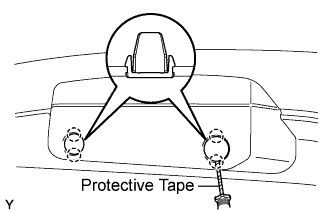
Using a screwdriver with its tip wrapped in protective tape, disengage the 4 claws and remove the 2 rear light covers.
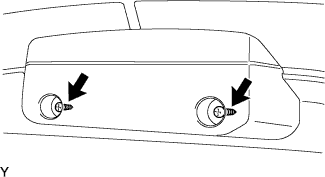 |
Remove the 2 screws.
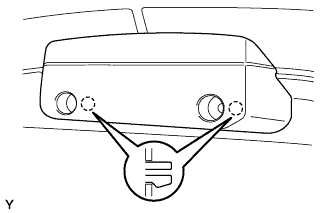 |
Disengage the 2 claws.
Disconnect the connector and remove the center stop light cover.
| 2. REMOVE HIGH MOUNTED STOP LIGHT ASSEMBLY |
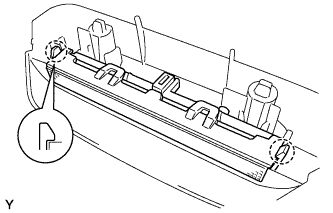 |
Disengage the 2 claws and remove the high mounted stop light.
| 3. REMOVE BACK DOOR TRIM BOARD ASSEMBLY |
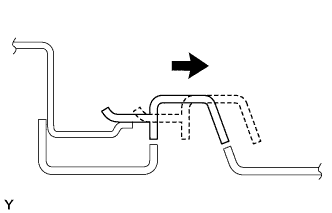 |
Using a screwdriver with its tip wrapped in protective tape, slide the handle plate of the back door trim board to disengage it.
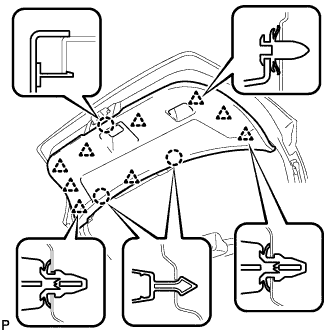 |
Disengage the 3 claws and 9 clips and remove the back door trim board.
| 4. REMOVE REAR WIPER ARM AND BLADE ASSEMBLY |
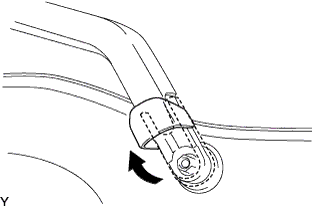 |
Open the rear wiper arm head cap.
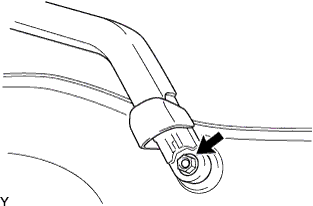 |
Remove the nut and rear wiper arm and blade.
| 5. REMOVE REAR WIPER MOTOR GROMMET |
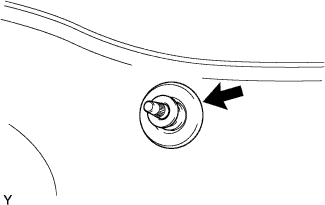 |
Remove the rear wiper motor grommet.
| 6. REMOVE REAR WIPER MOTOR |
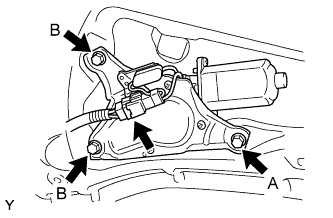 |
Disconnect the connector.
Loosen bolt A.
Remove bolt B and the rear wiper motor.
| 7. REMOVE BACK DOOR PANEL PROTECTOR NO.2 |
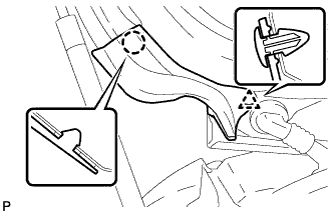 |
Disengage the claw and clip, then remove back door panel protector No. 2.
| 8. REMOVE BACK DOOR PANEL PROTECTOR NO.1 |
| 9. REMOVE BACK DOOR LOCK ASSEMBLY |
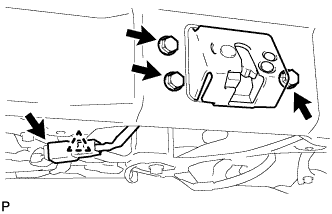 |
Disconnect the connector and the clamp.
Remove the 3 bolts and the back door lock.
| 10. REMOVE BACK DOOR LOCK CYLINDER ASSEMBLY |
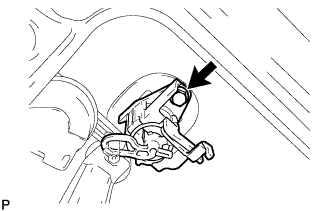 |
Remove the bolt and back door lock cylinder assembly.
| 11. REMOVE BACK DOOR OUTSIDE HANDLE |
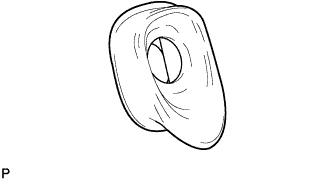 |
Remove the back door outside handle from the back door panel.
| 12. REMOVE BACK DOOR LOCK ACTUATOR ASSEMBLY |
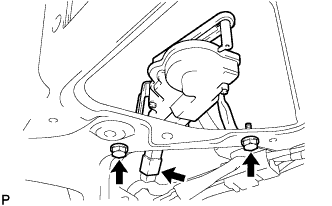 |
Disconnect the connector.
Remove the 2 bolts and the back door lock actuator.
| 13. REMOVE SYMBOL EMBLEM |
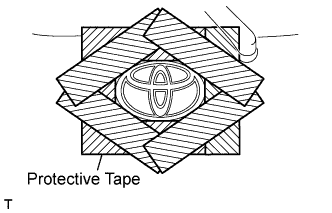 |
Apply protective tape to the back door panel in the area around the symbol emblem.
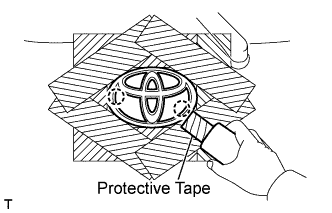 |
Using an infrared light, heat the symbol emblem.
Using a gasket scraper with its tip wrapped in protective tape, gradually peel the adhesive surface and remove the symbol emblem.
Remove the protective tape.
| 14. REMOVE NO. 1 LUGGAGE COMPARTMENT DOOR NAME PLATE |
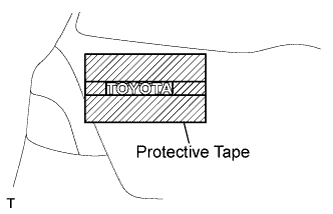 |
Apply protective tape to the back door panel in the area around the No. 1 luggage compartment door name plate.
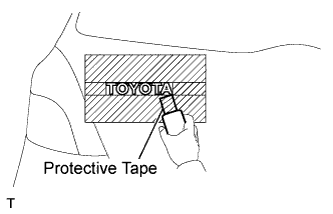 |
Using an infrared light, heat the No. 1 luggage compartment door name plate.
Using a gasket scraper with its tip wrapped in protective tape, gradually peel the adhesive surface and remove the No. 1 luggage compartment door name plate.
Remove the protective tape.
| 15. REMOVE NO. 2 LUGGAGE COMPARTMENT DOOR NAME PLATE |
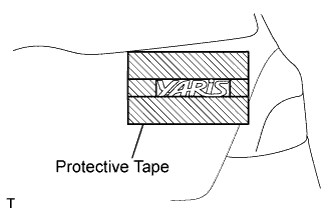 |
Apply protective tape to the back door panel in the area around the No. 2 luggage compartment door name plate.
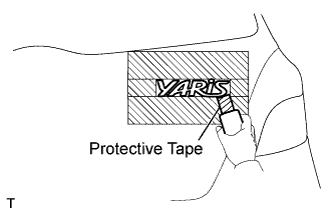 |
Using an infrared light, heat the No. 2 luggage compartment door name plate.
Using a gasket scraper with its tip wrapped in protective tape, gradually peel the adhesive surface and remove the No. 2 luggage compartment door name plate.
Remove the protective tape.