Home › ENGINE ยท 2NZ-FE › ENGINE CONTROL SYSTEM › CAMSHAFT TIMING OIL CONTROL VALVE ASSEMBLY

CAMSHAFT TIMING OIL CONTROL VALVE ASSEMBLY > INSTALLATION

for Preparation Click here


1. INSTALL CAMSHAFT TIMING OIL CONTROL VALVE ASSEMBLY


A116179
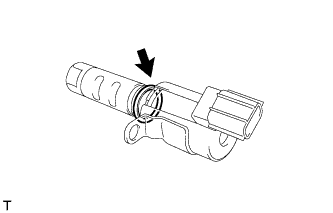
  1. Apply a light coat of engine oil to a new O-ring and install it onto the camshaft timing oil control valve assembly.
    NOTICE:
    Do not twist the O-ring.


    A116178
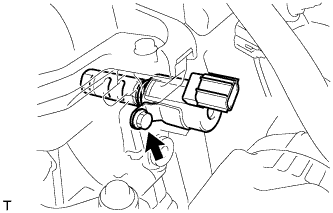
  1. Install the camshaft timing oil control valve assembly with the bolt.
    Torque:
    7.5 N*m{ 76 kgf*cm , 66 in.*lbf }


    A116177
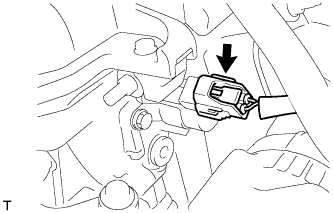
  1. Connect the camshaft timing oil control valve assembly connector.


2. INSTALL FAN BELT ADJUSTING BAR


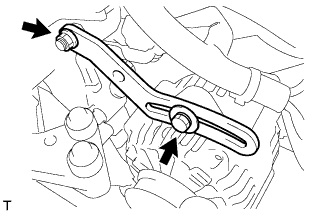
A115508
  1. Provisionally install the fan belt adjusting bar with the bolt and nut.

  1. Tighten the nut to the specified torque.

    Torque:
    11 N*m{ 112 kgf*cm , 8.1 ft.*lbf }


3. INSTALL FAN & GENERATOR V BELT
  1. Provisionally install the fan and generator V belt onto each pulley.

    NOTICE:
    1. Make sure that there is no foreign matter or liquid, such as oil, on the belt and pulleys.
    2. Make sure that the V belt is securely fitted into the rib grooves of the pulley.


4. ADJUST FAN & GENERATOR V BELT


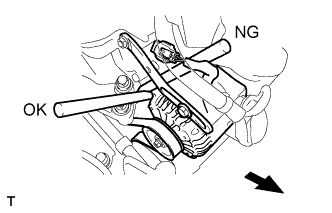
    A116198E01
  1. for Unleaded Gasoline Specification Vehicle:
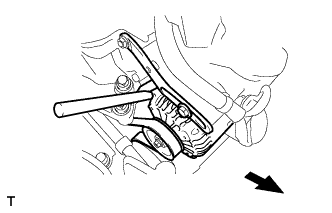
    Insert an adjusting bar between the engine mounting bracket and generator assembly. Pull the adjusting bar towards the vehicle front to adjust the generator V belt tension.
    NOTICE:
    Do not insert the adjusting bar between the camshaft timing oil control valve assembly and generator assembly. It could damage the camshaft timing oil control valve assembly.


    A117470
  1. for Leaded Gasoline Specification Vehicle:
    Insert the adjusting bar between the engine mounting bracket and generator assembly. Pull the adjusting bar towards the vehicle front to adjust the generator V belt tension.
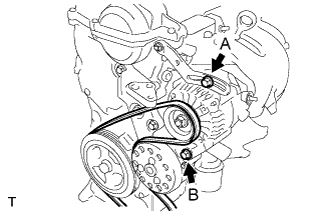


    A116197E01
  1. First tighten bolt A, then tighten bolt B.

    Torque:
    19 N*m{ 189 kgf*cm , 14 ft.*lbf } for bolt A
    54 N*m{ 551 kgf*cm , 40 ft.*lbf } for bolt B


5. INSPECT FAN & GENERATOR V BELT


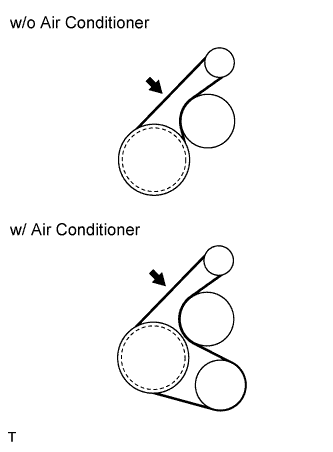
    A116200E01
  1. Check the V belt deflection and tension.

    Deflection:
    Item
    Specified Condition
    New belt
    8.0 to 9.0 mm (0.31 to 0.35 in)
    Used belt
    12.5 to 13.5 mm (0.49 to 0.53 in)

    Tension:
    Item
    Specified Condition
    New belt
    700 to 800 N (71 to 82 kg, 157 to 180 lb)
    Used belt
    300 to 400 N (31 to 41 kg, 67 to 90 lb)

    If the belt deflection is not as specified, adjust it.

    HINT:
    1. Perform the V belt inspection and adjustment while the engine is cold.
    2. V-ribbed belt tension and deflection should be checked immediately after installation of a new belt, and after cranking the engine when inspecting a used belt.
    3. Check the V belt deflection at the point between the specified pulleys where the deflection is greatest.
    4. When installing a new belt, set its tension to the intermediate value of the specification.
    5. When inspecting a belt which has been used for over 5 minutes, apply the Used Belt specifications.
    6. When reinstalling a belt which has been used for over 5 minutes, adjust its deflection and tension to the intermediate values of each Used Belt specification.
    7. V-ribbed belt tension and deflection should be checked after 2 revolutions of engine cranking.
    8. When using a belt tension gauge, confirm its accuracy by using a master gauge first.


6. CONNECT CABLE TO NEGATIVE BATTERY TERMINAL

Torque:
5.4 N*m{ 55 kgf*cm , 48 in.*lbf }


7. CHECK FOR ENGINE OIL LEAKAGE


8. INSTALL CYLINDER HEAD COVER NO. 2


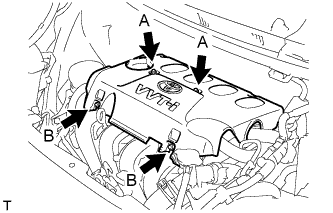
A116235E01
  1. Tighten 2 A nuts, then 2 B nuts.

    Torque:
    7.0 N*m{ 71 kgf*cm , 62 in.*lbf }


9. INSTALL ENGINE UNDER COVER RH


10. INSTALL ENGINE UNDER COVER SUB-ASSEMBLY (for Rough Road Area Specification Vehicles)