CAMSHAFT > REMOVAL |
| 1. DISCONNECT CABLE FROM NEGATIVE BATTERY TERMINAL |
| 2. REMOVE ENGINE UNDER COVER RH |
| 3. REMOVE ENGINE UNDER COVER SUB-ASSEMBLY (for Rough Road Area Specification Vehicles) |
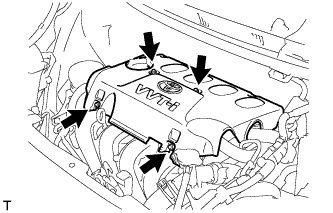
| 4. REMOVE CYLINDER HEAD COVER NO. 2 |
|
Remove the 4 nuts and cylinder head cover No. 2.
| 5. REMOVE IGNITION COIL NO. 1 |
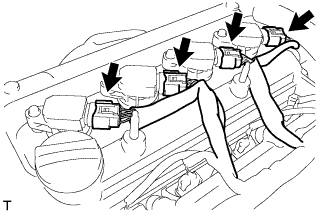 |
Disconnect the 4 ignition coil connectors.
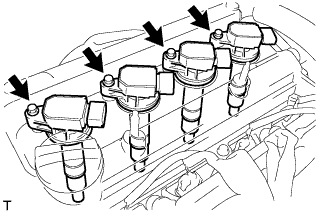 |
Remove the 4 bolts and 4 ignition coils.
| 6. DISCONNECT VENTILATION HOSE |
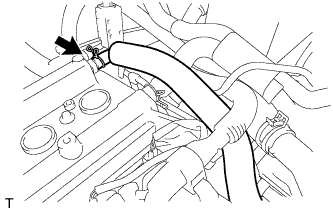 |
Disconnect the ventilation hose.
| 7. DISCONNECT VENTILATION HOSE NO. 2 |
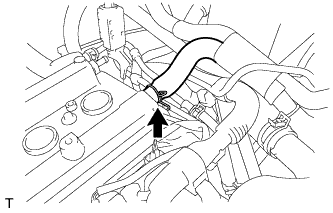 |
Disconnect ventilation hose No. 2.
| 8. REMOVE CYLINDER HEAD COVER SUB-ASSEMBLY (for RHD) |
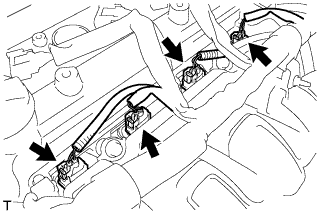 |
Disconnect the fuel injector connectors.
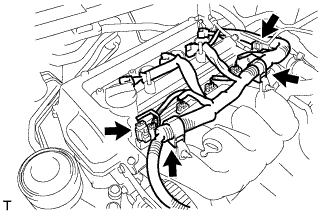 |
Disconnect the connector and 3 wire harness clamps shown in the illustration and disconnect the engine wire harness.
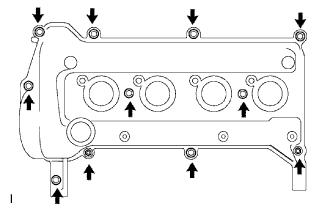 |
Remove the 9 bolts, 2 nuts and 2 seal washers and then remove the cylinder head cover sub-assembly.
| 9. REMOVE CYLINDER HEAD COVER SUB-ASSEMBLY (for LHD) |
|
Disconnect the fuel injector connectors.
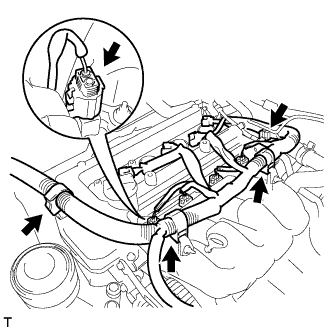 |
Disconnect the connector and 3 wire harness clamps shown in the illustration and disconnect the engine wire harness.
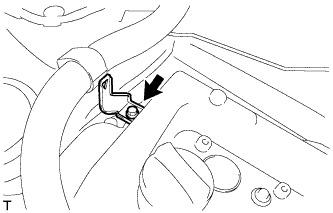 |
Remove the bolt and remove the wire harness bracket.
|
Remove the 9 bolts and 2 nuts, 2 seal washers and then remove the cylinder head cover sub-assembly.
| 10. REMOVE FAN & GENERATOR V BELT |
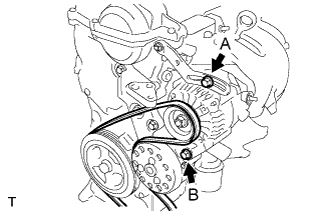 |
Loosen bolts A and B.
Release the fan and generator V belt tension and remove the fan and generator V belt.
| 11. REMOVE ENGINE MOUNTING INSULATOR SUB-ASSEMBLY RH |
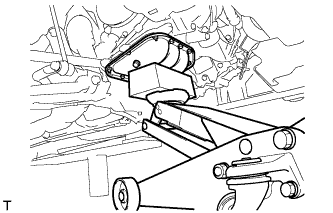 |
Place a wooden block on a jack underneath the engine.
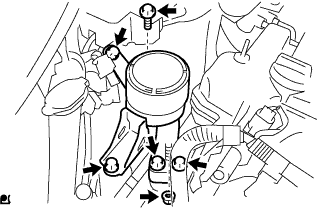 |
Remove the 5 bolts and nut and remove the engine mounting insulator sub-assembly RH.
| 12. REMOVE NO. 2 CAMSHAFT |
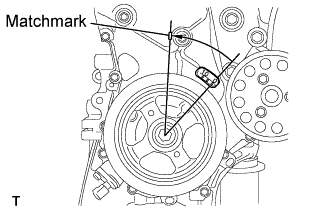 |
Set No. 1 cylinder to TDC/compression.
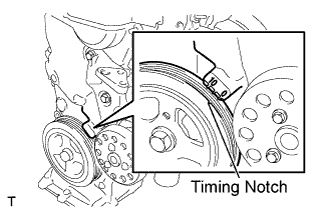 |
Turn the crankshaft damper, and align its timing notch with the timing mark "0" of the oil pump.
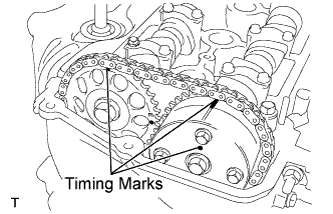 |
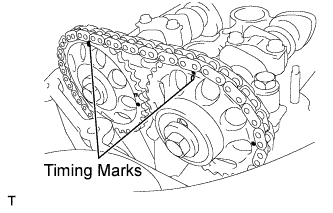
for Unleaded Gasoline Specification Vehicle:
Check that both timing marks on the camshaft timing sprocket and camshaft timing gear are facing upward, as shown in the illustration.
 |
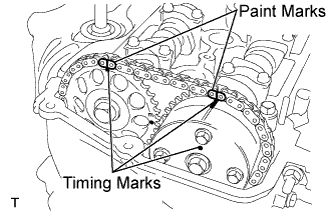
for Leaded Gasoline Specification Vehicle:
Check that both timing marks on the camshaft timing sprockets are facing upward as shown in the illustration.
 |
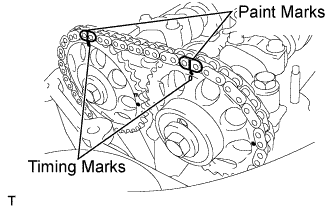
for Unleaded Gasoline Specification Vehicle:
Place paint marks on the chain in place where the timing marks of the camshaft timing sprocket and the camshaft timing gear are located.
 |
for Leaded Gasoline Specification Vehicle:
Put paint marks on the chain in place where the timing marks of the camshaft timing sprockets are located.
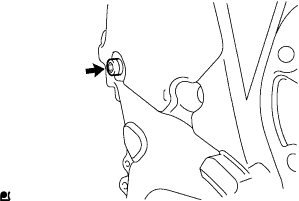 |
Using an 8 mm hexagon wrench, remove the screw plug.
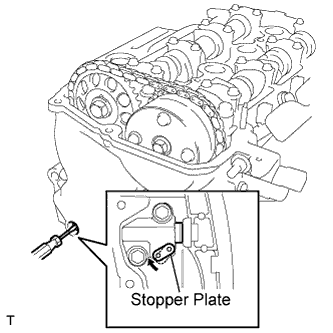 |
Insert a screwdriver into the service hole in the chain tensioner to pull the stopper plate of the chain tensioner upward.
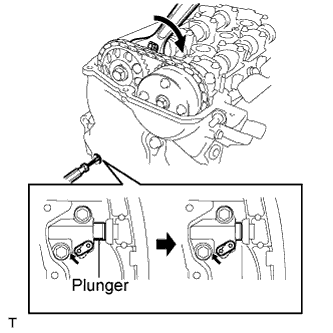 |
Using a wrench, rotate camshaft No. 2 clockwise to push in the plunger of the chain tensioner.
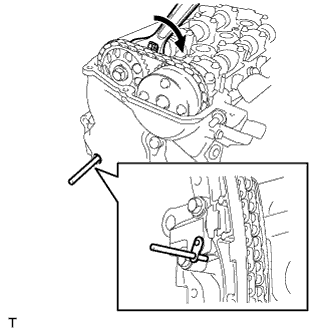 |
Remove the screwdriver from the service hole, then align the hole in the stopper plate with the service hole and insert a 3 mm (0.12 in.) diameter bar into the holes to hold the stopper plate.
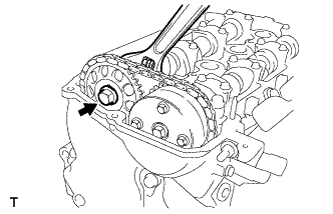 |
Using a wrench, hold the hexagonal lobe of camshaft No. 2 and remove the flange bolt.
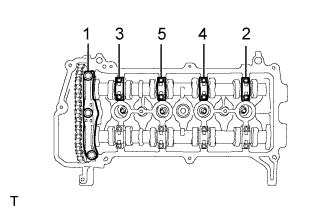 |
Using several steps, loosen and remove the 11 bearing cap bolts uniformly in the sequence shown in the illustration, then remove camshaft bearing cap No. 1 and camshaft bearing cap No. 2.
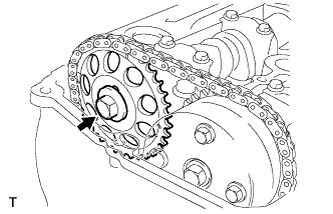 |
Remove the flange bolt and remove the camshaft timing sprocket.
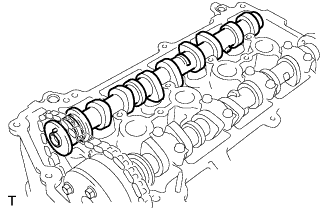 |
Remove camshaft No. 2.
| 13. REMOVE CAMSHAFT |
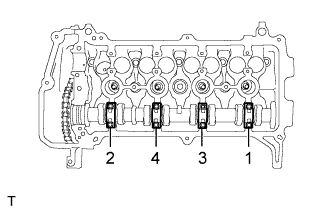 |
Using several steps, loosen and remove the 8 bearing cap bolts uniformly in the sequence shown in the illustration, then remove camshaft bearing cap No. 2.
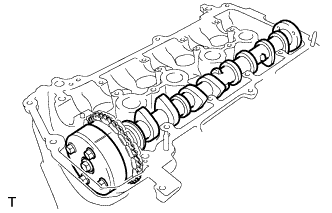 |
for Unleaded Gasoline Specification Vehicle:
Hold the chain by hand, and remove the camshaft and the camshaft timing gear assembly.
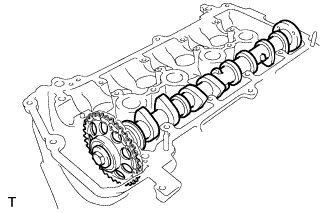 |
for Leaded Gasoline Specification Vehicle:
Hold the chain by hand, and remove the camshaft and the camshaft timing sprocket.
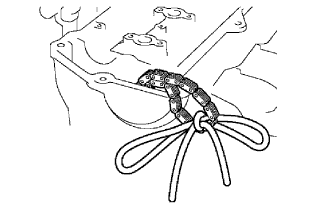 |
Tie the chain with a piece of string as shown in the illustration.
| 14. REMOVE CAMSHAFT TIMING GEAR ASSEMBLY (for Unleaded Gasoline Specification Vehicle) |
Clamp the camshaft in a vise and confirm that it is locked.
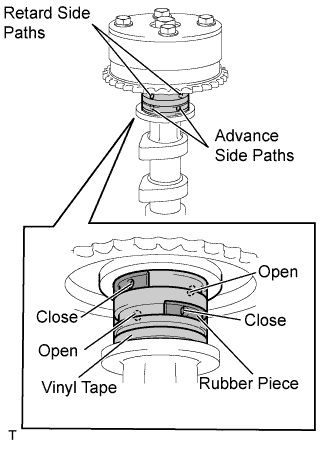 |
Cover the 4 oil paths of the cam journal with tape as shown in the illustration.
Puncture the tape covering the advance oil path and the retard oil path on the opposite side from the advance oil path.
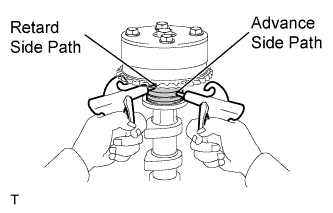 |
Apply air at about 150 kPa (1.5kgf*cm2) pressure into the 2 broken paths (the advance side path and the retard side path).
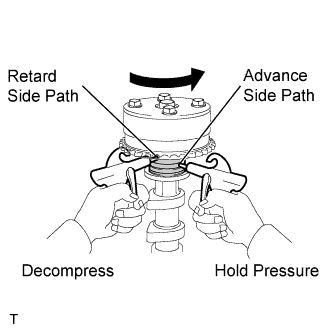 |
Confirm that the camshaft timing gear assembly revolves in the timing advance direction when the air pressure on the timing retard path is reduced.
When the camshaft timing gear reaches the most advanced position, release the air pressure on the timing retard side path, and then release the air pressure on the timing advance side path.
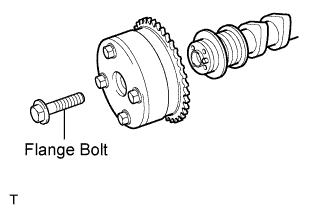 |
Remove the flange bolt and remove the camshaft timing gear assembly.
| 15. REMOVE CAMSHAFT TIMING SPROCKET (for Leaded Gasoline Specification Vehicle) |
Clamp the camshaft in a vice.
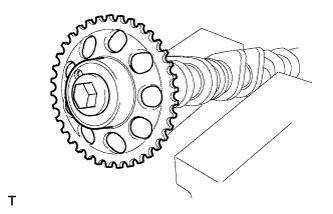 |
Remove the bolt and the camshaft timing sprocket.