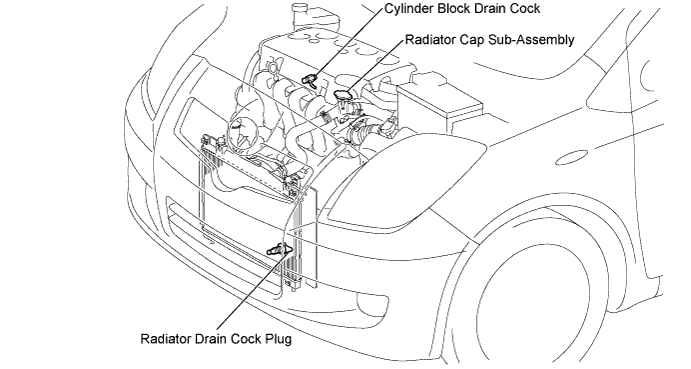
Loosen the cylinder block drain cock plug, then drain the coolant.
WATER PUMP > REMOVAL |
| 1. DISCONNECT CABLE FROM NEGATIVE BATTERY TERMINAL |
| 2. REMOVE ENGINE COOLANT |
Loosen the radiator drain cock plug.
Remove the radiator cap sub-assembly.
Loosen the cylinder block drain cock plug, then drain the coolant.
| 3. REMOVE ENGINE UNDER COVER RH |
| 4. REMOVE ENGINE UNDER COVER SUB-ASSEMBLY (for Rough Road Area Specification Vehicles) |
| 5. REMOVE FAN & GENERATOR V BELT |
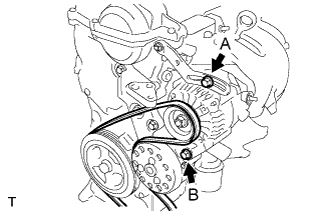 |
Loosen bolts A and B.
Release the fan and generator V belt tension and remove the fan and generator V belt.
| 6. REMOVE GENERATOR ASSEMBLY |
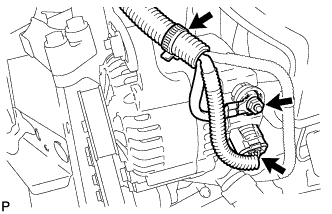 |
Remove the terminal cap.
Separate the connector and harness clamp.
Remove the nut and remove terminal B.
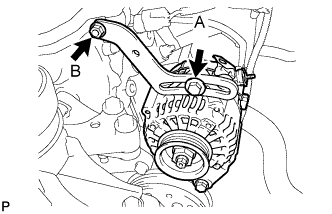 |
Remove fan belt adjusting slider fixing bolts A and B and remove the fan belt adjusting slider.
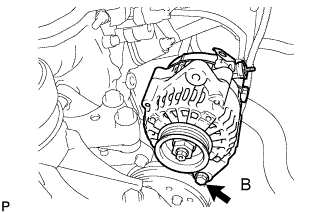 |
Remove fixing bolt B and remove the generator.
| 7. REMOVE ENGINE MOUNTING INSULATOR SUB-ASSEMBLY RH |
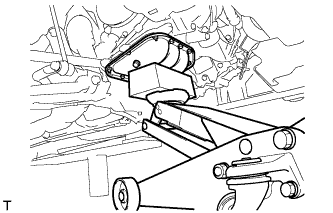 |
Place a wooden block on a jack underneath the engine.
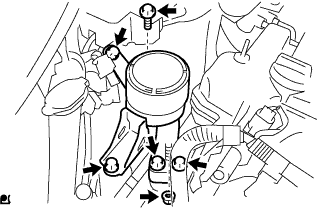 |
Remove the 5 bolts and nut and remove the engine mounting insulator sub-assembly RH.
| 8. REMOVE WATER PUMP PULLEY |
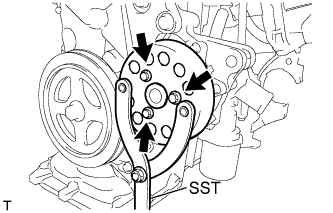 |
Using SST, hold the water pump pulley.
Remove the 3 bolts and remove the water pump pulley.
| 9. REMOVE WATER PUMP ASSEMBLY |
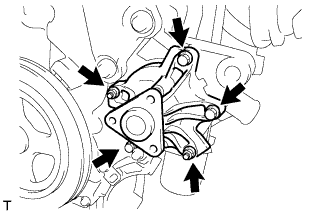 |
Remove the 3 bolts and 2 nuts and remove the water pump assembly and gasket.