BACK DOOR GLASS (for Hatchback) > INSTALLATION |
| 1. CLEAN BACK DOOR GLASS |
|
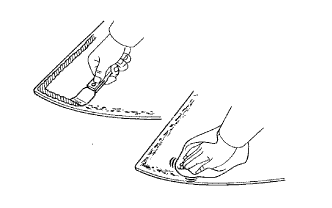
Using a scraper, remove the clips, dam and adhesive sticking to the back door glass.
Clean the outer circumference of the back door glass with a non-residue solvent.
| 2. CLEAN VEHICLE BODY |
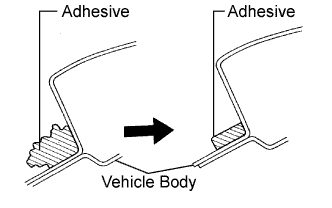 |
Clean and shape the contact surface of the vehicle body.
Using a knife, cut away any rough adhesive on the contact surface of the vehicle body to ensure the appropriate surface shape.
Clean the contact surface of the vehicle body with a shop rag or piece of cloth saturated with cleaner.
| 3. INSTALL BACK WINDOW GLASS ADHESIVE DAM KIT |
Apply Primer G to the glass where the dams will be installed.
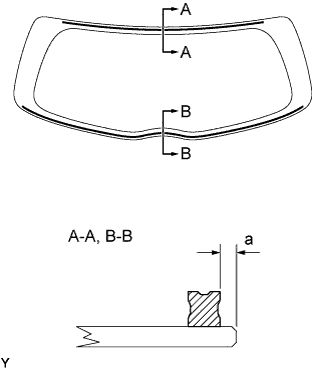 |
Install 2 new back door glass adhesive dams as shown in the illustration.
| Area | Measurement |
| a | 4.2 mm (0.165 in.) |
| 4. INSTALL BACK DOOR GLASS |
 |
Position the back door glass.
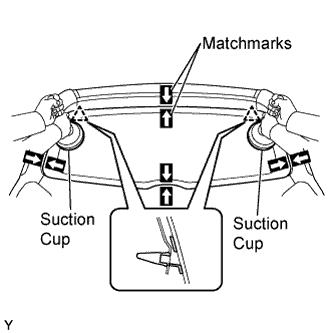
Using suction cups, place the back door glass in the correct position.
Check that the whole contact surface of the back door glass rim is perfectly even.
Place matchmarks on the back door glass and vehicle body.
Using suction cups, remove the back door glass.
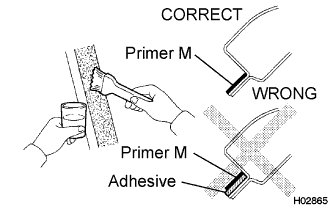 |
Using a brush, apply Primer M to the exposed part of the vehicle body.
Using a brush or sponge, apply Primer G to the edge of the back door glass and contact surface.
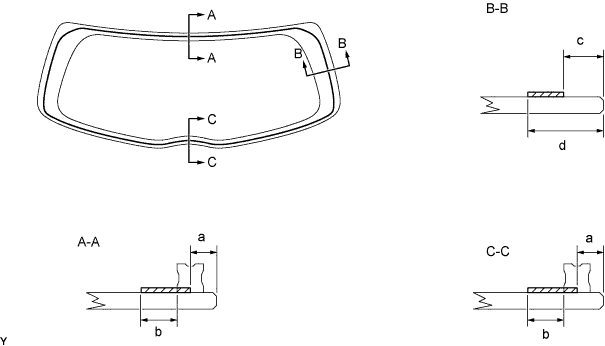
| Area | Measurement |
| a | 6.9 mm (0.272 in.) |
| b | 11.0 mm (0.433 in.) |
| c | 26.7 mm (1.051 in.) |
| d | 40.7 mm (1.602 in.) |
Apply adhesive.
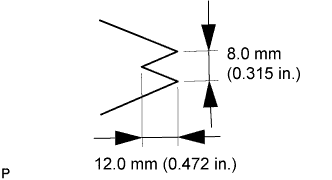 |
Cut off the tip of the cartridge nozzle, as shown in the illustration.
| Temperature | Usage Time Frame |
| 35°C (95°F) | 15 minutes |
| 20°C (68°F) | 1 hour 40 minutes |
| 5°C (41°F) | 8 hours |
Load the sealer gun with the cartridge.
Apply adhesive to the back door glass, as shown in the illustration.
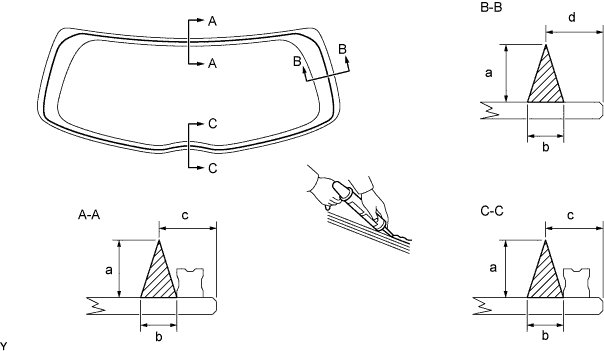
| Area | Measurement |
| a | 12.0 mm (0.472 in.) |
| b | 8.0 mm (0.315 in.) |
| c | 13.5 mm (0.532 in.) |
| d | 33.7 mm (1.327 in.) |
|
Install the back door glass onto the vehicle body.
Using suction cups, position the back door glass so that the matchmarks are aligned. Press it in gently along the rim.
Gently press the front surface of the back door glass to ensure that the back door glass is securely fitted to the vehicle body.
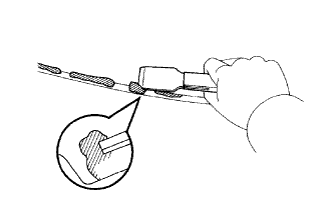 |
Using a scraper, remove any excessive or protruding adhesive.
| Temperature | Minimum time prior to driving vehicle |
| 35°C (95°F) | 1 hour 30 minutes |
| 20°C (68°F) | 5 hours |
| 5°C (41°F) | 24 hours |
| 5. CHECK FOR LEAKAGE AND REPAIR |
Conduct a leak test by applying water to the adhesive portions after the adhesive has completely hardened.
Seal any leakage with auto glass sealer.
| 6. INSTALL REAR WIPER ARM AND BLADE ASSEMBLY |
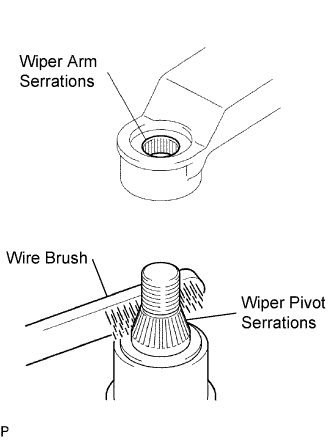 |
Scrape any metal powder off the serrated part of the wiper arm with a round file or the equivalent (when reinstalling).
Clean the wiper pivot serrations with a wire brush.
Operate the wiper, then stop the windshield wiper motor in the automatic stop position.
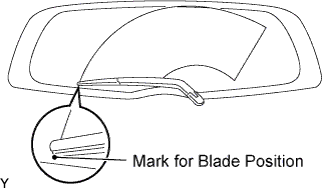 |
Install the rear wiper arm into the position shown in the illustration with the nut.
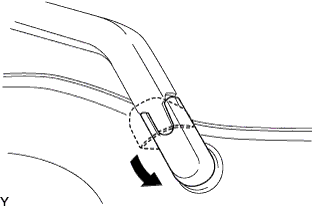 |
Close the rear wiper arm head cap.
| 7. INSTALL CENTER STOP LIGHT COVER |
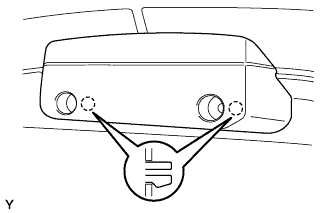 |
Connect the connector.
Engage the 2 claws.
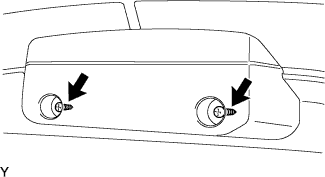 |
Install the center stop light cover with the 2 screws.
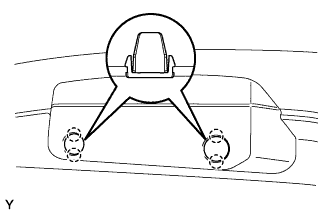 |
Engage the 4 claws and install the rear light cover.
| 8. CONNECT CABLE TO NEGATIVE BATTERY TERMINAL |