RADIATOR > INSTALLATION |
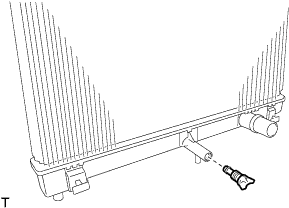
| 1. INSTALL RADIATOR DRAIN COCK |
|
Install the radiator drain cock onto the radiator assembly.
| 2. INSTALL RADIATOR RESERVE TANK HOSE GROMMET |
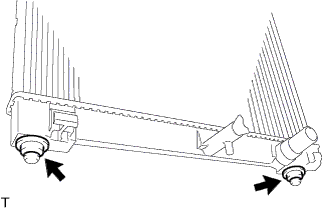 |
Install the 2 radiator reserve tank hose grommets onto the radiator assembly.
| 3. INSTALL RADIATOR SUPPORT CUSHION |
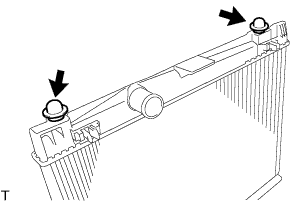 |
Install the 2 radiator support cushions onto the radiator assembly.
| 4. INSTALL FAN SHROUD |
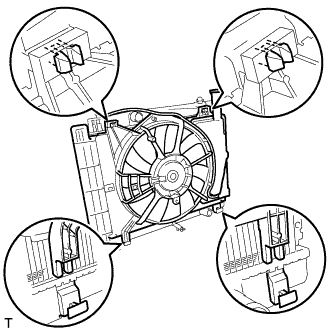 |
Engage the 2 claws and install the fan shroud.
| 5. INSTALL OIL COOLER OUTLET HOSE (for Automatic Transaxle) |
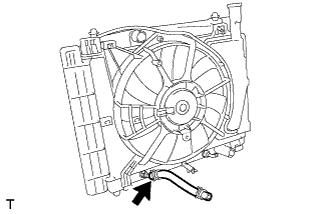 |
Install the oil cooler outlet hose with the clip.
| 6. INSTALL OIL COOLER INLET HOSE (for Automatic Transaxle) |
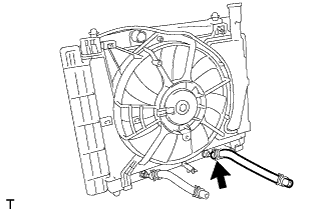 |
Install the oil cooler inlet hose with the clip.
| 7. INSTALL RADIATOR HOSE NO. 2 |
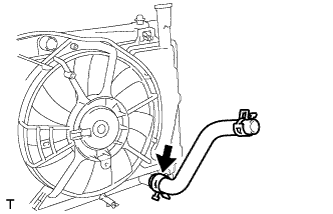 |
Install radiator hose No. 2 with the clip.
| 8. INSTALL RADIATOR ASSEMBLY (w/ Air Conditioning System) |
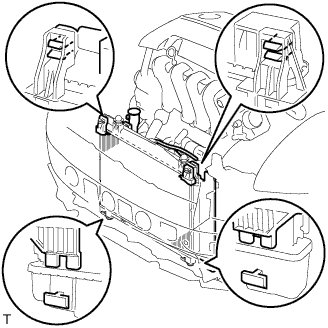 |
Engage the 2 claws and install the radiator assembly onto the vehicle.
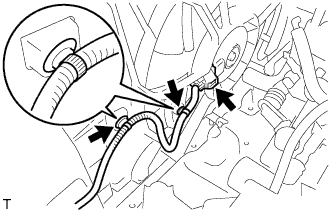 |
Connect the cooling fan motor connector and wire harness clamp.
| 9. INSTALL RADIATOR ASSEMBLY (w/o Air Conditioning) |
|
Install the radiator assembly onto the vehicle.
Connect the cooling fan motor connector and wire harness clamp.
| 10. CONNECT OIL COOLER OUTLET HOSE (for Automatic Transaxle) |
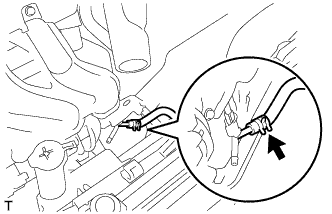 |
Connect the oil cooler outlet hose with the clip.
| 11. CONNECT OIL COOLER INLET HOSE (for Automatic Transaxle) |
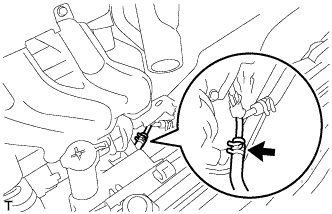 |
Connect the oil cooler inlet hose with the clip.
| 12. CONNECT RADIATOR HOSE NO. 2 |
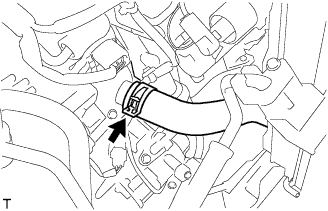 |
Connect radiator hose No. 2 with the clip.
| 13. INSTALL RADIATOR HOSE NO. 3 |
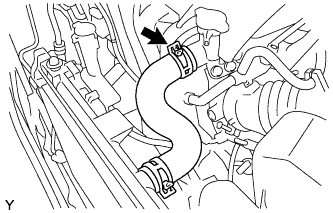 |
Install radiator hose No. 3 with the 2 clips.
| 14. CONNECT RADIATOR RESERVOIR TANK HOSE |
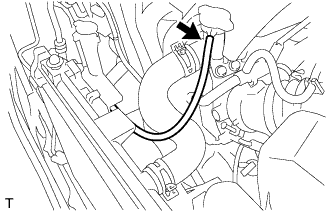 |
Connect the radiator reservoir tank hose to the water filler.
| 15. INSTALL RADIATOR SUPPORT SUB-ASSEMBLY UPPER |
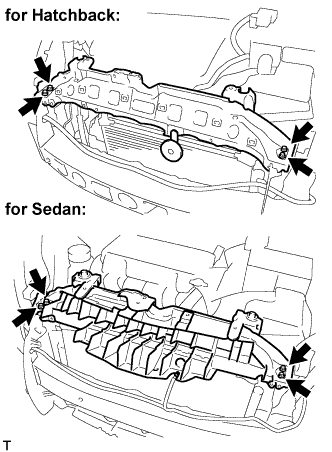 |
Install the radiator support sub-assembly upper with the 4 bolts.
Connect the horn assembly connector.
| 16. INSTALL HOOD LOCK ASSEMBLY |
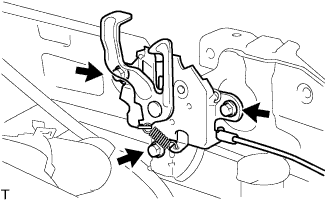 |
Install the hood lock assembly with the 3 bolts.
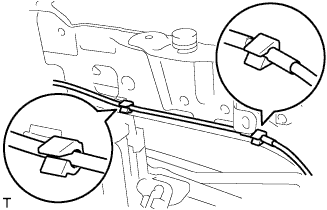 |
Install the hood lock control cable assembly with the 2 clamps.
| 17. INSTALL COOLER COVER NO. 1 (w/ Air Conditioning System) |
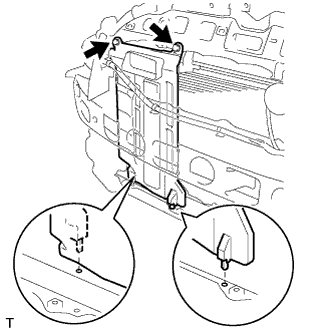 |
Insert the 2 pins of cooler cover No. 1 into the radiator support LWR.
Install cooler cover No. 1 with the 2 clips.
| 18. INSTALL FAN SHROUD VENTILATION DUCT ASSEMBLY (w/ Fan Shroud Ventilation Duct) |
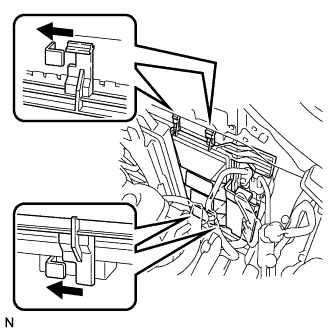 |
Engage the 4 claws and install the fan shroud ventilation duct.
| 19. INSTALL RADIATOR SUPPORT ABSORBER UPPER (for Hatchback) |
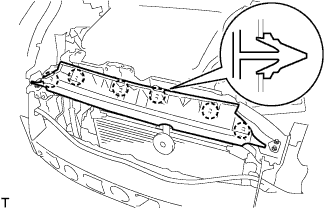 |
Engage the 6 claws and install the radiator support absorber upper.
| 20. INSTALL AIR CLEANER ASSEMBLY |
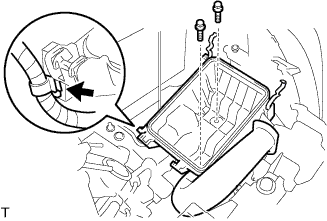 |
Install the air cleaner case with air cleaner inlet No.1 with the 2 bolts.
Connect the wire harness to the air cleaner case.
Install the air cleaner element.
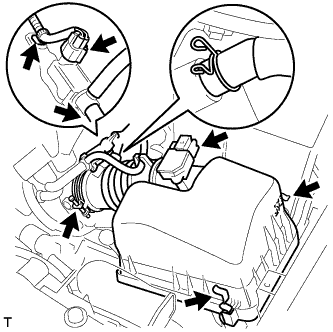 |
Install and lock the air cleaner cap and air cleaner hose and then tighten the air cleaner hose clamp.
Connect the ventilation hose to the air cleaner hose.
Connect the vacuum switching valve connector and wire harness clamp.
Connect the fuel vapor feed hose and fuel vapor feed hose No. 1 to the vacuum switching valve assembly.
Connect the intake air flow meter connector and wire harness clamp.
| 21. INSTALL FRONT BUMPER COVER (for Hatchback) |
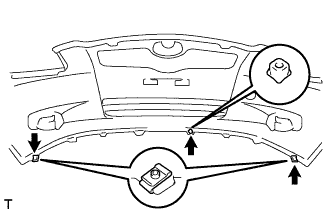 |
Install the 2 clips and the screw grommet.
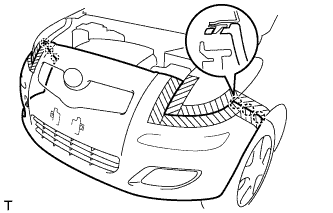 |
Engage the 6 claws and install the front bumper cover.
Connect the 2 connectors.
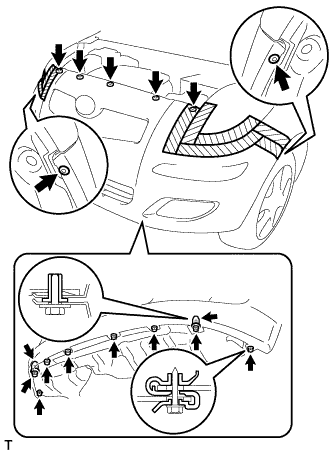 |
Install the 7 clips.
Install the 2 screw grommets.
Tighten the 8 screws.
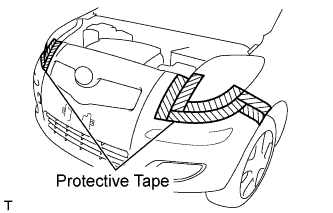 |
Remove the protective tape.
| 22. INSTALL FRONT BUMPER COVER (for Sedan) |
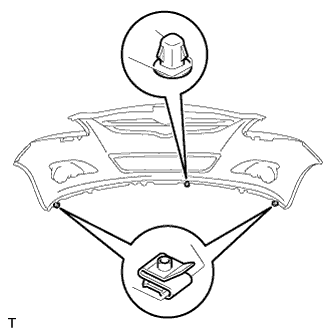 |
Install the 2 clips and the screw grommet.
 |
w/ Fog Light:
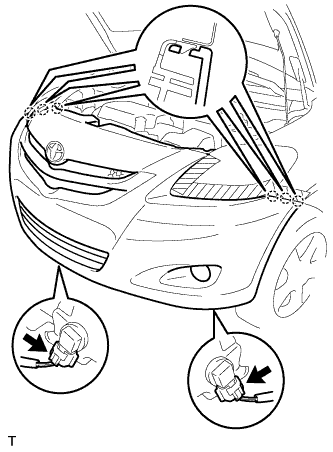
Connect the 2 fog light connectors.
Engage the 6 claws and install the front bumper cover.
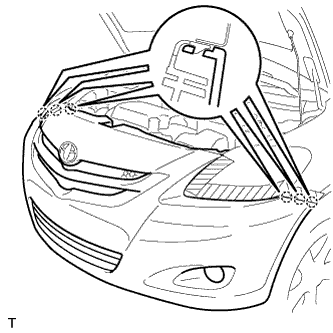 |
w/o Fog Light:
Engage the 6 claws and install the front bumper cover.
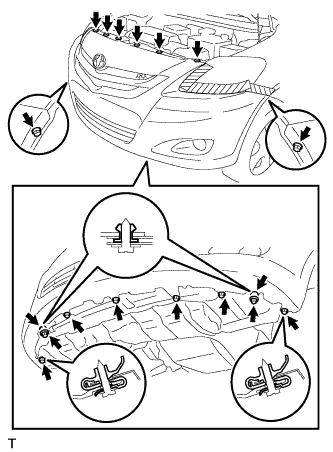 |
Install the 6 clips.
Install the 2 screw grommets.
Tighten the 7 screws and 3 bolts.
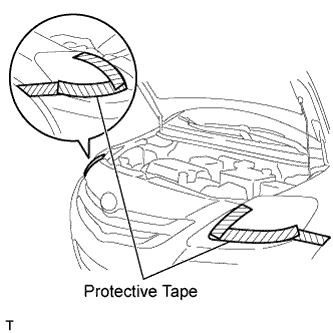 |
Remove the protective tape.
| 23. CONNECT CABLE TO NEGATIVE BATTERY TERMINAL |
| 24. ADD ENGINE COOLANT |
Tighten all the plugs.
Pour engine coolant into the radiator assembly until it overflows.
Check the engine coolant level inside the radiator assembly by squeezing the inlet and outlet radiator hoses several times by hand. If the engine coolant level goes down, add engine coolant.
Install the radiator cap sub-assembly securely.
Slowly pour engine coolant into the radiator reservoir until it reaches the FULL line.
Warm up the engine until the cooling fan operates.
Set the air conditioning as follows while warming up the engine.
| Item | Manual air conditioning system | Automatic air conditioning system |
| Set control as follows | Fan speed - Any setting except "OFF" Temperature - Toward WARM Air conditioning switch "OFF" | Fan speed - Any setting except "OFF" Temperature - To the highest temperature Air conditioning switch "OFF" "AUTO" switch "OFF" |
Maintain the engine speed at 2,000 to 2,500 rpm and warm up the engine until the cooling fan operates.
Stop the engine and wait until the coolant cools down.
If the engine coolant level is below the full level, perform steps (b) through (g) again and repeat the operation until the engine coolant level stays at the full level.
Recheck the engine coolant level inside the radiator reservoir tank assembly. If it is below the full level, add the engine coolant.
Visually check for engine coolant leakage.
| 25. ADJUST HOOD LOCK ASSEMBLY |
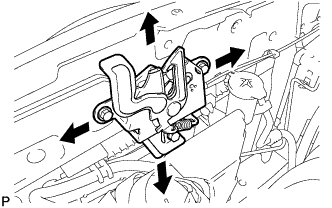 |
Loosen the 3 bolts.
Adjust the hood lock position so that the striker can enter it smoothly.
Tighten the 3 bolts after the adjustment.
| 26. CHECK FOR ENGINE COOLANT LEAKAGE |
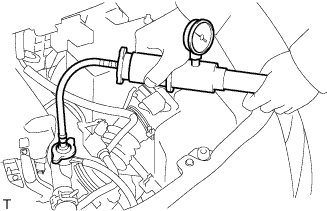 |
Fill the radiator assembly with engine coolant, then attach a radiator cap tester.
Pump the tester to 137 kPa (1.4 kgf/cm2, 19.9 psi), then check that the pressure does not drop.
If the pressure drops, check the hoses, radiator assembly and water pump assembly for leakage. If there are no signs or traces of external engine coolant leakage, check the heater core, cylinder block and head.