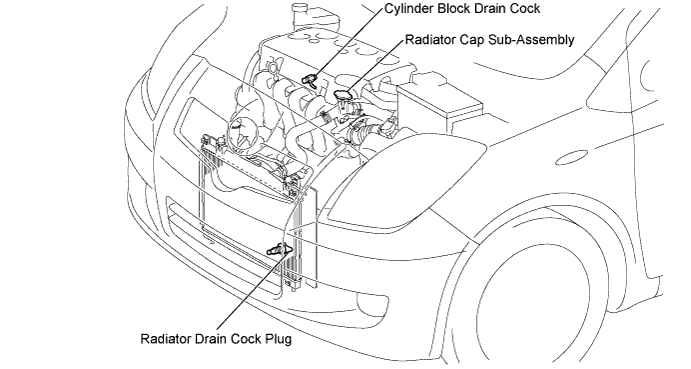
Loosen the cylinder block drain cock plug, then drain the coolant.
RADIATOR > REMOVAL |
| 1. DISCONNECT CABLE FROM NEGATIVE BATTERY TERMINAL |
| 2. DRAIN ENGINE COOLANT |
Loosen the radiator drain cock plug.
Remove the radiator cap sub-assembly.
Loosen the cylinder block drain cock plug, then drain the coolant.
| 3. REMOVE FRONT BUMPER COVER (for Hatchback) |
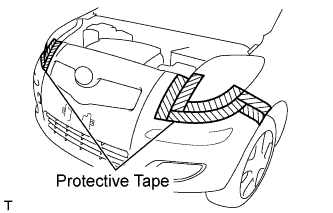 |
Apply protective tape as shown in the illustration.
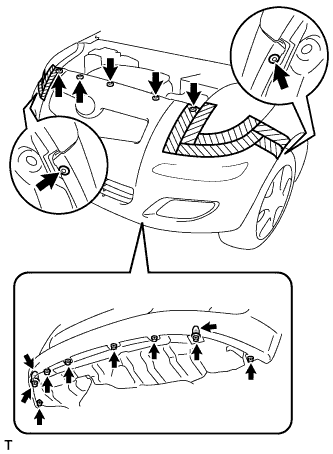 |
Remove the 8 screws.
Remove the 2 screw grommets.
Remove the 7 clips.
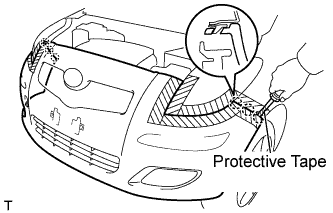 |
Using a screwdriver with its tip wrapped in protective tape, disengage the 6 claws and remove the front bumper cover.
Disconnect the 2 connectors.
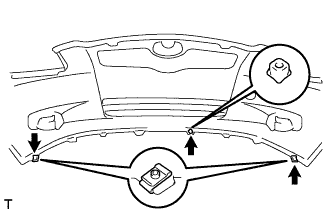 |
Remove the 2 clips and the screw grommet.
| 4. REMOVE FRONT BUMPER COVER (for Sedan) |
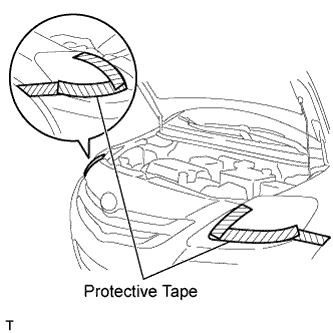 |
Apply protective tape, as shown in the illustration.
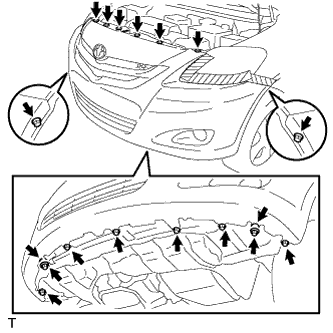 |
Remove the 7 screws and 3 bolts.
Remove the 2 screw grommets.
Remove the 6 clips.
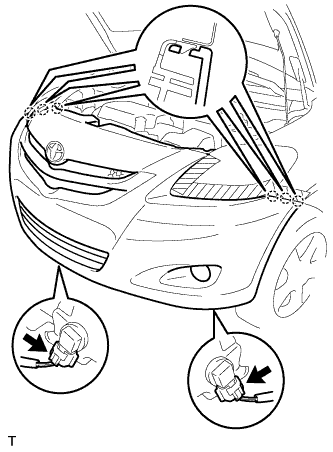 |
w/ Fog Light:
Disengage the 6 claws and remove the front bumper cover.
Disconnect the 2 fog light connectors.
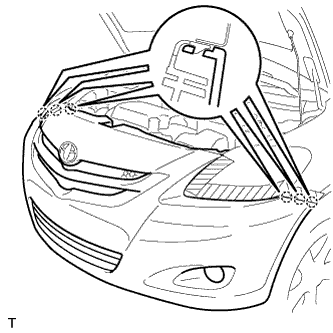 |
w/o Fog Light:
Disengage the 6 claws and remove the front bumper cover.
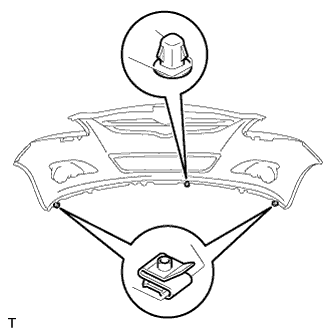 |
Remove the 2 clips and the screw grommet.
| 5. REMOVE AIR CLEANER ASSEMBLY |
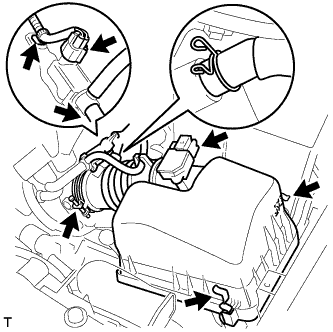 |
Separate the intake air flow meter connector and wire harness clamp.
Separate the fuel vapor feed hose and fuel vapor feed hose No. 1 from the vacuum switching valve assembly.
Separate the vacuum switching valve connector and wire harness clamp.
Separate the ventilation hose from the air cleaner hose.
Release the air cleaner cap with air cleaner hose No. 1.
Loosen the air cleaner hose clamp on the throttle body side and remove the air cleaner cap and air cleaner hose.
Remove the air cleaner element.
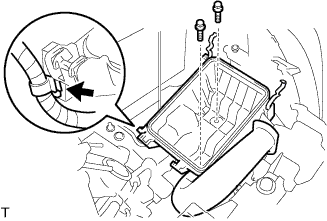 |
Separate the wire harness clamp from the air cleaner case.
Remove the 2 bolts and remove the air cleaner case with air cleaner inlet No. 1.
| 6. REMOVE RADIATOR SUPPORT ABSORBER UPPER (for Hatchback) |
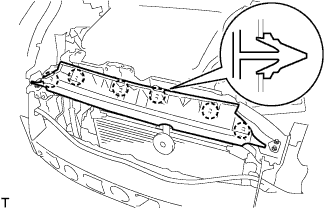 |
Disengage the 6 claws and remove the radiator support absorber upper.
| 7. REMOVE FAN SHROUD VENTILATION DUCT ASSEMBLY (w/ Fan Shroud Ventilation Duct) |
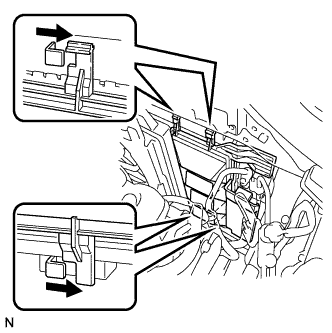 |
Disengage the 4 claws and remove the fan shroud ventilation duct from the vehicle.
| 8. REMOVE COOLER COVER NO. 1 (w/ Air Conditioning System) |
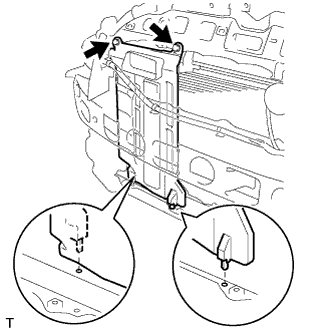 |
Remove the 2 clips and cooler cover No. 1.
| 9. REMOVE HOOD LOCK ASSEMBLY |
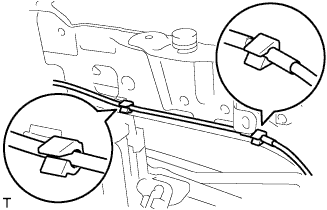 |
Separate the hood lock control cable assembly from the 2 clamps.
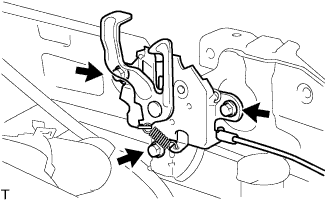 |
Remove the 3 bolts and remove the hood lock assembly.
| 10. REMOVE RADIATOR SUPPORT SUB-ASSEMBLY UPPER |
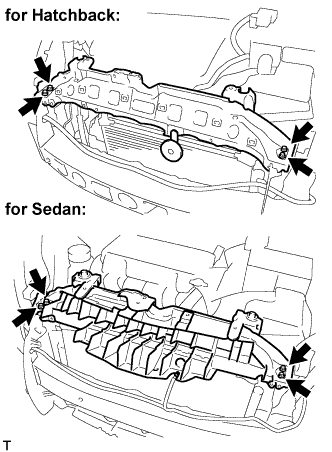 |
Separate the horn assembly connector.
Remove the 4 bolts and remove the radiator support sub-assembly upper.
| 11. DISCONNECT RADIATOR RESERVOIR TANK HOSE |
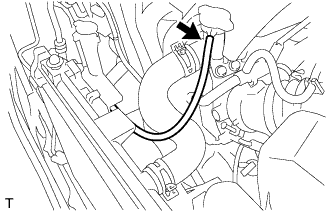 |
Disconnect the radiator reservoir tank hose from the water filler.
| 12. REMOVE RADIATOR HOSE NO. 3 |
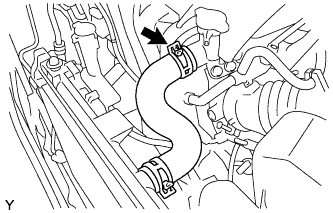 |
Loosen the 2 clips and remove radiator hose No. 3.
| 13. DISCONNECT RADIATOR HOSE NO. 2 |
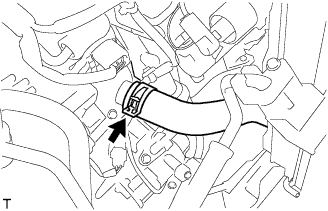 |
Loosen the clip and disconnect radiator hose No. 2.
| 14. DISCONNECT OIL COOLER INLET HOSE (for Automatic Transaxle) |
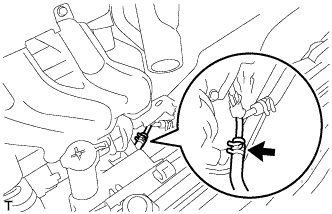 |
Loosen the clip and disconnect the oil cooler inlet hose.
| 15. DISCONNECT OIL COOLER OUTLET HOSE (for Automatic Transaxle) |
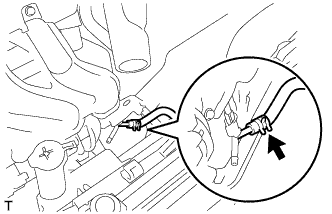 |
Loosen the clip and disconnect the oil cooler outlet hose.
| 16. REMOVE RADIATOR ASSEMBLY (w/ Air Conditioning System) |
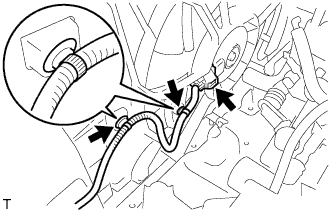 |
Separate the cooling fan motor connector and wire harness clamp.
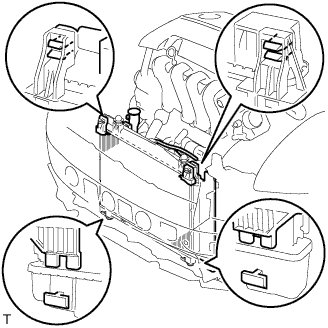 |
Disengage the 2 claws and remove the radiator assembly from the vehicle.
| 17. REMOVE RADIATOR ASSEMBLY (w/o Air Conditioning) |
|
Separate the cooling fan motor connector and wire harness clamp.
Remove the radiator assembly from the vehicle.
| 18. REMOVE RADIATOR HOSE NO. 2 |
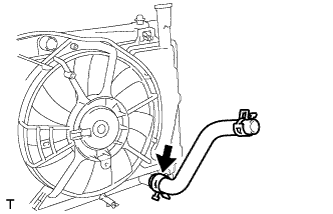 |
Loosen the clip and remove radiator hose No. 2.
| 19. REMOVE OIL COOLER INLET HOSE (for Automatic Transaxle) |
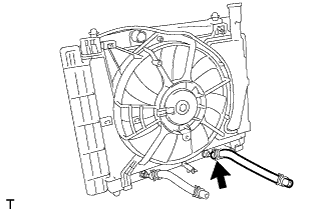 |
Loosen the clip and remove the cooler inlet hose.
| 20. REMOVE OIL COOLER OUTLET HOSE (for Automatic Transaxle) |
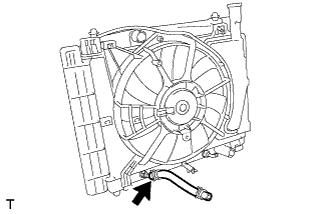 |
Loosen the clip and remove the cooler outlet hose.
| 21. REMOVE FAN SHROUD |
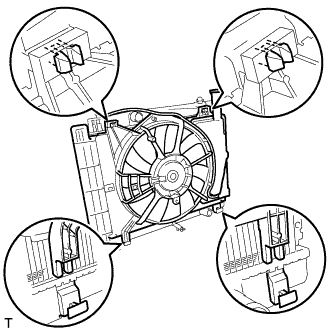 |
Disengage the 2 claws and remove the fan shroud.
| 22. REMOVE RADIATOR SUPPORT CUSHION |
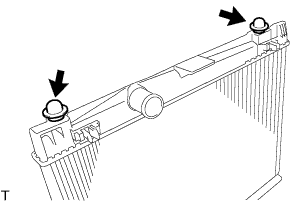 |
Remove the 2 radiator support cushions from the radiator assembly.
| 23. REMOVE RADIATOR RESERVE TANK HOSE GROMMET |
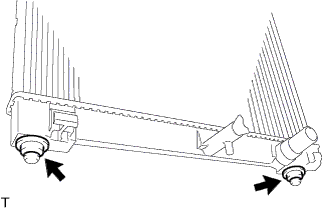 |
Remove the 2 radiator reserve tank hose grommets from the radiator assembly.
| 24. REMOVE RADIATOR DRAIN COCK |
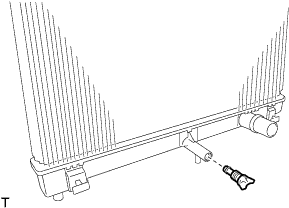 |
Remove the radiator drain cock from the radiator assembly.