FUEL INJECTOR > REMOVAL |
| 1. DISCHARGE FUEL SYSTEM PRESSURE |
| 2. DISCONNECT CABLE FROM NEGATIVE BATTERY TERMINAL |
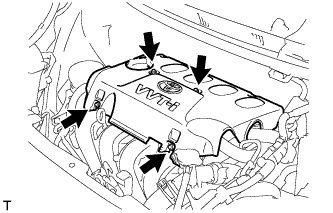
| 3. REMOVE CYLINDER HEAD COVER NO. 2 |
|
Remove the 4 nuts and cylinder head cover No. 2.
| 4. REMOVE IGNITION NO. 1 |
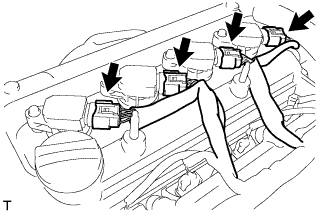 |
Disconnect the 4 ignition coil connectors.
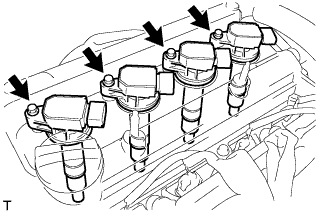 |
Remove the 4 bolts and 4 ignition coils.
| 5. REMOVE VENTILATION HOSE |
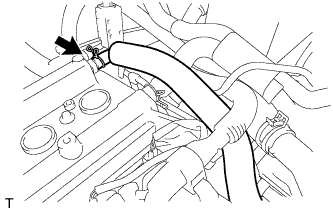 |
Disconnect the ventilation hose.
| 6. REMOVE VENTILATION HOSE NO. 2 |
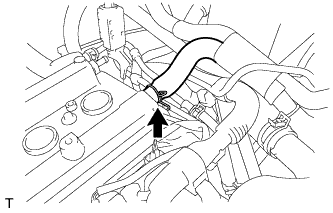 |
Disconnect ventilation hose No. 2.
| 7. REMOVE CYLINDER HEAD COVER SUB-ASSEMBLY (for RHD) |
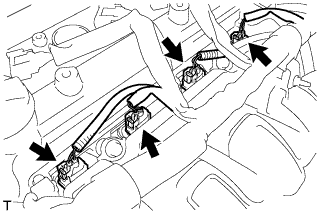 |
Disconnect the fuel injector connectors.
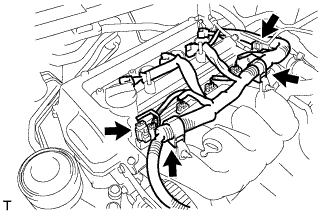 |
Disconnect the connector and 3 wire harness clamps shown in the illustration and disconnect the engine wire harness.
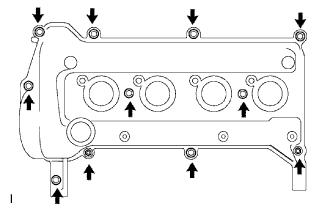 |
Remove the 9 bolts, 2 nuts and 2 seal washers and then remove the cylinder head cover sub-assembly.
| 8. REMOVE CYLINDER HEAD COVER SUB-ASSEMBLY (for LHD) |
|
Disconnect the fuel injector connectors.
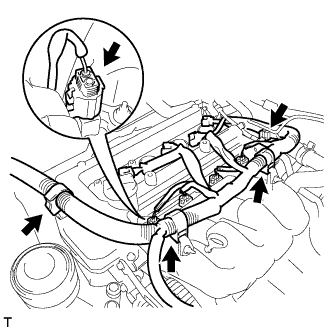 |
Disconnect the connector and 3 wire harness clamps shown in the illustration and disconnect the engine wire harness.
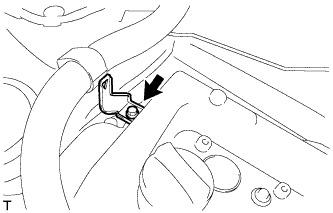 |
Remove the bolt and remove the wire harness bracket.
|
Remove the 9 bolts and 2 nuts, 2 seal washers and then remove the cylinder head cover sub-assembly.
| 9. DISCONNECT FUEL TUBE SUB-ASSEMBLY |
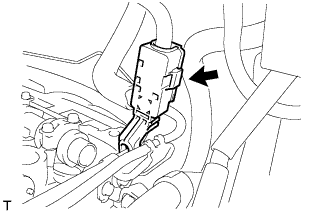 |
Remove the fuel pipe clamp.
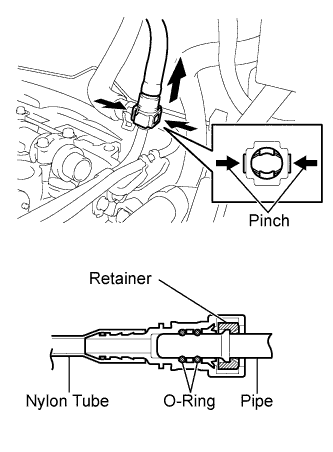 |
Pinch the retainer of the fuel tube connector, then pull out the fuel tube connector to disconnect the fuel tube from the fuel delivery pipe sub-assembly.
| 10. REMOVE FUEL DELIVERY PIPE SUB-ASSEMBLY |
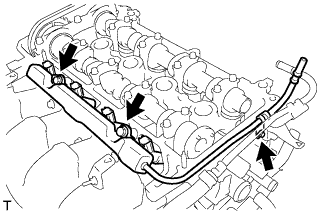 |
Remove the 3 bolts and remove the fuel delivery pipe sub-assembly with the 4 fuel injectors.
| 11. REMOVE DELIVERY PIPE NO. 1 SPACER |
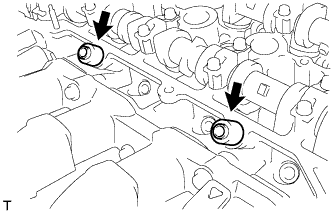 |
Remove the 2 delivery pipe No. 1 spacers.
| 12. REMOVE INJECTOR VIBRATION INSULATOR |
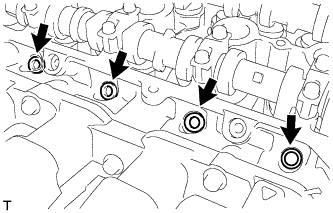 |
Remove the 4 injector vibration insulators.
| 13. REMOVE FUEL INJECTOR ASSEMBLY |
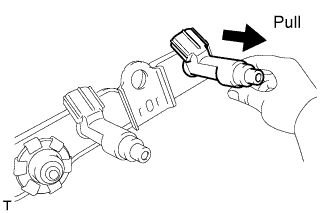 |
Pull the 4 fuel injector assemblies out of the fuel delivery pipe sub-assembly.