UPPER INSTRUMENT PANEL (for Sedan) > REMOVAL |
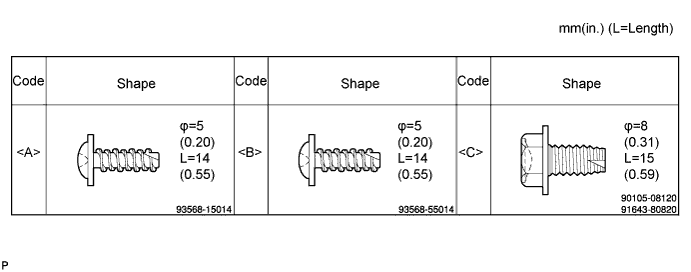
| 1. BOLTS, SCREWS AND NUTS TABLE |
| 2. DISCONNECT CABLE FROM NEGATIVE BATTERY TERMINAL |
Wait for at least 90 seconds after disconnecting the cable to prevent the airbag from working.
| 3. REMOVE INSTRUMENT PANEL FINISH PANEL LOWER CENTER |
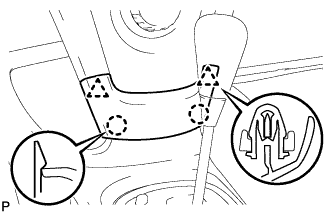 |
Disengage the 2 claws and 2 clips and remove the instrument panel finish panel lower center.
| 4. REMOVE INSTRUMENT PANEL FINISH PANEL END LH |
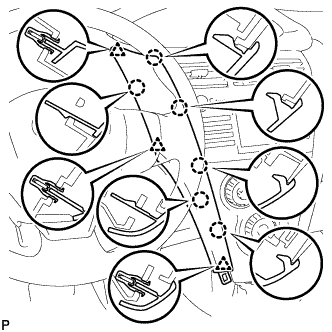 |
Disengage the 6 claws and 3 clips and remove the instrument panel finish panel end LH.
| 5. REMOVE INSTRUMENT PANEL FINISH PANEL END RH |
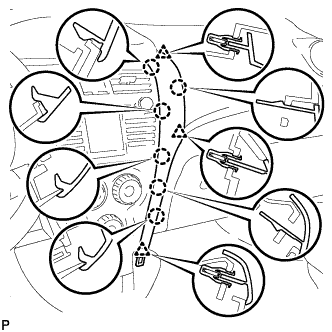 |
Disengage the 6 claws and 3 clips and remove the instrument panel finish panel end RH.
| 6. REMOVE INSTRUMENT CLUSTER FINISH PANEL NO.1 |
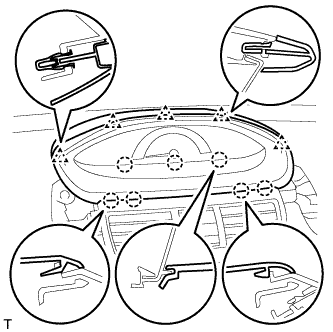 |
Disengage the 4 claws and 5 clips and remove the instrument cluster finish panel.
| 7. REMOVE COMBINATION METER ASSEMBLY |
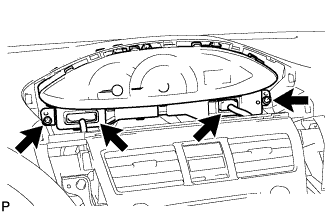 |
Disconnect the 2 connectors.
Remove the 2 screws and pull the combination meter rearward to remove it.
| 8. SEPARATE FRONT DOOR OPENING TRIM WEATHERSTRIP RH |
Separate the front door opening trim weatherstrip.
| 9. SEPARATE FRONT DOOR OPENING TRIM WEATHERSTRIP LH |
Separate the front door opening trim weatherstrip.
| 10. REMOVE FRONT PILLAR GARNISH RH |
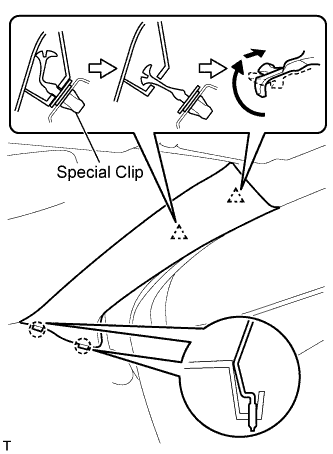 |
w/ Curtain Shield Airbag:
Disengage the 2 clips and the 2 claws and remove the front pillar garnish.
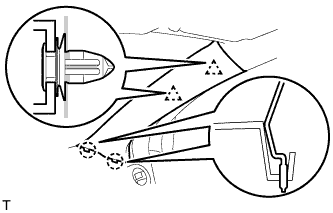 |
w/o Curtain Shield Airbag:
Disengage the 2 clips and the 2 claws and remove the front pillar garnish.
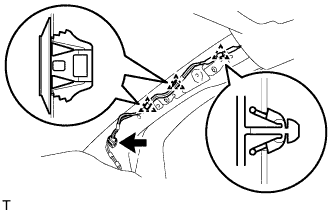 |
Disconnect the antenna connector.
Using a clip remover, remove the 3 clamps.
 |
w/ Curtain Shield Airbag:
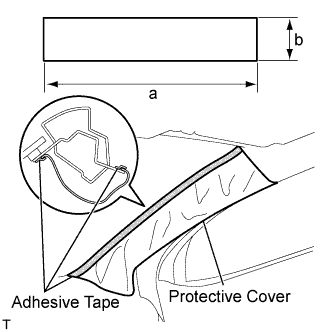
Completely cover the curtain shield airbag with a piece of cloth or nylon and fix the ends of the fabric with adhesive tape, as shown in the illustration.
| Area | Measurement |
| a | 700 mm (27.56 in.) |
| b | 120 mm (4.72 in.) |
| 11. REMOVE FRONT PILLAR GARNISH LH |
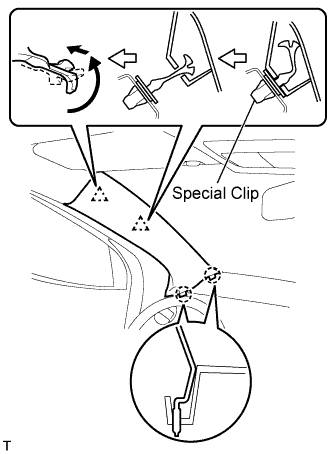 |
w/ Curtain Shield Airbag:
Disengage the 2 clips and the 2 claws and remove the front pillar garnish.
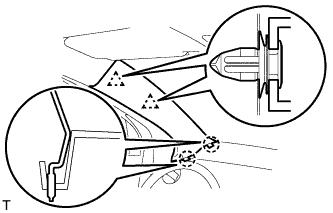 |
w/o Curtain Shield Airbag:
Disengage the 2 clips and the 2 claws and remove the front pillar garnish.
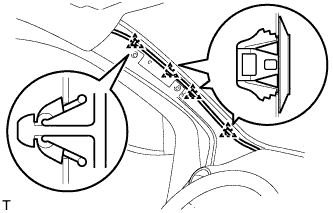 |
Using a clip remover, remove the 4 clamps.
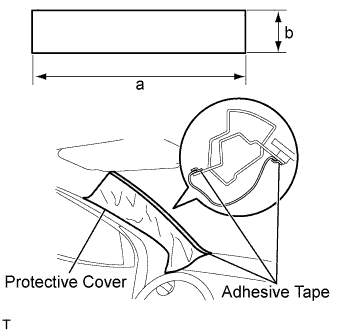 |
w/ Curtain Shield Airbag:
Completely cover the curtain shield airbag with a piece of cloth or nylon and fix the ends of the fabric with adhesive tape, as shown in the illustration.
| Area | Measurement |
| a | 700 mm (27.56 in.) |
| b | 120 mm (4.72 in.) |
| 12. REMOVE GLOVE COMPARTMENT DOOR ASSEMBLY |
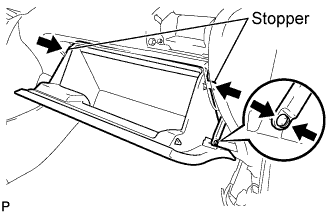 |
Disengage the claw and separate the glove compartment door stopper from the glove compartment door.
Slightly flex the upper part of the glove compartment door assembly to release the 2 stoppers and open the glove compartment door until it becomes horizontal.
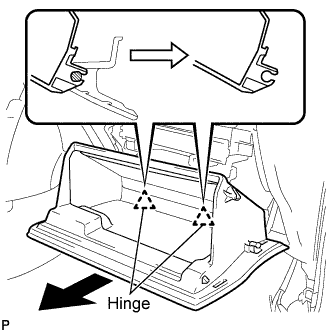 |
Pull the glove compartment door assembly out horizontally to disengage the hinge portion and remove the glove compartment door.
| 13. REMOVE UPPER INSTRUMENT PANEL SUB-ASSEMBLY |
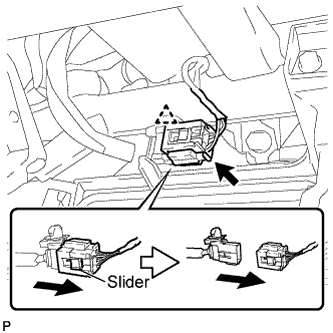 |
Slide the slider and disconnect the passenger airbag connector.
Disconnect the clamp.
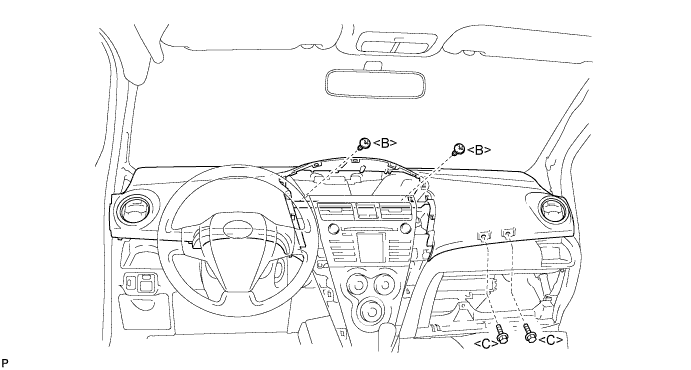
Remove the 2 <C> bolts and 2 <B> screws.
Disengage the 7 clips by lifting the rear side of the instrument panel up.
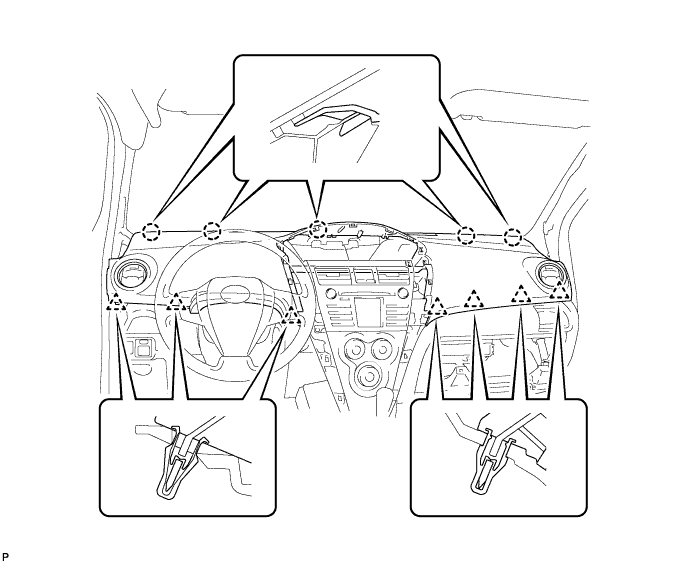
While lifting the instrument panel, slide it toward the rear of the vehicle. Disengage the 5 claws from the front side of the instrument panel and remove the instrument panel.
| 14. REMOVE NO. 2 HEATER TO REGISTER DUCT |
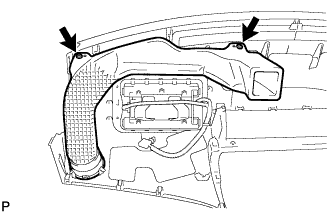 |
Remove the 2 <A> screws and remove the register duct.
| 15. REMOVE NO. 1 HEATER TO REGISTER DUCT |
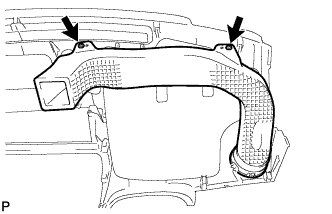 |
Remove the 2 <A> screws and remove the register duct.
| 16. REMOVE NO. 1 INSTRUMENT PANEL REGISTER ASSEMBLY |
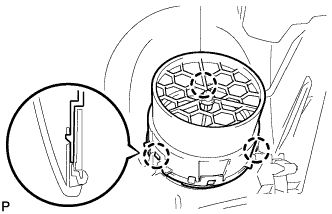 |
Disengage the 3 claws and remove the register.
| 17. REMOVE FRONT PASSENGER AIRBAG ASSEMBLY (w/ Front Passenger Airbag) |
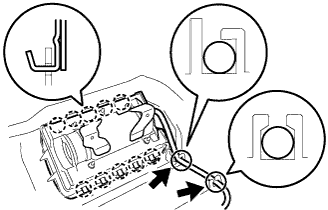 |
Remove the wire harness from the 2 claws of the instrument panel.
Disengage the 10 hooks and remove the instrument panel passenger airbag.
| 18. REMOVE INSTRUMENT PANEL PLATE NAME (w/o Front Passenger Airbag) |
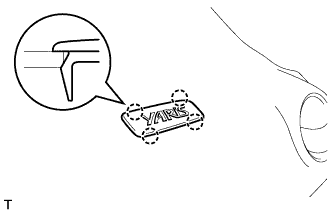 |
Disengage the 4 claws and remove the instrument panel plate name.
| 19. REMOVE INSTRUMENT PANEL CUSHION |
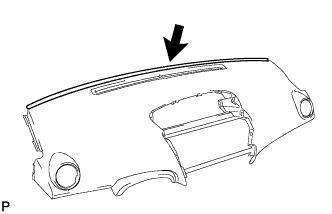 |
Remove the instrument panel cushion from the upper instrument panel.
| 20. REMOVE NO. 1 INSTRUMENT PANEL CUSHION |
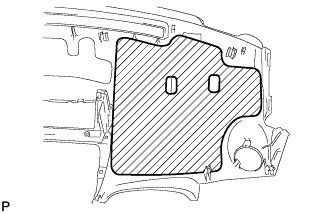 |
Remove the instrument panel cushion from the upper instrument panel.
| 21. REMOVE NO. 2 INSTRUMENT PANEL CUSHION |
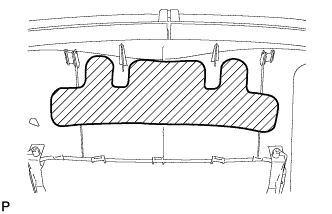 |
Remove the instrument panel cushion from the upper instrument panel.
| 22. REMOVE NO. 3 INSTRUMENT PANEL CUSHION |
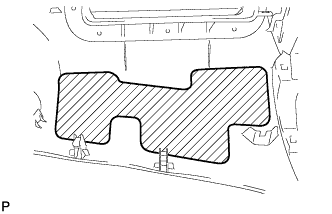 |
Remove the instrument panel cushion from the upper instrument panel.