Perform pull-in test.
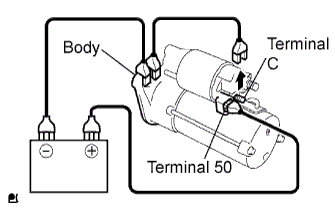
Disconnect the field coil lead wire from terminal C.
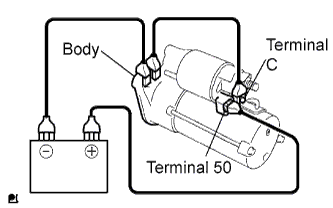
Connect the battery to the starter magnetic switch as shown in the illustration and check that the pinion gear is extended.
 |
STARTER > INSPECTION |
| 1. INSPECT STARTER ASSEMBLY |
Perform pull-in test.
Disconnect the field coil lead wire from terminal C.
|
Connect the battery to the starter magnetic switch as shown in the illustration and check that the pinion gear is extended.
 |
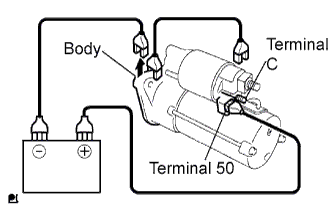
Perform holding test.
Check that the pinion gear does not return inward after the cable of terminal C is disconnected.
 |
Inspect the clutch pinion gear return.
Move the pinion gear toward the armature.
Perform operation test without load.
Connect the field coil lead wire to terminal C.
Clamp the starter in a vise.
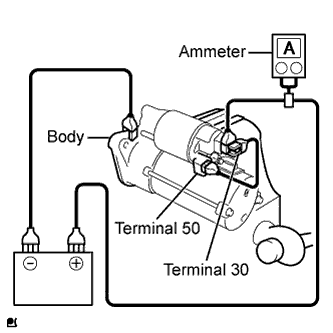 |
Connect the battery and ammeter to the starter as shown in the illustration.
Check that the ammeter indicates the specified current.
| 2. INSPECT STARTER ARMATURE ASSEMBLY |
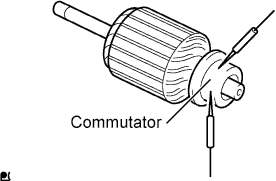 |
Check the commutator for open circuits.
Using an ohmmeter, check the resistance between the segments of the commutator.
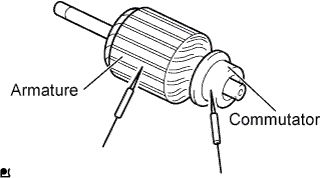 |
Check the commutator for ground.
Using an ohmmeter, check the resistance between the commutator and armature core.
Check the commutator for dirt and burns on the surface.
If the surface is dirty or burnt, restore it with sandpaper (No. 400) or a lathe.
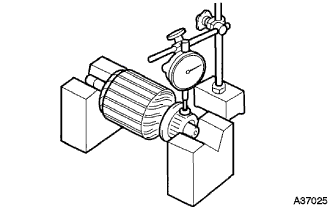 |
Check for the commutator cirumference runout.
Place the commutator on V-blocks.
Using a dial indicator, measure the cirumference runout.
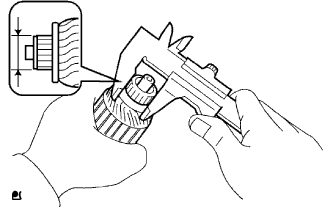 |
Using vernier calipers, measure the commutator diameter.
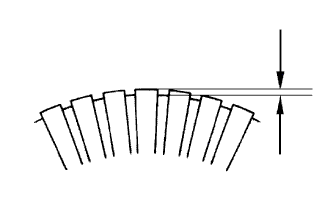 |
Check that the undercut portion between the segments is free of foreign matter and measure its depth.
| 3. INSPECT STARTER YOKE ASSEMBLY |
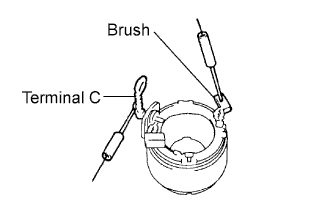 |
Using an ohmmeter, check the resistance between the terminal C and field coil brush lead.
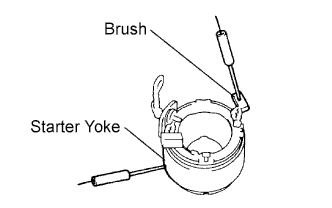 |
Using an ohmmeter, check the resistance between the brush lead and starter yoke.
| 4. INSPECT BRUSH |
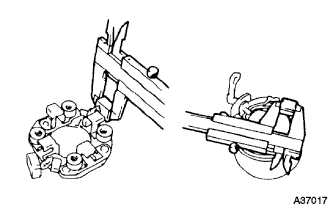 |
Using vernier calipers, measure the brush length.
| 5. INSPECT STARTER BRUSH HOLDER ASSEMBLY |
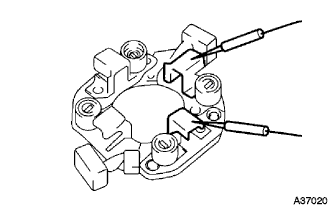 |
Using an ohmmeter, measure the resistance between the positive (+) and negative (-) brush holders.
| 6. INSPECT STARTER CLUTCH SUB-ASSEMBLY |
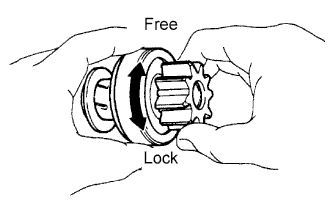 |
Hold the starter clutch and rotate the pinion gear clockwise, and check that it turns freely. Try to rotate the pinion gear counterclockwise and check that it locks.
If necessary, replace the starter clutch sub-assembly.
| 7. INSPECT MAGNET STARTER SWITCH ASSEMBLY |
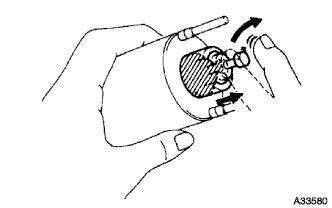 |
Check the plunger.
Push in the plunger and check that it returns quickly to its original position.
If necessary, replace the magnet starter switch assembly.
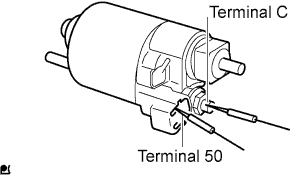 |
Check the pull-in coil for open circuits.
Using an ohmmeter, check the resistance between terminals 50 and C.
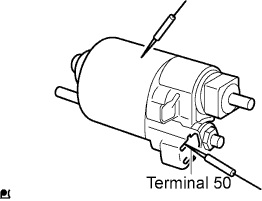 |
Check whether the holding coil has open circuits.
Using an ohmmeter, check the resistance between terminal 50 and the switch body.