 |
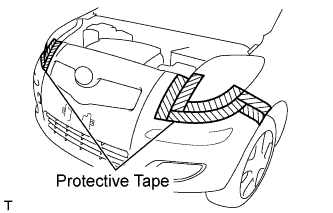
Apply protective tape as shown in the illustration.
NAME PLATE (for Hatchback) > REMOVAL |
| 1. REMOVE FRONT BUMPER COVER |
|
Apply protective tape as shown in the illustration.
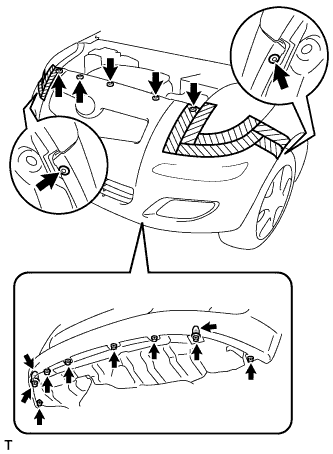 |
Remove the 8 screws.
Remove the 2 screw grommets.
Remove the 7 clips.
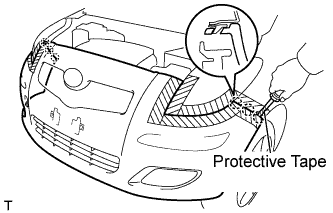 |
Using a screwdriver with its tip wrapped in protective tape, disengage the 6 claws and remove the front bumper cover.
Disconnect the 2 connectors.
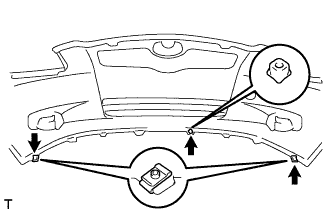 |
Remove the 2 clips and the screw grommet.
| 2. REMOVE RADIATOR GRILLE EMBLEM |
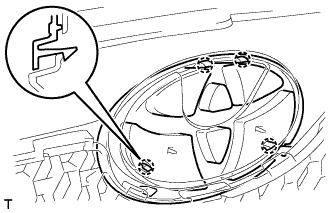 |
Disengage the 4 claws and remove the radiator grille emblem.
| 3. REMOVE SYMBOL EMBLEM |
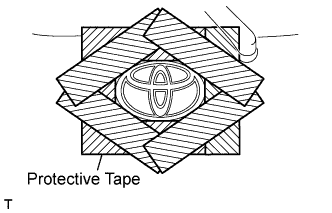 |
Apply protective tape to the back door panel in the area around the symbol emblem.
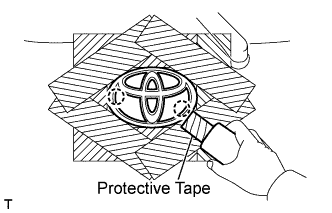 |
Using an infrared light, heat the symbol emblem.
Using a gasket scraper with its tip wrapped in protective tape, gradually peel the adhesive surface and remove the symbol emblem.
Remove the protective tape.
| 4. REMOVE NO. 1 LUGGAGE COMPARTMENT DOOR NAME PLATE |
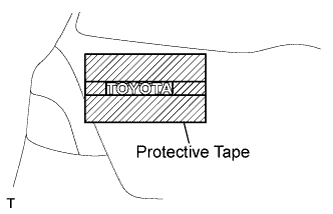 |
Apply protective tape to the back door panel in the area around the No. 1 luggage compartment door name plate.
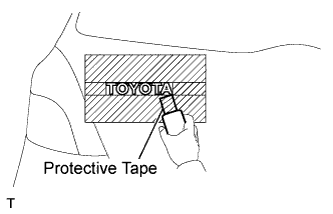 |
Using an infrared light, heat the No. 1 luggage compartment door name plate.
Using a gasket scraper with its tip wrapped in protective tape, gradually peel the adhesive surface and remove the No. 1 luggage compartment door name plate.
Remove the protective tape.
| 5. REMOVE NO. 2 LUGGAGE COMPARTMENT DOOR NAME PLATE |
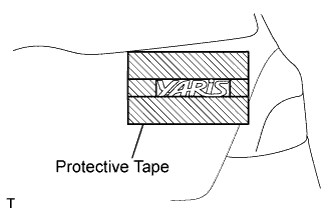 |
Apply protective tape to the back door panel in the area around the No. 2 luggage compartment door name plate.
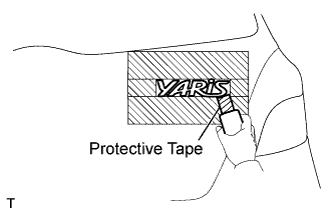 |
Using an infrared light, heat the No. 2 luggage compartment door name plate.
Using a gasket scraper with its tip wrapped in protective tape, gradually peel the adhesive surface and remove the No. 2 luggage compartment door name plate.
Remove the protective tape.