FRONT DOOR BELT MOULDING (for Hatchback) > REMOVAL |
| 1. REMOVE FRONT DOOR ARMREST COVER |
|
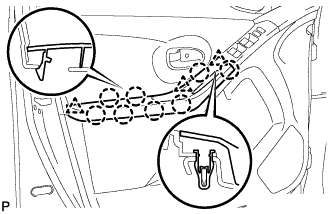
for 5 Door:
Using a screwdriver with its tip wrapped in protective tape, disengage the 8 claws and 3 clips and remove the door armrest cover.
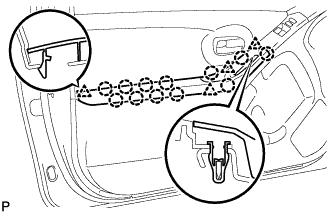 |
for 3 Door:
Disengage the 12 claws and 3 clips and remove the door armrest cover.
| 2. REMOVE FRONT DOOR ARMREST BASE UPPER PANEL |
w/ Power Window:
Remove the front door armrest base upper panel .
w/o Power Window:
Remove the front door armrest base upper panel .
| 3. REMOVE FRONT DOOR WINDOW REGULATOR HANDLE ASSEMBLY (w/o Power Window) |
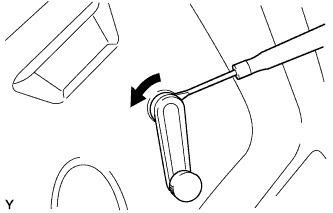 |
Insert a clip remover between the plate and door trim.
Turn the handle with the clip remover inserted, as shown in the illustration.
Remove the front door window regulator handle and clip.
Remove the window regulator handle plate.
| 4. REMOVE FRONT DOOR TRIM BOARD SUB-ASSEMBLY |
w/ Power Window:
Remove the front door trim board sub-assembly .
w/ Power Window:
Remove the front door trim board sub-assembly .
| 5. REMOVE OUTER REAR VIEW MIRROR ASSEMBLY |
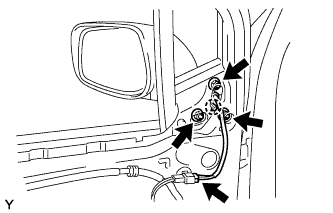 |
w/ Power mirror:
Disconnect the connector.
Remove the 3 nuts, disengage the claw and remove the outer rear view mirror.
| 6. REMOVE FRONT DOOR WINDOW FRAME REAR MOULDING (for 3 Door) |
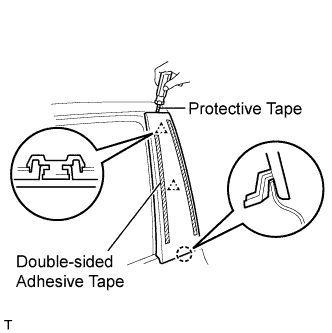 |
Using an infrared light, heat the front door window frame rear moulding.
Using a screwdriver with its tip wrapped in protective tape, disengage the 2 clips and the claw and remove the double-sided adhesive tape and front door window frame rear moulding.
| 7. REMOVE FRONT DOOR BELT MOULDING |
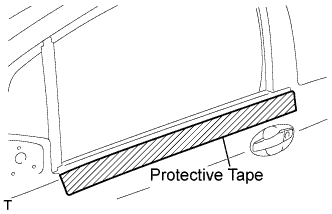 |
for 5 Door:
Apply protective tape to the door panel in the area around the front door belt moulding.
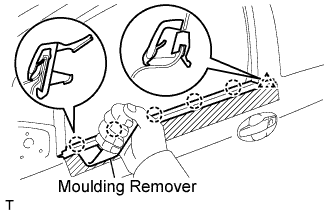 |
Using a moulding remover, disengage the 5 claws and the clip and remove the front door belt moulding.
 |
for 3 Door:
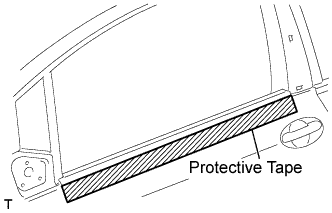
Apply protective tape to the door panel in the area around the front door moulding.
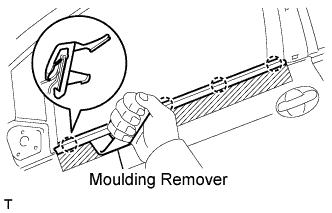 |
Using a moulding remover, disengage the 5 claws and remove the front door belt moulding.