 |
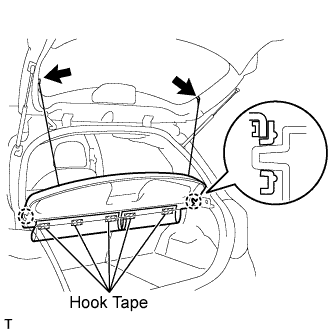
Remove the 2 package tray trim suspenders.
REAR SEAT ASSEMBLY (for Hatchback Bench Seat Type) > REMOVAL |
| 1. REMOVE PACKAGE TRAY TRIM PANEL ASSEMBLY |
|
Remove the 2 package tray trim suspenders.
Remove the 5 pieces of hook tape.
Disengage the 2 claws and remove the package tray trim.
| 2. REMOVE DECK BOARD SUB-ASSEMBLY |
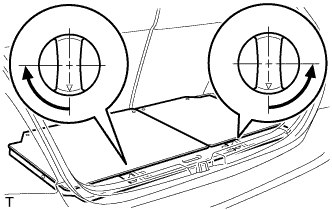 |
Release the 2 knobs and remove the deck board.
| 3. REMOVE DECK FLOOR BOX RH |
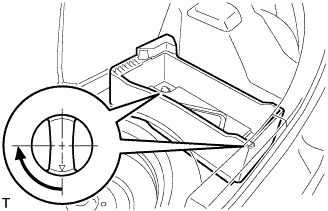 |
Release the 2 knobs and remove the deck floor box.
| 4. REMOVE DECK FLOOR BOX LH |
| 5. REMOVE REAR SEAT CUSHION COVER PAD |
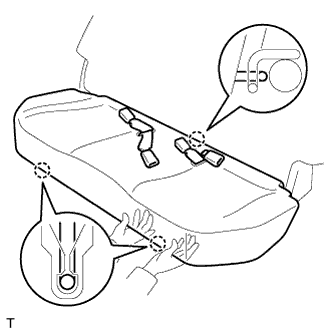 |
Hold the front edge of the rear seat cushion and lift it up, as shown in the illustration, to disengage the the 2 rear seat cushion lock hooks.
Pass the rear seat inner belt through the slit in the rear seat cushion, disengage the hook between the rear seat cushion and rear seat back, and remove the rear seat cushion.
| 6. REMOVE REAR SEAT CUSHION LOCK HOOK |
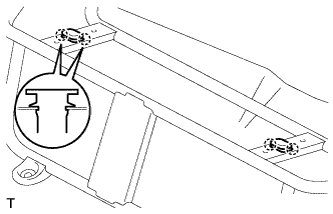 |
Disengage the 4 claws and remove the 2 rear seat cushion lock hooks.
| 7. REMOVE REAR SEAT BACK ASSEMBLY |
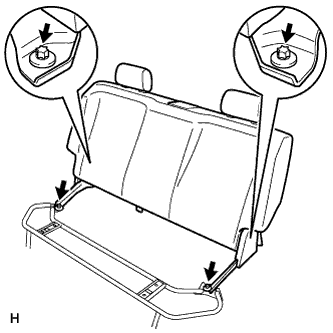 |
Using "TORX" socket wrench E10, remove the 4 bolts and the rear seat back.
| 8. REMOVE REAR SEAT CUSHION LEG SUB-ASSEMBLY |
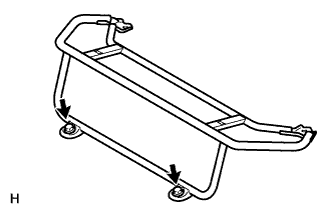 |
Remove the 2 bolts and the rear seat cushion leg sub-assembly.