CIGARETTE LIGHTER ASSEMBLY (for Hatchback) > REMOVAL |
| 1. REMOVE INSTRUMENT PANEL FINISH PANEL END LH |
|
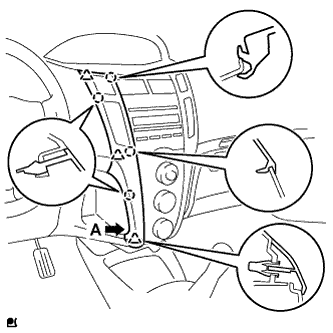
with CD player
Pull the instrument panel finish panel end LH rearward and disengage the 4 claws and 3 clips.
Disconnect the connector and remove the instrument panel finish panel end LH.
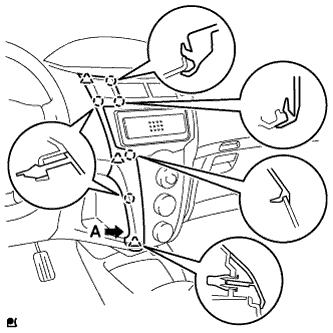 |
Except CD player
Pull the instrument panel finish panel end LH rearward and disengage the 5 claws and 3 clips.
Disconnect the connector and remove the instrument panel finish panel end LH.
| 2. REMOVE INSTRUMENT PANEL FINISH PANEL END RH |
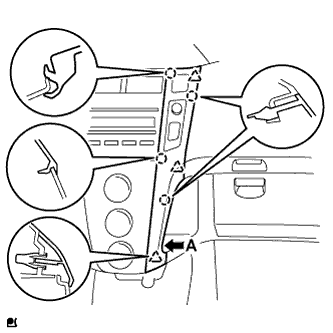 |
with CD player
Pull the instrument panel finish panel end RH and disengage the 4 claws and 3 clips.
Disconnect the connector and remove the instrument panel finish panel end RH.
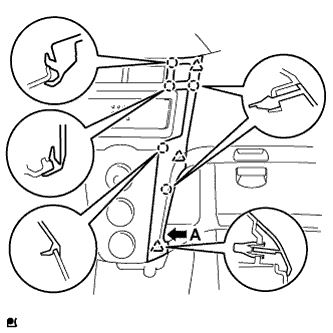 |
Except CD player
Pull the instrument panel finish panel end RH rearward and disengage the 5 claws and 3 clips.
Disconnect the connector and remove the instrument panel finish panel end RH.
| 3. REMOVE INSTRUMENT CLUSTER FINISH PANEL NO.1 |
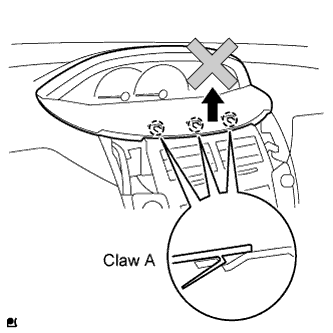 |
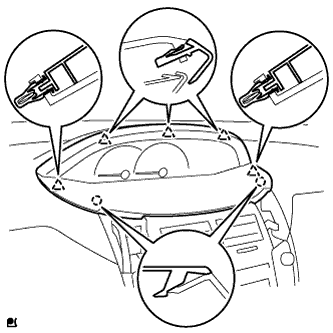 |
Disengage the 2 claws and 5 clips.
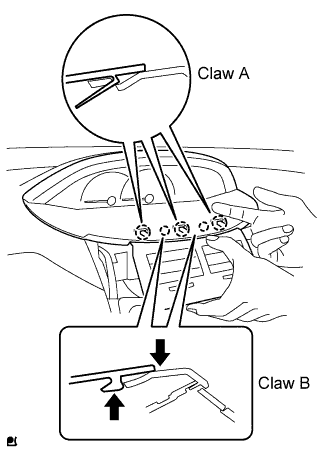 |
After removing the instrument panel finish panel end, insert your finger into the opening as shown, push the upper portion of the instrument cluster finish panel center and the 2 B claws of the instrument cluster finish panel, and then disengage the claws B.
Disengage the 3 A claws and remove the instrument cluster finish panel.
| 4. REMOVE INSTRUMENT CLUSTER FINISH CENTER PANEL SUB-ASSEMBLY (w/ Cassette Tape Player) |
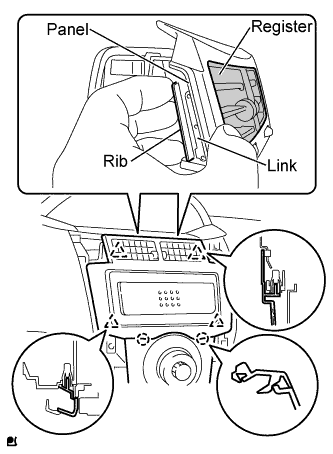 |
Disengage the 2 claws and 4 clips and remove the instrument cluster finish panel center.
| 5. REMOVE INSTRUMENT CLUSTER FINISH LOWER CENTER PANEL SUB-ASSEMBLY |
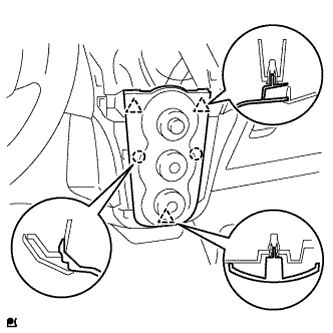 |
Disengage the 3 clips and 2 claws and remove the air conditioning panel.
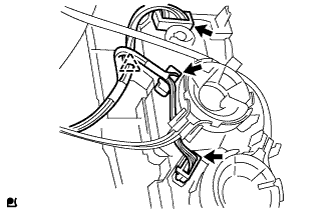 |
Disconnect the 3 connectors and clamp.
| 6. DISCONNECT AIR MIX DAMPER CONTROL CABLE SUB-ASSEMBLY |
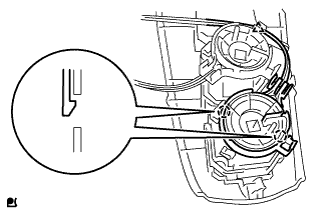 |
Disconnect the air mix control cable from the clamp.
Disengage the 2 claws and disconnect the air mix damper control cable.
| 7. DISCONNECT DEFROSTER DAMPER CONTROL CABLE SUB-ASSEMBLY |
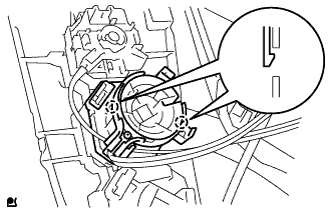 |
Disengage the 2 claws and disconnect the defroster damper control cable.
| 8. DISCONNECT AIR INLET DAMPER CONTROL CABLE SUB-ASSEMBLY |
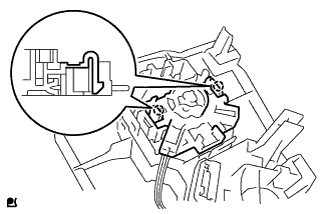 |
Disengage the 2 claws and disconnect the air inlet damper control cable.
| 9. REMOVE CIGARETTE LIGHTER KNOB |
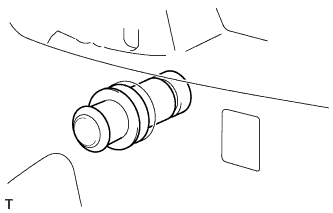 |
Remove the cigarette lighter knob.
| 10. REMOVE CIGARETTE LIGHTER COVER |
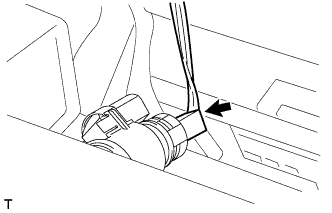 |
Disconnect the cigarette lighter connector.
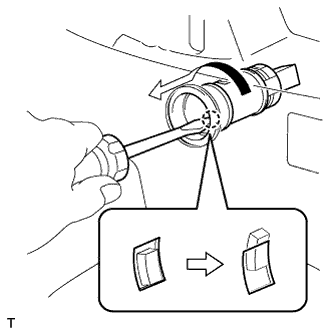 |
Using a screwdriver, disengage the claw, then turn the cigarette lighter socket counterclockwise and push the cigarette lighter socket half way out.
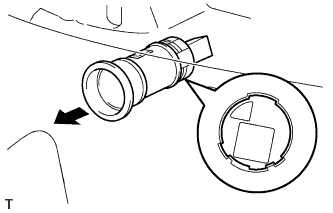 |
Align the protrusion of the cigarette lighter socket with the cutout of the cigarette lighter indicator lens and then push out the cigarette lighter socket.
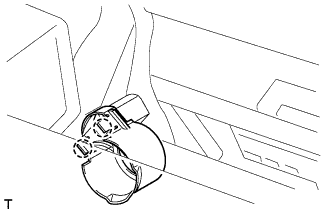 |
Disengage the 2 claws and remove the cigarette lighter cover.
| 11. REMOVE CIGARETTE LIGHTER INDICATOR LENS |
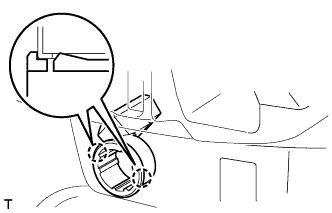 |
Disengage the 2 claws and remove the cigarette lighter indicator lens.