Home › Suspension › FRONT SUSPENSION › FRONT LOWER SUSPENSION ARM (for LH Side)

FRONT LOWER SUSPENSION ARM (for LH Side) > REMOVAL

for Preparation Click here


1. REMOVE FRONT WHEEL


2. REMOVE ENGINE UNDER COVER SUB-ASSEMBLY (for Metal Type)


3. REMOVE FRONT LOWER SUSPENSION ARM SUB-ASSEMBLY LH


C107513
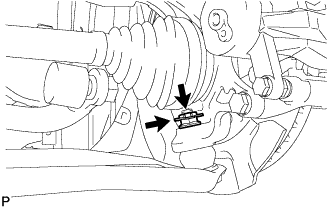
  1. Remove the clip and castle nut.


    C172759E05
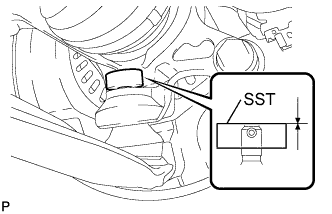
  1. Install SST to the threaded section of the lower ball joint.

    SST
    09960-20010   (09961-02060)

    NOTICE:
    Make sure the upper ends of the threaded section of the lower ball joint and SST are aligned.


  1. Using SST, separate the front lower suspension arm sub-assembly LH from the front axle assembly.
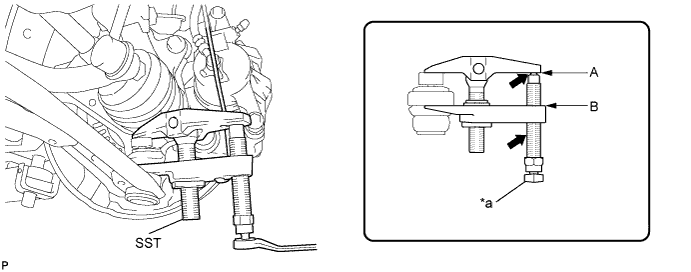

    C172760E06


    Text in Illustration 
    *a
    Place the wrench here
    -
    -
    V100135
    Apply grease to the bolt threads and the tip of SST.
    -
    -
    SST
    09960-20010   (09961-02010)

    NOTICE:
    1. Make sure to tie the string of SST to the vehicle to prevent SST from dropping.
    2. Install SST so that A and B are parallel.
    3. Be sure to place the wrench on the part indicated in the illustration.
    4. Do not damage the lower ball joint dust cover.
    5. Do not damage the drive shaft outboard joint boots.
    6. Do not damage the front disc brake dust cover.


    C107515
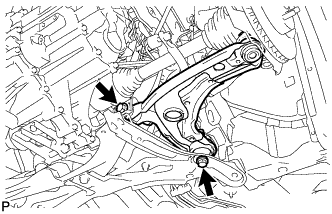
  1. Remove the 2 bolts and front lower suspension arm sub-assembly LH.