 |
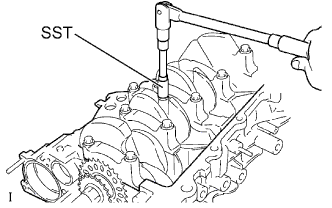
Using SST, remove the connecting rod cap bolt and cap.
- SST
- 09205-16011
CYLINDER BLOCK > DISASSEMBLY |
| 1. REMOVE PISTON SUB-ASSEMBLY WITH CONNECTING ROD |
Using a ridge reamer, remove all the carbon from the top of the cylinder.
|
Using SST, remove the connecting rod cap bolt and cap.
Push the piston, connecting rod assembly and upper bearing through the top of the cylinder block to remove them.
| 2. REMOVE CONNECTING ROD BEARING |
| 3. REMOVE CRANKSHAFT |
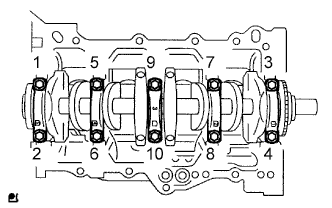 |
Using several steps, loosen and remove the 10 bearing cap sub-assembly bolts uniformly using 12 mm socket wrench in the sequence shown in the illustration.
Remove the bearing cap and the crankshaft.
| 4. REMOVE CRANKSHAFT BEARING |
| 5. REMOVE CRANKSHAFT THRUST WASHER UPPER |
| 6. REMOVE PISTON RING SET |
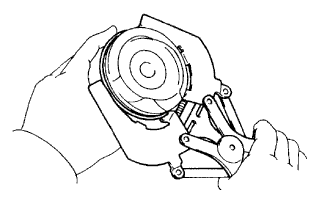 |
Using a piston ring expander, remove the 2 compression rings.
Remove the 2 side rails and the oil ring by hand.
| 7. REMOVE WITH PIN PISTON SUB-ASSEMBLY |
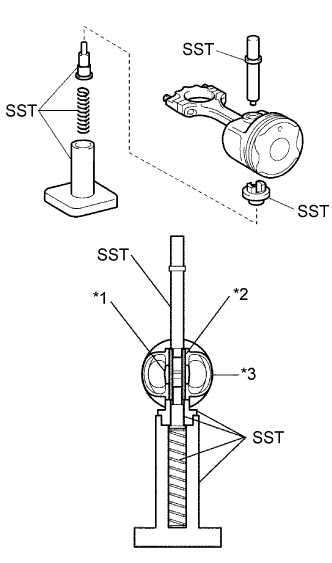 |
Using SST, press the piston pin out of the piston.
| *1 | Connecting Rods |
| *2 | Piston Pin |
| *3 | Piston |
| 8. REMOVE CYLINDER BLOCK WATER DRAIN COCK SUB-ASSEMBLY |
| 9. REMOVE STUD BOLT |
| 10. REMOVE OIL PUMP SET RING PIN |
| 11. REMOVE STRAIGHT PIN |