RADIATOR > REMOVAL |
| 1. DRAIN COOLANT |
|
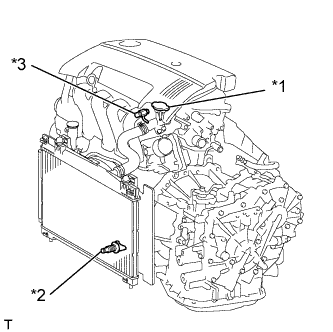
| *1 | Water Filler Cap Sub-assembly |
| *2 | Radiator Drain Cock Plug |
| *3 | Cylinder Block Drain Cock Plug |
Loosen the radiator drain cock plug.
Remove the water filler cap sub-assembly.
Loosen the cylinder block drain cock plug, then drain the coolant.
| 2. REMOVE HEADLIGHT ASSEMBLY |
| 3. SEPARATE HOOD LOCK CONTROL CABLE ASSEMBLY |
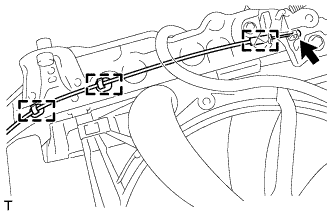 |
Disengage the 2 clamps and separate the hood lock cable assembly.
Separate the hood lock control cable assembly from the hood lock.
| 4. REMOVE UPPER RADIATOR SUPPORT SUB-ASSEMBLY |
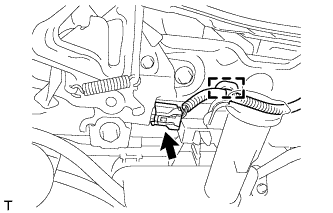 |
Disconnect the hood lock courtesy switch connector and disengage the wire harness clamp.
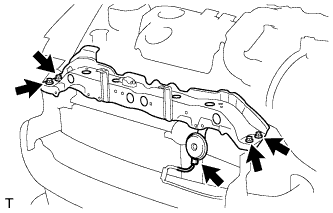 |
Separate the horn assembly connector.
Remove the 4 bolts and the upper radiator support sub-assembly.
| 5. DISCONNECT RADIATOR RESERVOIR TANK HOSE |
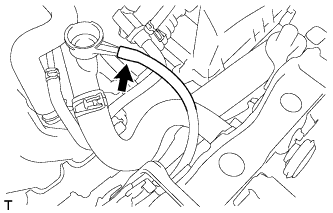 |
Disconnect the radiator reservoir tank hose from the water filler.
| 6. REMOVE NO. 3 RADIATOR HOSE |
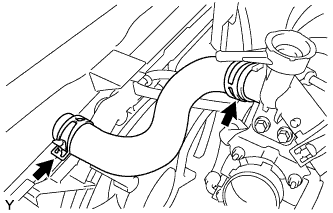 |
Loosen the 2 clips and remove No. 3 radiator hose.
| 7. DISCONNECT NO. 2 RADIATOR HOSE |
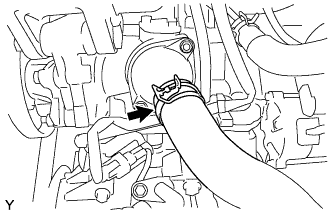 |
Loosen the clip and disconnect No. 2 radiator hose.
| 8. REMOVE INLET OIL COOLER HOSE (for Automatic Transaxle) |
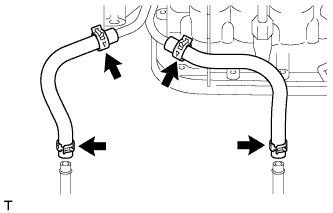 |
| 9. REMOVE OUTLET OIL COOLER HOSE (for Automatic Transaxle) |
| 10. REMOVE AIR CLEANER ASSEMBLY |
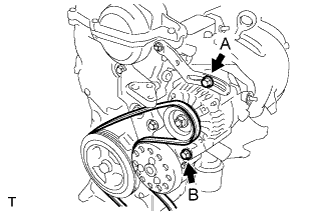 |
Loosen bolts A and B.
Release the fan and generator V belt tension and remove the fan and generator V belt.
| 11. REMOVE RADIATOR ASSEMBLY |
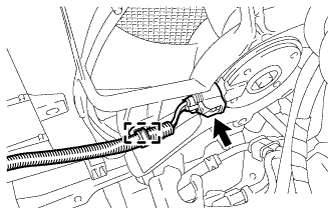 |
Separate the cooling fan motor connector and wire harness clamp.
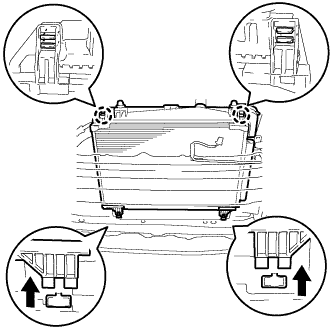 |
Disengage the 2 claws and remove the radiator assembly from the vehicle.
| 12. REMOVE NO. 2 RADIATOR HOSE |
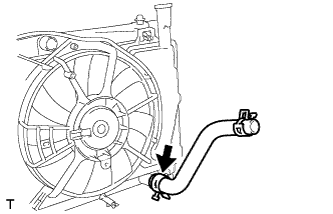 |
Loosen the clip and remove the No. 2 radiator hose.
| 13. REMOVE FAN SHROUD |
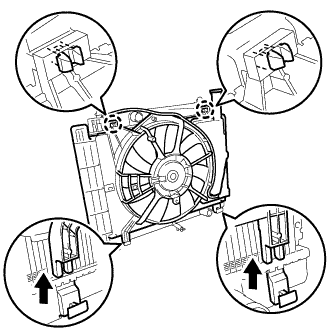 |
Disengage the 2 claws and remove the fan shroud.
| 14. REMOVE RADIATOR SUPPORT CUSHION |
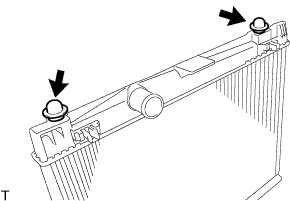 |
Remove the 2 radiator support cushions from the radiator assembly.
| 15. REMOVE GROMMET |
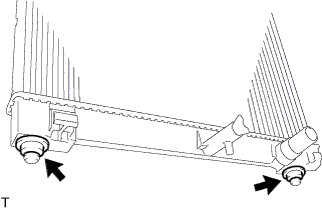 |
Remove the 2 grommets from the radiator assembly.
| 16. REMOVE RADIATOR DRAIN COCK |
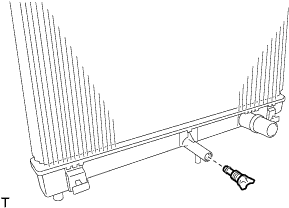 |
Remove the radiator drain cock from the radiator assembly.