 |
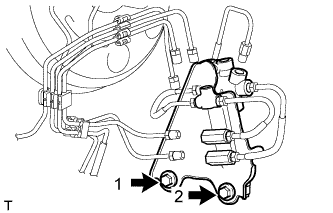
Install the proportioning valve bracket with the 2 bolts in the sequence order shown in the illustration.
- Torque:
- 19 N*m{ 194 kgf*cm , 14 ft.*lbf }
PROPORTIONING VALVE > INSTALLATION |
| 1. INSTALL PROPORTIONING VALVE |
Install the proportioning valve onto the proportioning valve bracket with the 2 nuts.
Using a union nut wrench 10 mm, install the 3 brake tubes onto the proportioning valve and the brake tube way.
|
Install the proportioning valve bracket with the 2 bolts in the sequence order shown in the illustration.
Using a union nut wrench 10 mm, install the 6 brake tubes onto the proportioning valve and the brake tube way.
| 2. INSTALL BATTERY CARRIER |
Install the battery carrier with the 5 bolts.
Engage the 6 wire harness clamps and install the wire harness.
| 3. INSTALL BATTERY TRAY |
| 4. INSTALL BATTERY |
Install the battery onto the vehicle with the battery clamp.
Connect the cable to the battery terminal.
| 5. FILL RESERVOIR WITH BRAKE FLUID |
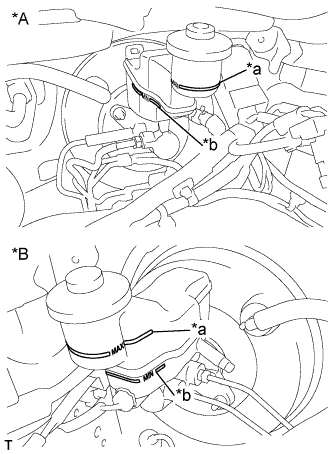 |
Fill the reservoir with brake fluid.
| *A | for LHD |
| *B | for RHD |
| *a | MAX Line |
| *b | MIN Line |
| 6. BLEED MASTER CYLINDER |
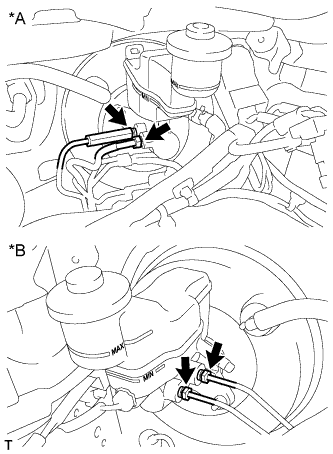 |
Using a union nut wrench 12 mm, separate the 2 brake tubes from the master cylinder.
| *A | for LHD |
| *B | for RHD |
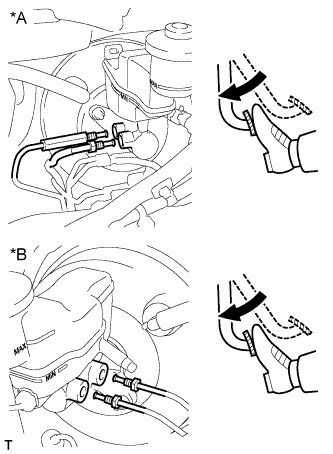 |
Slowly depress the brake pedal and hold it there (Step A).
| *A | for LHD |
| *B | for RHD |
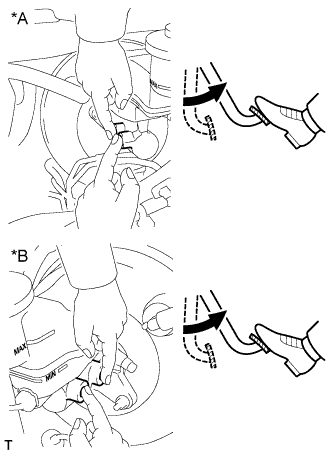 |
Block the outer holes with your fingers, and release the brake pedal (Step B).
| *A | for LHD |
| *B | for RHD |
Repeat Steps A and B 3 or 4 times.
|
Using a union nut wrench 12 mm, install the 2 brake tubes into the master cylinder.
| *A | for LHD |
| *B | for RHD |
| 7. BLEED BRAKE LINE |
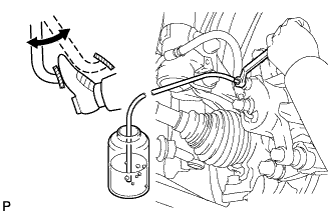 |
Connect a vinyl tube to the bleeder plug.
Depress the brake pedal several times, and then loosen the bleeder plug with the pedal depressed (Step C).
At the point where the fluid stops coming out, tighten the bleeder plug, and then release the brake pedal (Step D).
Repeat Steps C and D until all the air in the fluid is completely bled out.
Tighten the bleeder plug.
Repeat the above procedure to bleed the air out of the brake line for each wheel.
| 8. INSPECT FOR BRAKE FLUID LEAK |
| 9. INSPECT FLUID LEVEL |
|
Check the fluid level.
| *A | for LHD |
| *B | for RHD |
| *a | MAX Line |
| *b | MIN Line |
| 10. INSTALL CENTER COWL TOP VENTILATOR LOUVER |
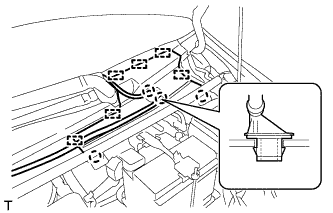 |
Engage the 2 claws and 6 guides and install the cowl top ventilator louver center.
Engage the 2 claws and install the washer hose joint.
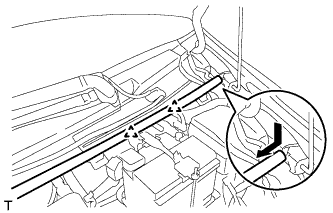 |
Engage the 2 clips and slide the hood to cowl top seal as shown in the illustration.