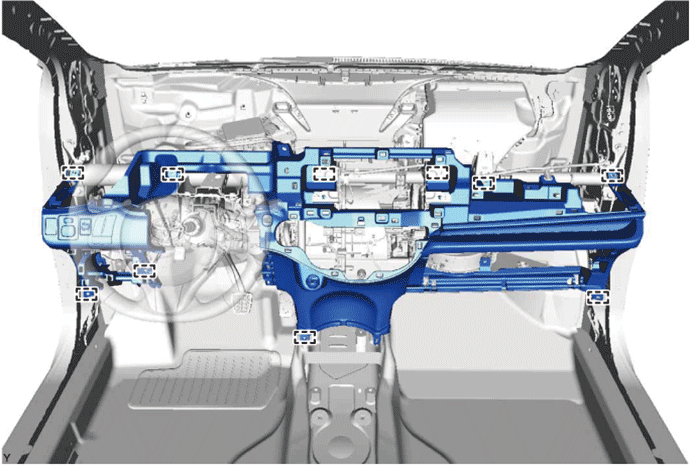
LOWER INSTRUMENT PANEL > REMOVAL |
| 1. REMOVE UPPER INSTRUMENT PANEL SUB-ASSEMBLY |
| 2. REMOVE GLOVE COMPARTMENT DOOR ASSEMBLY |
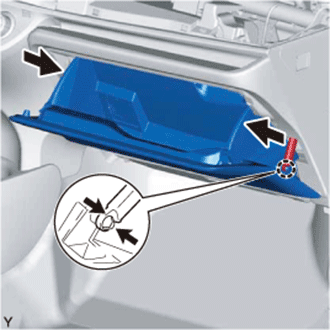 |
Disengage the claw and separate the glove compartment door stoppers from the glove compartment door.
Slightly flex the upper part of the glove compartment door to release the 2 stoppers and open the glove compartment door until it is horizontal.
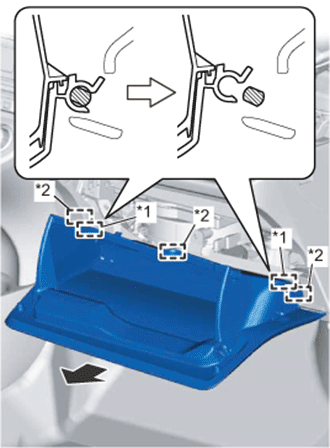 |
Pull the glove compartment door out horizontally to disengage the 2 hinges and 3 guides and remove the glove compartment door.
| *1 | Hinge |
| *2 | Guide |
| 3. REMOVE NO. 2 INSTRUMENT PANEL UNDER COVER SUB-ASSEMBLY |
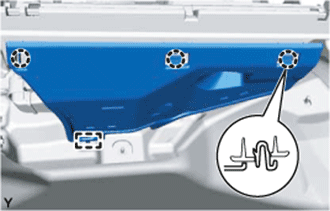 |
Disengage the 3 claws and the guide and remove the instrument panel under cover.
| 4. REMOVE NO. 1 INSTRUMENT PANEL UNDER COVER SUB-ASSEMBLY |
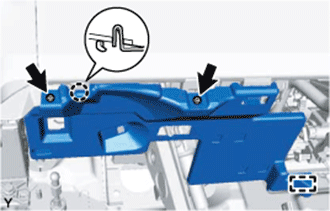 |
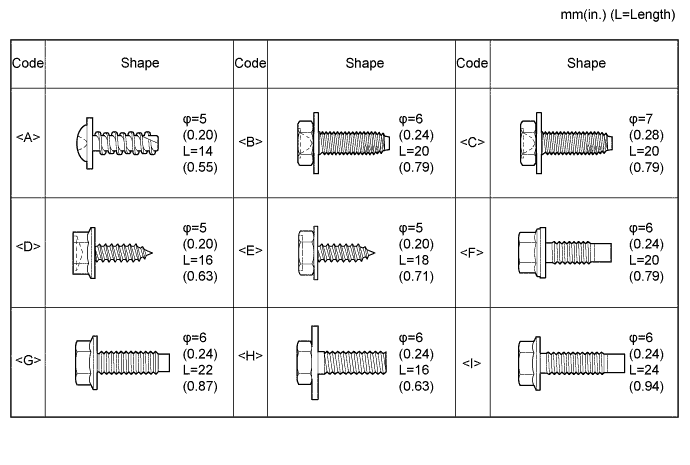
Remove the 2 <A> screws.
Disengage the claw and the guide and remove the instrument panel under cover.
| 5. REMOVE LOWER NO. 2 INSTRUMENT PANEL FINISH PANEL (for LHD) |
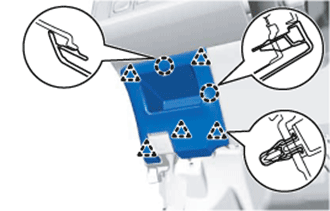 |
Disengage the 5 clips and the 2 claws and remove the instrument panel finish panel.
| 6. REMOVE LOWER INSTRUMENT PANEL FINISH PANEL (w/o Knee Airbag) |
for LHD:
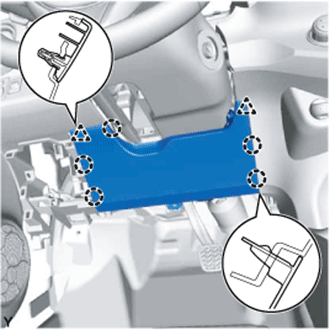 |
Disengage the 2 clips and the 5 claws and remove the instrument panel finish panel.
for RHD:
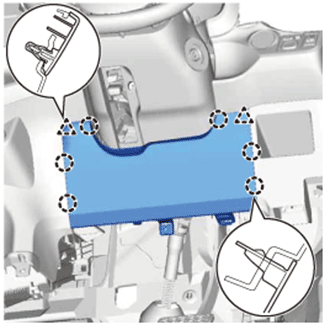 |
Disengage the 2 clips and the 6 claws and remove the instrument panel finish panel.
| 7. REMOVE LOWER NO. 1 INSTRUMENT PANEL AIRBAG ASSEMBLY (w/ Knee Airbag) |
Check that the ignition switch is off.
Check that the cable is disconnected from the negative (-) battery terminal.
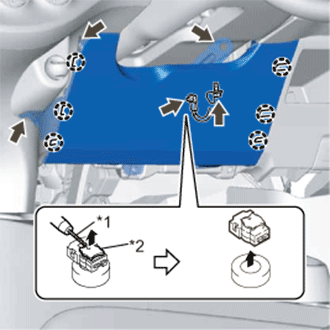 |
Remove the 4 bolts.
| *1 | Protective Tape |
| *2 | Locking Button |
Disengage the 6 claws to separate the lower No. 1 instrument panel airbag assembly.
Using a screwdriver with its tip wrapped in protective tape, release the locking button.
Disconnect the airbag connector to remove the lower No. 1 instrument panel airbag assembly.
| 8. REMOVE STEREO OPENING COVER WITH BRACKET (w/o Radio Receiver) |
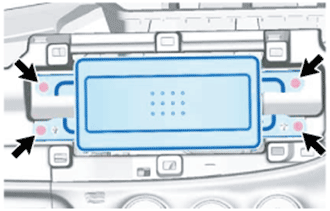 |
Remove the 4 screws and the stereo opening cover with bracket.
| 9. REMOVE RADIO RECEIVER ASSEMBLY WITH BRACKET (w/ Radio Receiver) |
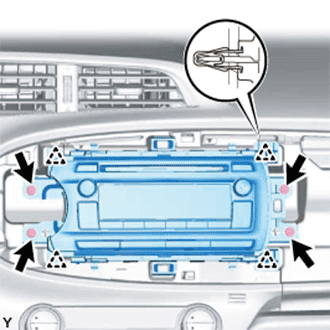 |
Remove the 4 screws.
Disengage the 4 clips.
Disconnect the connectors and remove the radio receiver assembly with bracket.
| 10. REMOVE AIR CONDITIONING CONTROL ASSEMBLY (for Automatic Air Conditioning System) |
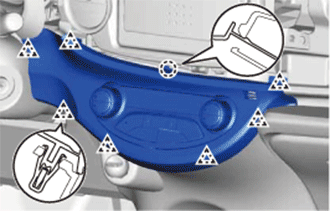 |
Disengage the claw and 7 clips and remove the air conditioning control.
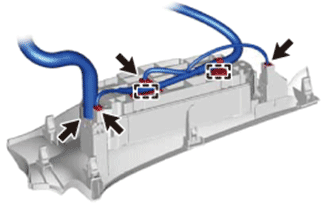 |
Separate the cooler hose.
Disconnect the connectors and disengage the clamps, then remove the air conditioning control.
| 11. SEPARATE AIR CONDITIONING PANEL ASSEMBLY (for Manual Air Conditioning System) |
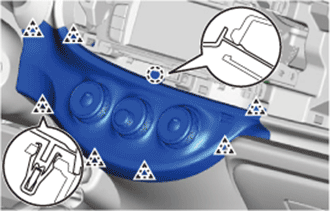 |
Disengage the claw and 7 clips.
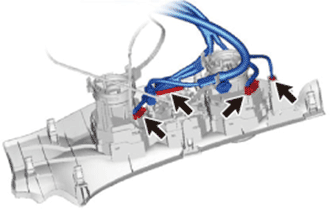 |
Disconnect the connectors and separate the air conditioning panel.
| 12. DISCONNECT DEFROSTER DAMPER CONTROL CABLE SUB-ASSEMBLY (for Manual Air Conditioning System) |
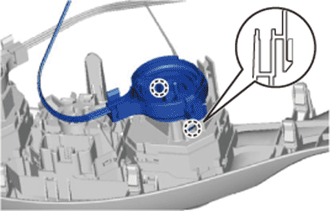 |
Disengage the 2 claws and disconnect the defroster damper control cable.
| 13. DISCONNECT AIR INLET DAMPER CONTROL CABLE SUB-ASSEMBLY (for Manual Air Conditioning System) |
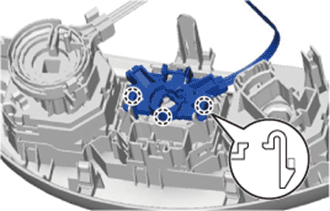 |
Disengage the 3 claws and disconnect the air inlet damper control cable.
| 14. DISCONNECT AIR MIX DAMPER CONTROL CABLE SUB-ASSEMBLY (for Manual Air Conditioning System) |
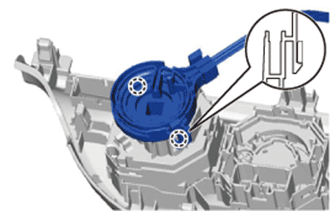 |
Disengage the 2 claws and disconnect the air mix damper control cable.
| 15. REMOVE REAR CONSOLE BOX ASSEMBLY |
| 16. SEPARATE HOOD LOCK CONTROL LEVER SUB-ASSEMBLY |
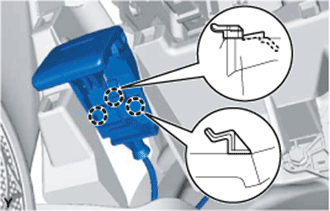 |
Disengage the 3 claws and separate the hood lock control lever.
| 17. REMOVE LOWER INSTRUMENT PANEL SUB-ASSEMBLY |
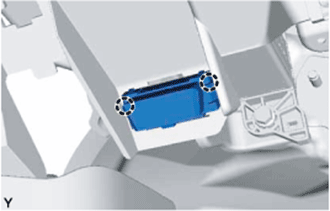 |
Disengage the 2 claws and disconnect the DLC3 connector.
Disconnect the clamps and connectors.
Remove the 6 <B> or <C> bolts, <D> or <E> screw, 2 <F> or <H> or <I> bolts, and bolt from the lower instrument panel.
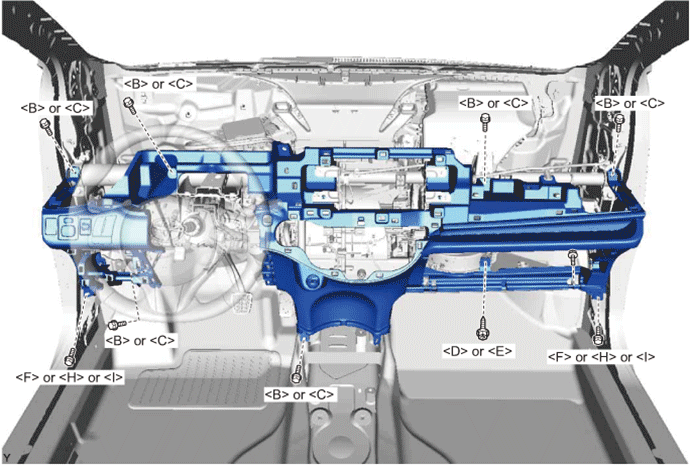
Disengage the 10 guides and remove the lower instrument panel.