BACK DOOR > REASSEMBLY |
| 1. APPLY BODY GREASE |
| 2. INSTALL NO. 2 LUGGAGE COMPARTMENT DOOR NAME PLATE |
Clean the attachment surface.
Using an infrared light, heat the double-sided tape remaining on the back door panel.
| Item | Temperature |
| Vehicle Body | 40 to 60°C (104 to 140°F) |
Using a piece of cloth, rub the double-sided tape off the back door panel while it is hot from the infrared light.
Using a non-residue solvent, clean the attachment surface.
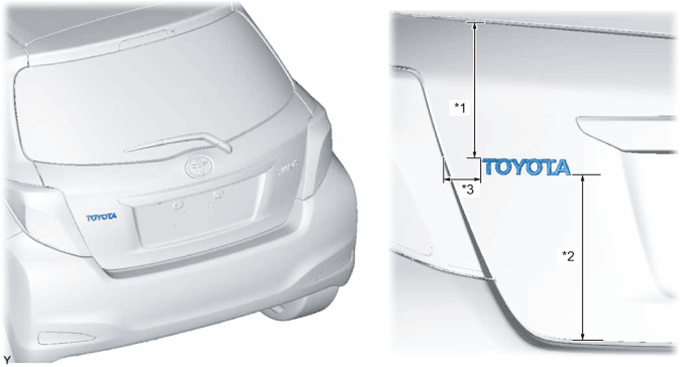
Install a new No. 2 luggage compartment door name plate as shown in the illustration.
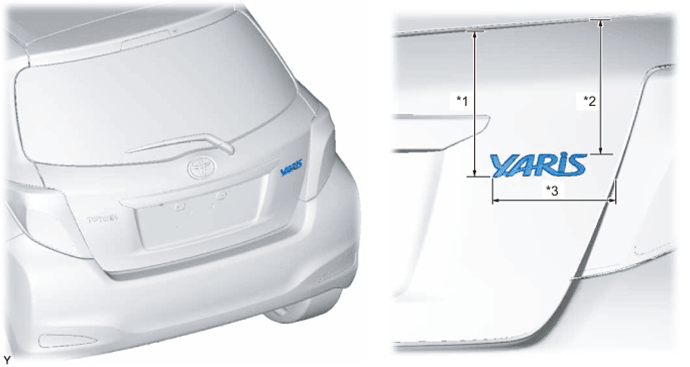
| Mark | Measurement (along surface) |
| *1 | 223.8 mm (8.81 in.) |
| *2 | 211.9 mm (8.34 in.) |
| *3 | 167.1 mm (6.58 in.) |
| 3. INSTALL NO. 6 BACK DOOR NAME PLATE |
Clean the attachment surface.
Using an infrared light, heat the double-sided tape remaining on the back door panel.
| Item | Temperature |
| Vehicle Body | 40 to 60°C (104 to 140°F) |
Using a piece of cloth, rub the double-sided tape off the back door panel while it is hot from the infrared light.
Using a non-residue solvent, clean the attachment surface.
Install a new No. 6 back door name plate as shown in the illustration.

| Mark | Measurement (along surface) |
| *1 | 215.8 mm (8.50 in.) |
| *2 | 220.0 mm (8.66 in.) |
| *3 | 51.5 mm (2.03 in.) |
| 4. INSTALL SYMBOL EMBLEM |
Clean the attachment surface.
Using an infrared light, heat the double-sided tape remaining on the back door panel.
| Item | Temperature |
| Vehicle Body | 40 to 60°C (104 to 140°F) |
Using a piece of cloth, rub the remaining double-sided tape off the back door panel while it is hot from the infrared light.
Using a non-residue solvent, clean the attachment surface.
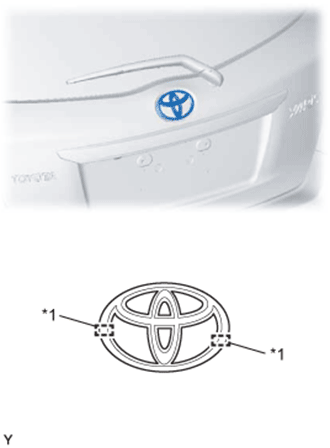
![]() |
Insert the 2 pins into the back door panel and install a new symbol emblem.
| *1 | Location Pin |
| 5. INSTALL PACKAGE TRAY TRIM HANGER (w/ Package Tray Trim) |
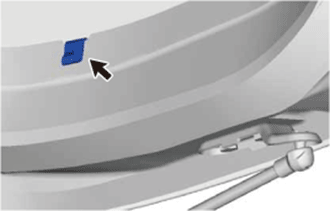
![]() |
Install the package tray trim hanger.
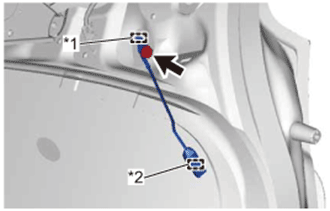
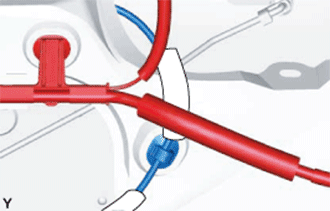
| 6. INSTALL BACK DOOR NO. 2 WIRE |
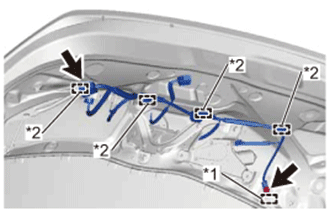
![]() |
Engage the 4 clamps and connect the connector.
| *1 | Hook |
| *2 | Clamp |
Engage the hook and install the wire harness with the bolt.
| 7. INSTALL REAR WINDOW NO. 1 WIRE (w/ Rear Window Defogger) |
![]() |
Engage the hook and install the bolt.
| *1 | Hook |
| *2 | Clamp |
Engage the clamp and install the wire harness.
| 8. INSTALL LICENSE PLATE LIGHT ASSEMBLY |
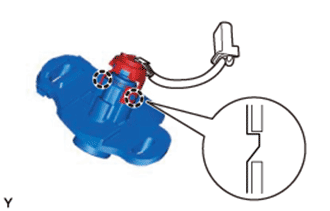
Engage the 2 claws to install the license plate light assembly.
Connect the connector.
| 9. INSTALL BACK DOOR PANEL CUSHION |
![]() |
Install the new back door panel cushion.
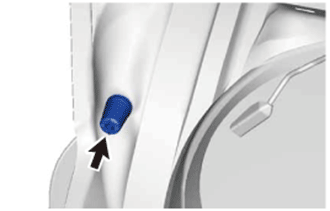
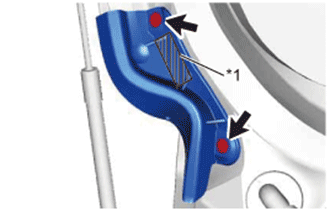
| 10. INSTALL BACK DOOR PANEL NO. 2 PROTECTOR |
![]() |
Using a piece of cloth or similar material, rub off any double-sided tape remaining on the back door panel.
| *1 | Double-sided Tape |
Using a non-residue solvent, clean the attachment surface.
Remove the double-sided tape backing of the new back door panel protector.
Install the back door panel protector with 2 clips.
| 11. INSTALL BACK DOOR PANEL NO. 1 PROTECTOR |
| 12. INSTALL REAR WASHER NOZZLE (w/ Rear Wiper) |
Connect the rear washer nozzle to the washer hose.
Engage the 2 claws and install the rear washer nozzle.
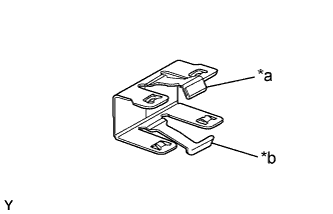
| 13. INSTALL CENTER STOP LIGHT ASSEMBLY |
Install a new packing.
![]() |
Engage the 4 claws to install a new clip.
| *a | Upper Side (side with short claws) |
| *b | Lower Side (side with long claws) |
Connect the connector.
![]() |
Engage the 4 claws of the metal clips and install the center stop light assembly.
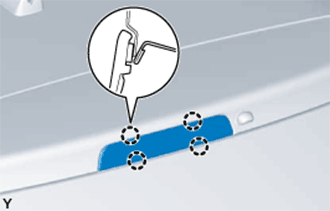
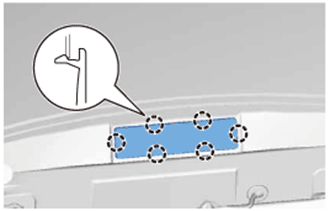
| 14. INSTALL REAR LIGHT COVER |
![]() |
Engage the 6 claws and install the rear lamp cover.
| 15. INSTALL BACK DOOR OPENER SWITCH ASSEMBLY (w/ Power Door Lock) |
Install the back door opener switch.
| 16. INSTALL BACK DOOR OUTSIDE HANDLE SUB-ASSEMBLY (w/o Power Door Lock) |
Install the back door outside handle.
| 17. INSTALL BACK DOOR OUTSIDE GARNISH SUB-ASSEMBLY (w/ Power Door Lock) |
Engage the 2 clips and install the back door outside garnish.
Tighten the 3 nuts.
Connect the connectors.
| 18. INSTALL BACK DOOR OUTSIDE GARNISH SUB-ASSEMBLY (w/o Power Door Lock) |
Engage the 2 clips and install the back door outside garnish.
Tighten the nut.
| 19. INSTALL BACK DOOR LOCK CONTROL ASSEMBLY (w/o Power Door Lock) |
Install the back door lock control with the 2 nuts.
![]() |
Engage the clamp.
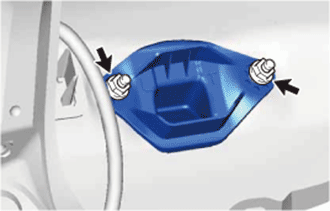
| 20. INSTALL BACK DOOR GARNISH NO. 2 RETAINER (w/ Cover) |
![]() |
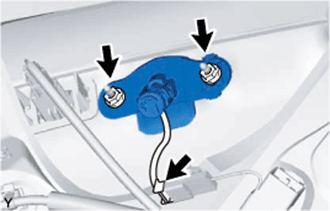
Install the back door garnish No. 2 retainer with the 2 nuts.
| 21. INSTALL BACK DOOR LOCK CYLINDER ASSEMBLY (w/ Power Door Lock) |
![]() |
Engage the 2 claws and install the back door lock cylinder.
![]() |
Install the back door lock cylinder with the 2 nuts.
Connect the connector.
| 22. INSTALL BACK DOOR LOCK CYLINDER ASSEMBLY (w/o Power Door Lock) |
Install the back door lock cylinder with the 2 nuts.
| 23. INSTALL BACK DOOR LOCK CONTROL ROD (w/o Power Door Lock) |
![]() |
Install the back door lock control rod.
| 24. INSTALL DOOR PULL HANDLE |
![]() |
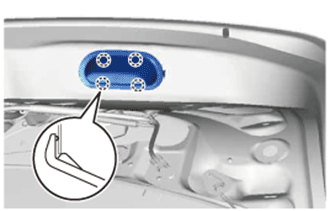
Engage the 4 claws and install the door pull handle.
| 25. INSTALL BACK DOOR LOCK ASSEMBLY (w/ Power Door Lock) |
Apply MP grease to the sliding parts of the back door lock assembly.
Install the back door lock assembly with the 2 bolts.
Connect the connector.
| 26. INSTALL BACK DOOR LOCK ASSEMBLY (w/o Power Door Lock) |
Apply MP grease to the sliding parts of the back door lock assembly.
Install the back door lock assembly with the 2 bolts.
![]() |
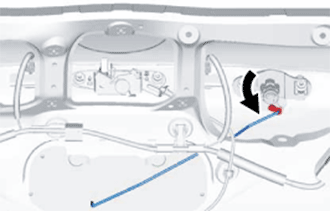
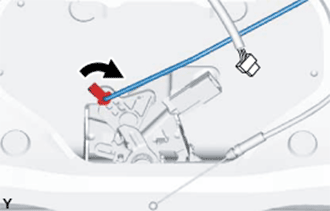
Connect the back door lock control rod.
Connect the back door outside handle cable.
Connect the connector.
| 27. INSTALL REAR WIPER MOTOR GROMMET (w/ Rear Wiper) |
![]() |
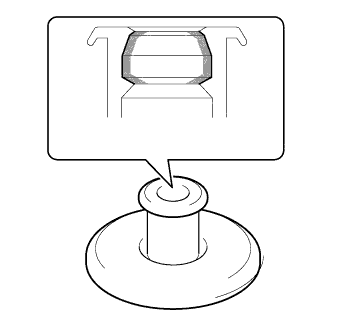
Apply MP grease to the entire surface of the rear wiper motor grommet lip.
![]() | Lip of Rear Wiper Motor Grommet |
| 28. INSTALL REAR WIPER MOTOR ASSEMBLY (w/ Rear Wiper) |
![]() |
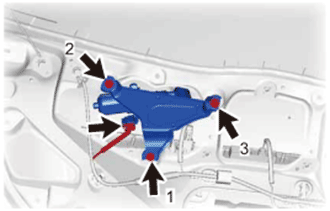
Install the rear wiper motor with the 3 bolts in the order shown in the illustration.
Connect the connector.
| 29. INSTALL REAR WIPER ARM AND BLADE ASSEMBLY (w/ Rear Wiper) |
![]() |
Operate the wiper and stop the rear wiper motor at the automatic stop position.
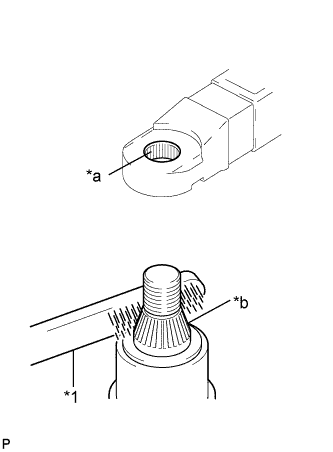
Scrape any metal powder off the serrated part of the wiper arm with a round file or the equivalent (when reinstalling).
Clean the wiper pivot serrations with a wire brush.
| *1 | Wire Brush |
| *a | Wiper Arm Serration |
| *b | Wiper Pivot Serration |
![]() |
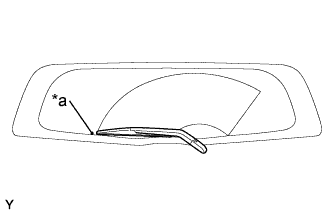
Install the rear wiper arm and blade with the nut to the position as shown in the illustration.
| *a | Mark for Blade Position |
Operate the rear wiper while spraying washer fluid on the glass. Make sure that the rear wiper functions properly and there is no interference with the vehicle body.
| 30. INSTALL REAR WIPER ARM HEAD CAP (w/ Rear Wiper) |
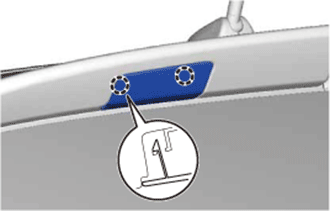
Engage the 2 claws and 2 hinges, and install the rear wiper arm head cap.
| 31. INSTALL BACK DOOR TRIM BOARD |
![]() |
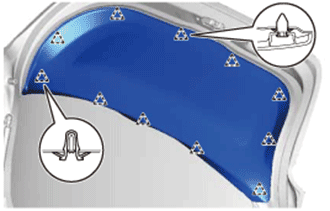
Engage the 11 clips and install the back door trim board.
| 32. INSTALL REAR SPOILER SUB-ASSEMBLY (w/ Rear Spoiler) |
Clean the attachment surface.
Using an infrared light, heat the double-sided adhesive tape remaining on the back door panel.
| Item | Temperature |
| Vehicle Body | 40 to 60°C (104 to 140°F) |
Using a piece of cloth, rub the remaining double-sided tape off the back door panel while it is hot from the infrared light.
Using a non-residue solvent, clean the attachment surface.
Engage the 4 clips and install a new rear spoiler.
Tighten the 2 screws.
| 33. INSTALL REAR SPOILER COVER LH (w/ Rear Spoiler) |
![]() |
Engage the 2 claws and install the rear spoiler cover.
| 34. INSTALL REAR SPOILER COVER RH (w/ Rear Spoiler) |