COMPRESSOR (for 1NZ-FE, 2NZ-FE) > INSTALLATION |
| 1. INSPECT COMPRESSOR OIL |
Remove the suction seal cap.
![]() |
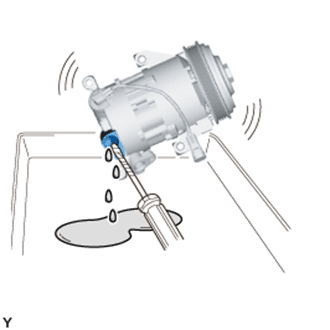
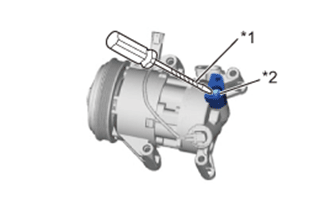
Using a screwdriver with its tip wrapped in protective tape, insert the screwdriver through the suction port and set the VST valve (valve inside suction port) to the open position.
| *1 | Protective Tape |
| *2 | VST valve (Valve Inside Suction Port) |
![]() |
Lightly shake the compressor with the suction port facing down, and drain the oil (*1).
![]() |
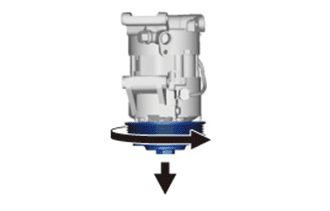
With the pulley facing down, rotate the pulley in the direction shown by the arrow 10 times at a rate of approximately once every 2 seconds (*2).
![]() |
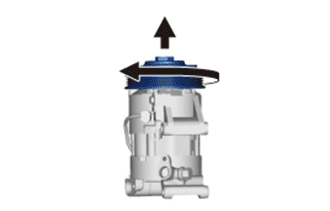
Rotate the pulley once in the direction shown by the arrow while quickly turning the compressor so the pulley is up (*3).
Proceed with the above procedure (*1) and drain the oil (*4).
Drain the oil by repeating the procedures above approximately 5 times (from (*2) to (*4)).
| Standard (Amount of Oil to be Removed) | Amount of Oil Inside a New Compressor |
| 30 cm3
| 60 cm3
|
| 2. INSTALL COMPRESSOR WITH PULLEY ASSEMBLY |
![]() |
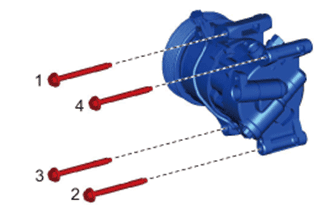
Install the compressor with the 4 bolts.
Connect the connector.
| 3. CONNECT NO. 1 COOLER REFRIGERANT DISCHARGE HOSE |
Remove the attached vinyl tape from the discharge hose.
Apply sufficient compressor oil to a new O-ring and the fitting surface of the compressor.
Install the O-ring onto the discharge hose.
Install the discharge hose onto the compressor with the bolt.
| 4. CONNECT SUCTION HOSE SUB-ASSEMBLY |
Remove the attached vinyl tape from the suction hose.
Apply sufficient compressor oil to a new O-ring and the fitting surface of the compressor.
Install the O-ring onto the suction hose.
Install the suction hose onto the compressor with the bolt.
| 5. INSTALL ENGINE UNDER COVER RH (for Plastic Type) |
| 6. INSTALL NO. 1 ENGINE UNDER COVER SUB-ASSEMBLY (for Metal Type) |
| 7. INSTALL FAN AND GENERATOR V BELT |
| 8. CHARGE REFRIGERANT |

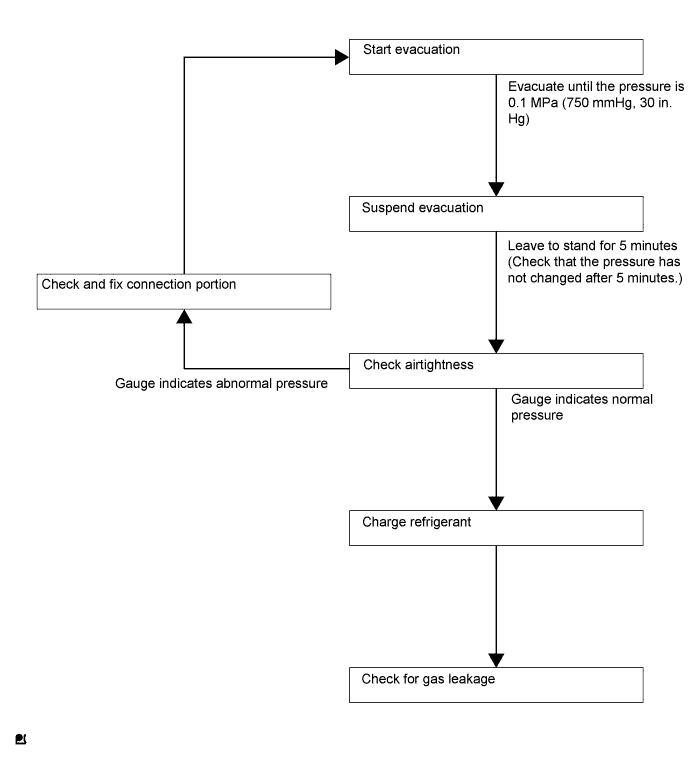
Perform vacuum purging using a vacuum pump.
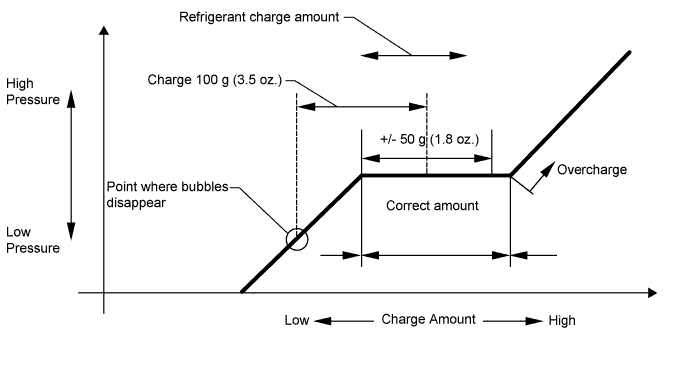
Charge refrigerant HFC-134a (R134a).
| Item | Refrigerant Charging Amount |
| w/o Fan Shroud Ventilation Duct | 330 to 390 g (11.6 to 13.8 oz.) |
| w/ Fan Shroud Ventilation Duct | 350 to 410 g (12.3 to 14.5 oz.) |

Install the caps onto the service valves on the refrigerant line.
| 9. WARM UP ENGINE |
| 10. INSPECT FOR REFRIGERANT LEAK |
After recharging the refrigerant gas, check for refrigerant gas leakage using a halogen leak detector.
Perform the operation as follows:
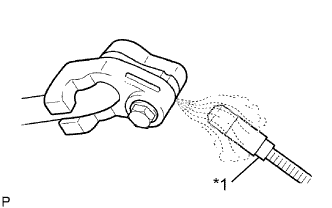
![]() |
Using the halogen leak detector, check the refrigerant line, especially at the connection points, for leakage.
| *1 | Halogen Leak Detector |
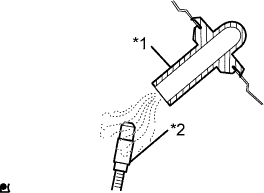
![]() |
Bring the halogen leak detector close to the drain hose before performing the test.
| *1 | Drain Hose |
| *2 | Halogen Leak Detector |
If no gas leakage is detected from the drain hose, remove the blower motor from the cooling unit. Insert the halogen leak detector sensor into the unit and perform the test.
Disconnect the pressure switch connector and leave it for approximately 20 minutes. Bring the halogen leak detector close to the pressure switch and perform the test.