Home › Audio/Visual/Telematics › AUDIO / VIDEO › RADIO RECEIVER

RADIO RECEIVER > REMOVAL

for Preparation Click here


1. REMOVE INSTRUMENT CLUSTER FINISH PANEL GARNISH ASSEMBLY


    B290391E01
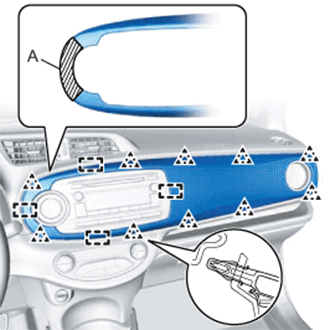
  1. Disengage the 10 clips and the 4 guides and remove the instrument cluster finish panel garnish.

    HINT:
    Disengage the clips in order starting from the outside of the vehicle.

    NOTICE:
    To prevent parts from breaking, do not pull on section A when disengaging the clips.
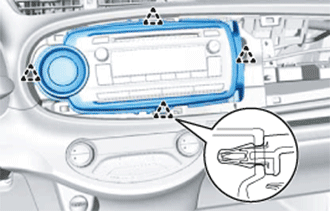


2. REMOVE INSTRUMENT CLUSTER FINISH CENTER PANEL SUB-ASSEMBLY


    B290376
  1. Disengage the 4 clips.

  1. Disconnect the connector and remove the instrument cluster finish center panel.


3. REMOVE RADIO RECEIVER ASSEMBLY WITH BRACKET


    E232536
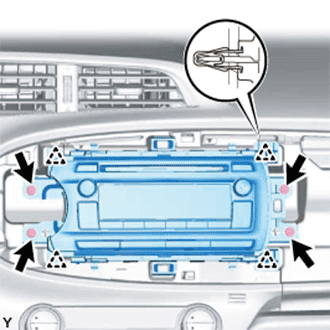
  1. Remove the 4 screws.

  1. Disengage the 4 clips.

  1. Disconnect the connectors and remove the radio receiver assembly with bracket.


4. REMOVE NO. 1 RADIO BRACKET


    E232537
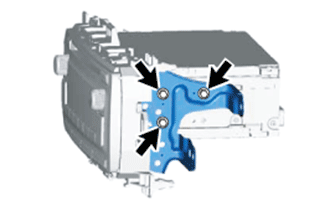
  1. Remove the 3 bolts and No. 1 radio bracket.


5. REMOVE NO. 2 RADIO BRACKET


    E232538
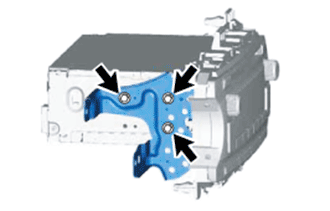
  1. Remove the 3 bolts and No. 2 radio bracket.