 |
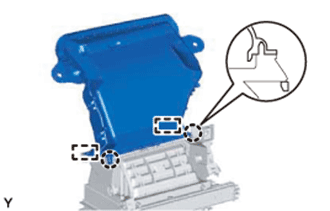
Disengage the 2 claws and 2 guides, and remove the air duct.
BLOWER UNIT > DISASSEMBLY |
| 1. REMOVE NO. 1 AIR DUCT SUB-ASSEMBLY |
|
Disengage the 2 claws and 2 guides, and remove the air duct.
| 2. REMOVE NO. 1 BLOWER DAMPER SERVO SUB-ASSEMBLY (for Automatic Air Conditioning System) |
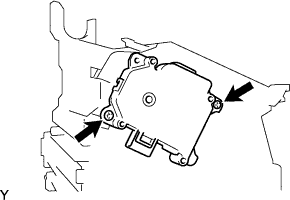 |
Remove the 2 screws and the blower damper servo.
| 3. REMOVE AIR INLET DAMPER CONTROL CABLE SUB-ASSEMBLY (for Manual Air Conditioning System) |
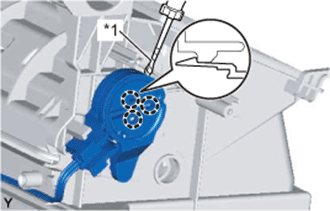 |
Using a screwdriver with its tip wrapped in protective tape, disengage the 3 claws and remove the air inlet damper control cable.
| *1 | Protective Tape |
| 4. REMOVE NO. 1 AIR CONDITIONING WIRE (for LHD Automatic Air Conditioning System) |
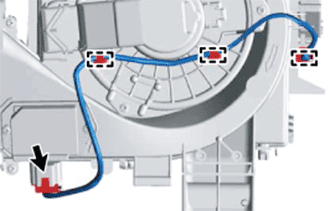 |
Disconnect the connector.
Disengage the 3 clamps and remove the air conditioning wire.
| 5. REMOVE BLOWER MOTOR WITH FAN SUB-ASSEMBLY |
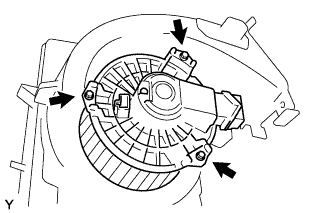 |
Remove the 3 screws and the blower motor.
| 6. REMOVE BLOWER MOTOR CONTROL (for LHD Automatic Air Conditioning System) |
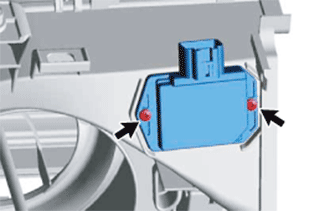 |
Remove the 2 screws and the blower motor control.
| 7. REMOVE BLOWER RESISTOR (for Manual Air Conditioning System) |
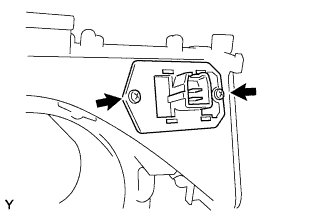 |
Remove the 2 screws and the blower resistor.
| 8. REMOVE AIR FILTER CASE |
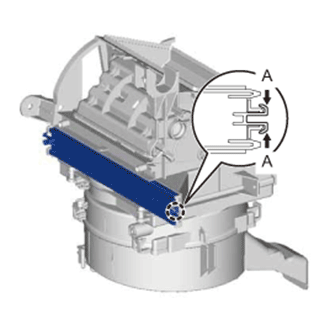 |
Pinch portion A to disengage the claw and remove the air filter case.
| 9. REMOVE CLEAN AIR FILTER |
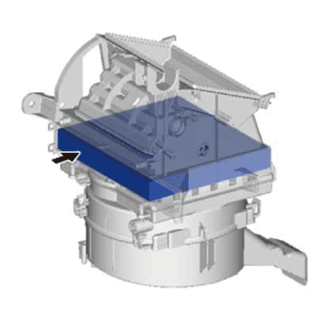 |
Remove the clean air filter from the blower.