INSTALLATION
GAS ENGINES
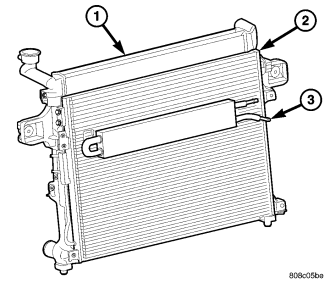
CAUTION: Before installing the radiator or A/C condenser, be sure the radiator-to-body and radiator-to-A/C condenser rubber air seals are properly fastened to their original positions. These are used at the top, bottom and sides of the radiator and A/C condenser. To prevent overheating, these seals must be installed to their original positions.
1. Equipped with air conditioning: Gently lower the radiator and fan shroud into the vehicle. Guide the two radiator alignment dowels through the holes in the rubber air seals first and then through the A/C support brackets. Continue to guide the alignment dowels into the rubber grommets located in lower radiator crossmember. The holes in the L-shaped brackets (located on bottom of A/C condenser) must be positioned between bottom of rubber air seals and top of rubber grommets.
2. Connect the radiator upper and lower hoses and hose clamps to radiator.
CAUTION: The tangs on the hose clamps must be positioned straight down.
3. Install coolant reserve/overflow tank hose at radiator.
4. Connect both transmission cooler lines at the radiator.
5. Install both radiator mounting bolts.
6. Install air inlet duct at grille.
7. Attach electric connector for hydraulic fan control solenoid.
8. Install the grille (Refer to 23 - BODY/EXTERIOR/GRILLE - INSTALLATION).
9. Connect the two high pressure lines to the hydraulic fan drive. Tighten ½ in. pressure line fitting to 49 N·m (36 ft. lbs.). and the 3/8 in. pressure line fitting to 29 N·m (21 ft. lbs.).
10. Connect the low pressure hose to the hydraulic fan drive. Position the spring clamp.
11. Connect the power steering filter hoses to the filter. Install new hose clamps.
12. Rotate the fan blades (by hand) and check for interference at fan shroud.
13. Refill cooling system (Refer to 7 - COOLING - STANDARD PROCEDURE).
14. Refill the power steering reservoir and bleed air from system (Refer to 19 - STEERING/PUMP - STANDARD PROCEDURE).
15. Connect battery cable at battery.
16. Start and warm engine. Check for leaks.
3.0L DIESEL
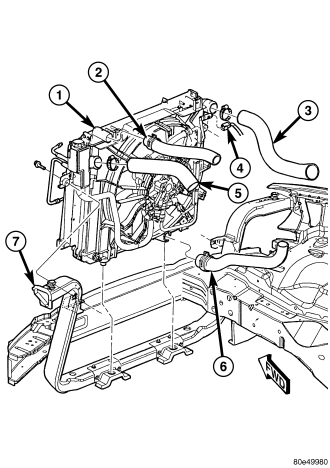
CAUTION: Constant tension hose clamps are used on most cooling systems hoses. Use only the tools that are designed for this type of service. A number or letter is stamped on the clamp. If replacement is required, use only an original equipment clamp with the matching number or letter.
NOTE: Care must be taken when installing the radiator not to damage the fins of the radiator or other ancillary components. Note the location and proper installation of the radiator to charge air cooler and radiator to body rubber air seals. These must be installed correctly to prevent engine over heating and provide proper A/C efficiency.
1. Position the coolant module assembly.
2. Carefully lower the radiator tank alignment dowels into the rubber grommets in the lower crossmember and secure coolant module.
3. Connect upper, lower radiator and coolant pressure container hoses then secure.
4. Connect coolant fan electrical connector and assure good ECM ground to fan assembly.
NOTE: When ever the pressure line fittings are installed at the hydraulic fan drive, the O-rings must be replaced.
5. Connect low pressure return hose at hydraulic fan.
6. Connect both high pressure hoses at hydraulic fan.
NOTE: Do Not waste usable coolant. If the solution is clean and the mixture is correct, reuse original coolant.
7. Refill cooling system with correct mixture with the proper level (Refer to 7 - COOLING/ENGINE/COOLANT - STANDARD PROCEDURE).
8. Reconnect negative battery cable.
WARNING: Use extreme caution when engine is operating. Do not stand in direct line with the fan. Do not put your hands near pulleys, belts or fan. Do not wear loose clothes.
9. Start engine and inspect for leaks.