LATCH - SECOND ROW
REMOVAL
Inboard Latch
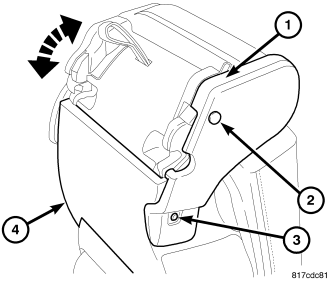
1. Tumble the seat (4) forward.
2. Remove the screw (3) and push pin fastener (2) and remove the trim cover (1).
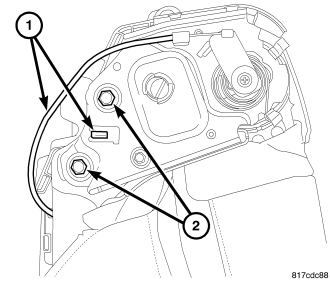
3. Disconnect the cable (1) from the tab and position aside.
4. Remove the two bolts (2).
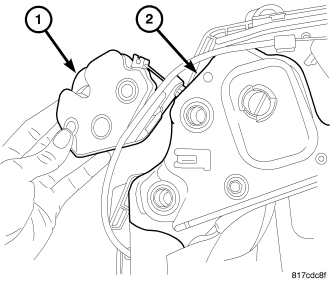
5. Remove the latch (1) from the seat frame (2).
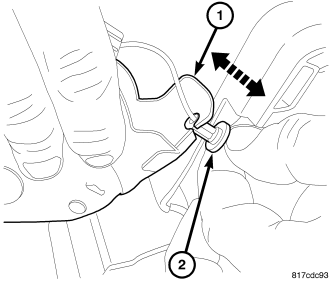
6. Separate the cable housing (2) from the latch (1).
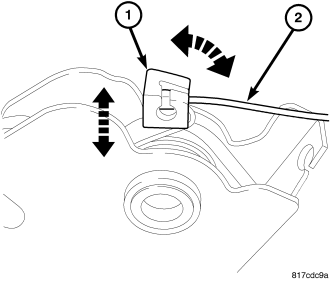
7. Disconnect the cable (2) from the latch (1).
Outboard Latch
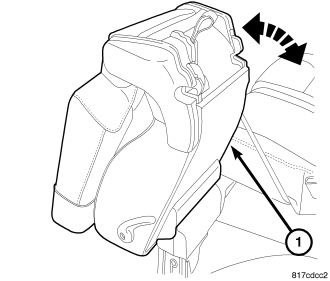
1. Tumble the seat (1) forward.
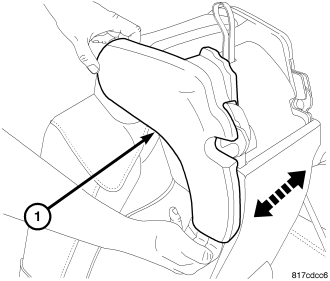
2. Using a trim stick C-4755 or equivalent, remove the trim cover (1).
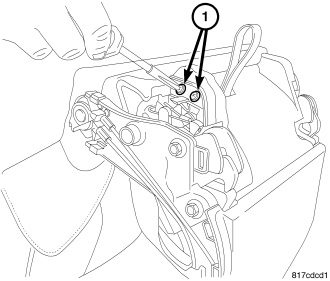
3. Remove the two screws (1).
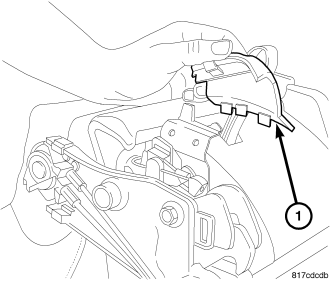
4. Remove the trim cover (1).
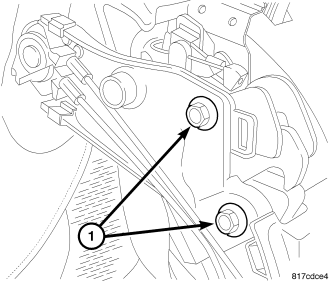
5. Remove the bolts (1).
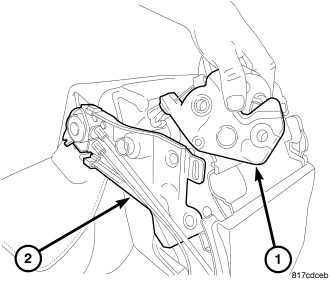
6. Remove the latch (1) from the seat frame (2).
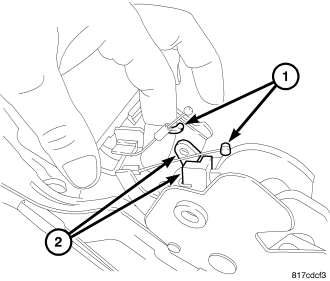
7. Disconnect the cable ends (1) from the latch (2).
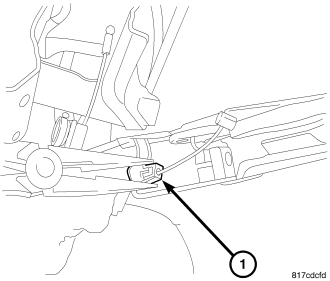
8. Separate the cable housings (1) from the latch.
INSTALLATION
Inboard Latch
1. Connect the latch cable end (2) to the release lever (1).
2. Connect the cable housing (2) to the latch (1).
3. Position the latch assembly (1) back into the seat frame assembly (2).
4. Install the bolts (2) and tighten to 55 N·m (41 ft. lbs.).
5. Position the cable (1) back into the retaining tab.
6. Position the trim cover (1) back into place and install the push pin (2) as well as the screw (3).
7. Return the seat (1) to the operating position.
Outboard Latch
1. Connect the cable housings (1) to the latch.
2. Connect the cable ends (1) to the latch levers (2).
3. Position the latch assembly (1) back into the seat frame assembly (2).
4. Install the bolts (1) and tighten to 55 N·m (41 ft. lbs.).
5. Install the trim cover (1).
6. Install the screws (1).
7. Position the trim cover (1) in place and seat fully.
8. Return the seat (1) to the operating position.