CAMSHAFT(S)
OPERATION
The camshaft is driven by the crankshaft via drive sprockets and a chain. The camshaft has precisely machined lobes to provide accurate valve timing and duration.
REMOVAL
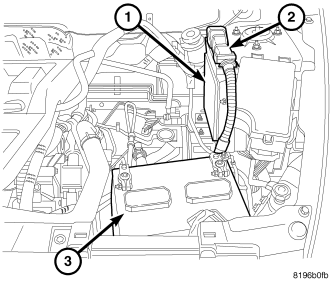
1. Remove engine cover by pulling upward.
2. Disconnect negative cable from battery (3).
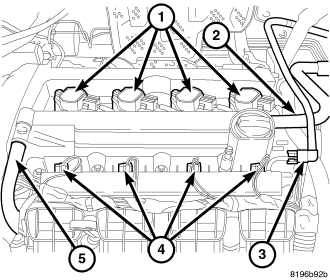
3. Disconnect coil electrical connectors (1).
4. Remove cylinder head cover (Refer to 9 - ENGINE/CYLINDER HEAD/CYLINDER HEAD COVER(S) - REMOVAL).
5. Raise vehicle.
6. Remove right splash shield.
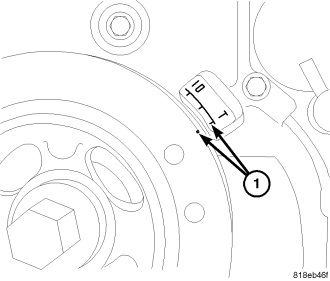
7. Rotate engine to TDC (1).
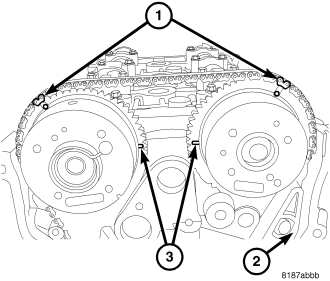
8. Make sure camshaft timing marks (3) are aligned.
9. Mark the chain link corresponding to timing marks (1) with a paint marker.
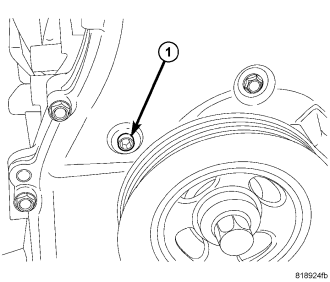
10. Remove timing tensioner plug (1) from front cover.
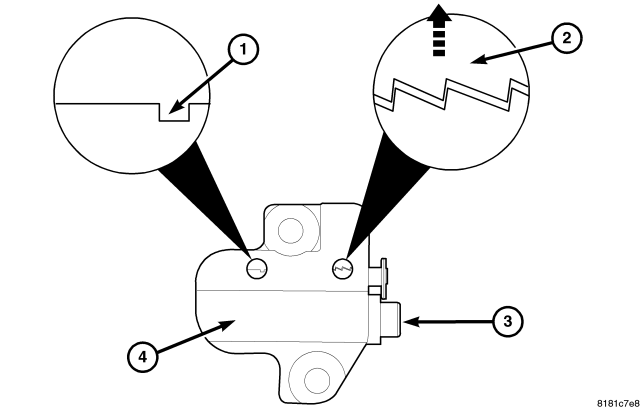
11. Insert small allen wrench through timing tensioner plug hole and lift ratchet (2) upward to release the tensioner and push allen wrench inward. Leave the allen wrench installed during the remainder of this procedure.
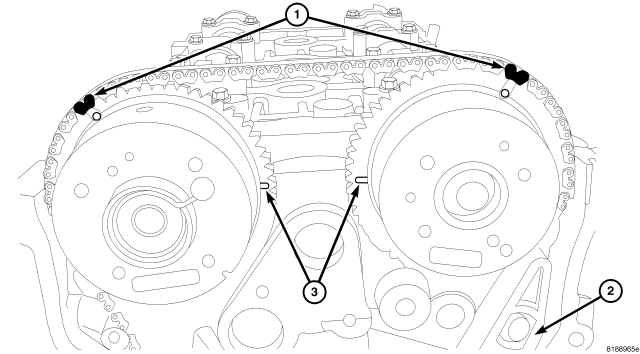
12. Verify that camshaft timing marks (3) are facing each other as shown.
13. Mark the camshaft sprocket timing marks and the corresponding chain links (1) with a paint marker.
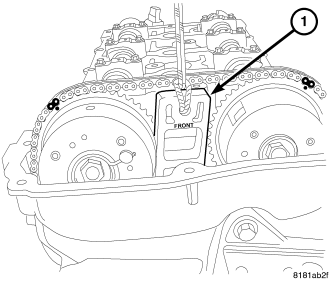
14. Insert wedge 9701 (1) between camshaft phasers.
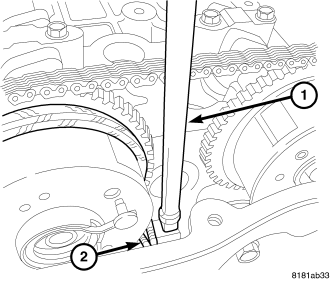
15. Lightly tap Wedge 9701(2) into place until it will no longer sink down.
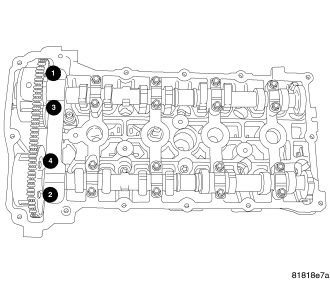
16. Remove the front camshaft bearing cap.
17. Slowly remove the remaining intake and exhaust camshaft bearing cap bolts one turn at a time.
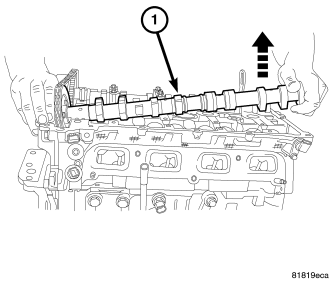
18. Remove intake camshaft (1) by lifting the rear of the camshaft upward.
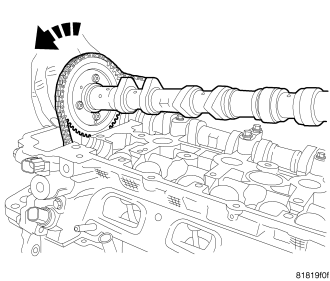
19. Rotate the camshaft while lifting out of the front bearing cradle.
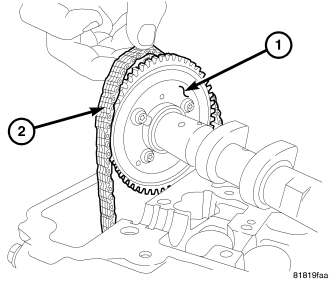
20. Lift the timing chain (2) off the sprocket (1).
21. Remove exhaust camshaft.
22. Secure timing chain with wire so that it does fall into the timing chain cover.
CLEANING
Clean camshafts with a suitable solvent.
INSPECTION
1. Inspect camshaft bearing journals for damage. If journals are damaged, check the cylinder head for damage. Also check cylinder head oil holes for clogging.
2. Check the cam lobe and bearing surfaces for abnormal wear and damage. Replace camshaft if defective.
NOTE: If camshaft is replaced due to lobe wear or damage, always replace the lash buckets.
INSTALLATION
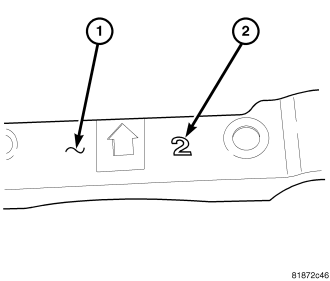
1. The cam cap (1) is numbered (2) either one, two, or three, this corresponds to the select fit bearing to use.
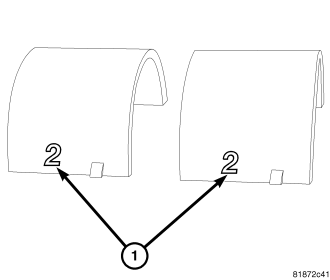
2. Install the corresponding select fit bearing (1).
3. Oil all of the camshaft journals with clean engine oil.
4. Install camshaft phasers on camshafts if removed.
a. Install camshaft phaser making sure that the dowel is in the correct hole.
b. Install camshaft phaser bolt and hand tighten.
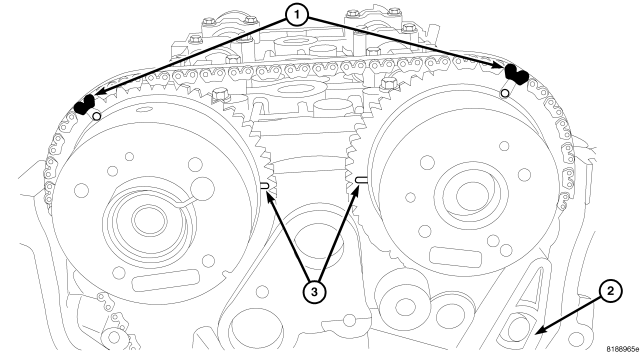
5. Install timing chain onto exhaust cam sprocket making sure that the timing marks (1) on the sprocket and the painted chain link are aligned.
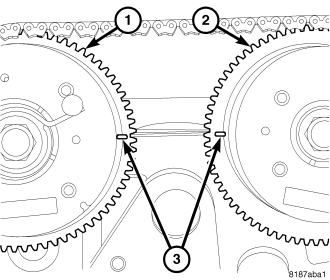
6. Position exhaust camshaft and on bearing journals in the cylinder head.
7. Align exhaust cam timing mark (3) so it is parallel to the cylinder head as shown.
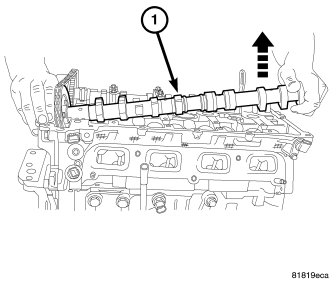
8. Install intake camshaft by raising the rear of the camshaft upward and roll the sprocket into the chain.
9. Align the timing marks (1) on the intake cam sprocket with the painted chain link.
10. Position the intake camshaft into the bearing journals in the cylinder head.
11. Verify that the timing marks (1) are aligned on both camshafts and that the timing marks (3) are parallel with the cylinder head.
CAUTION: Install the front intake and exhaust camshaft bearing cap last. Ensure that the dowels are seated and follow torque sequence or damage to engine could result.
NOTE: If the front camshaft bearing cap is broken, the cylinder head MUST be replaced.
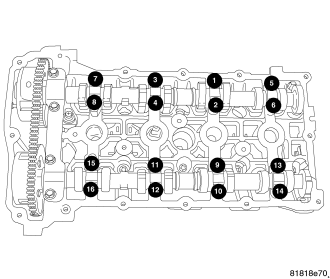
12. Install intake and exhaust camshaft bearing caps and slowly tighten bolts to 12 N·m (105 in. lbs.) in the sequence shown.
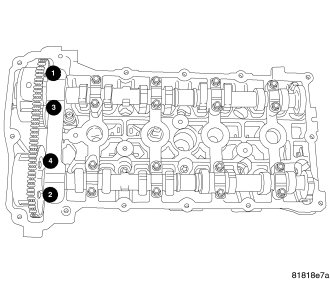
NOTE: Verify that the exhaust bearing shells are correctly installed, and the dowels are seated in the head, prior to torquing bolts.
13. Install the front intake and exhaust bearing cap and tighten bolts to 34 N·m (25 ft. lbs.) in the sequence shown.
14. Verify that all timing marks (1,3) are aligned.
15. Remove allen wrench from timing chain tensioner.
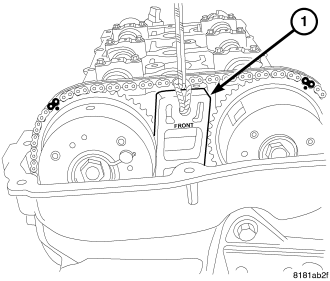
16. Remove locking wedge 9701 by pulling straight upward on pull rope.
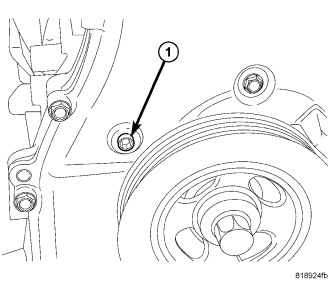
17. Apply MOPAR® thread sealant to timing tensioner plug (1) and Install.
18. Install right splash shield.
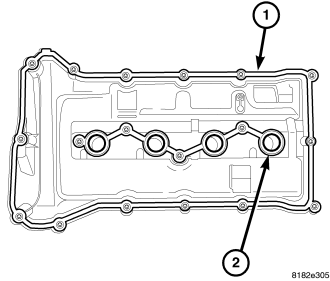
19. Install new cylinder head cover gaskets (1,2).
20. Install cylinder head cover (Refer to 9 - ENGINE/CYLINDER HEAD/CYLINDER HEAD COVER(S) - INSTALLATION).
21. Install engine cover.
22. Connect negative battery cable.
23. Fill cooling system.
24. Fill with oil.
25. Start engine and check for leaks.