STRIKER
REMOVAL
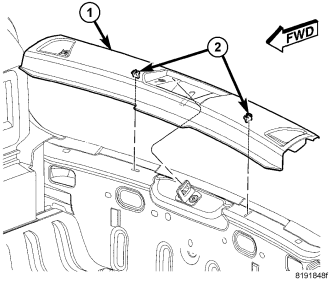
1. Using a trim stick C-4755 or equivalent, release the retaining clips (2) and remove the liftgate scuff plate (1).
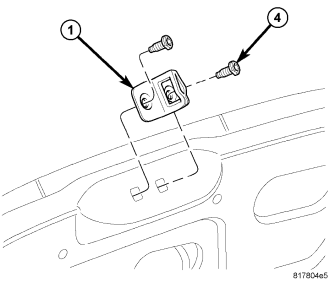
NOTE: Place a reference mark along the outer edge of the striker to ensure it is reinstalled to its original position.
2. Using a grease pencil or equivalent, mark the position of the striker (1) on the liftgate opening lower panel to aid installation.
3. Remove the two screws (4) that secure the striker to the lower panel and remove the striker.
INSTALLATION
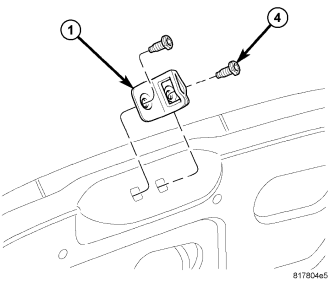
1. Position the liftgate striker (1) onto the liftgate opening lower panel and align the striker to the previously marked location.
2. Install the two bolts (4) that secure the striker to the lower panel. Tighten the bolts to 23 N·m (17 ft. lbs.).
3. Check and adjust the striker if necessary, (Refer to 23 - BODY/LIFTGATE/LATCH STRIKER - ADJUSTMENTS).
4. Position the liftgate scuff plate (1) onto the liftgate sill and seat the retaining clips (2) fully.