SHAFT-PROPELLER
REMOVAL
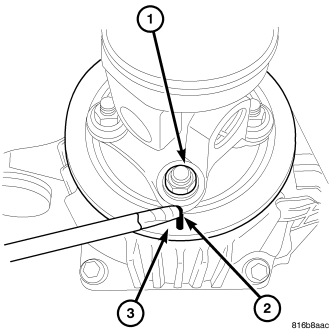
1. Raise the vehicle on the hoist.
2. Mark (2) propeller shaft and differential (3) for proper installation.
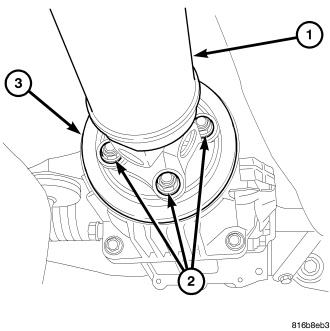
3. Remove rear propeller shaft to rear axle retaining nuts (2).
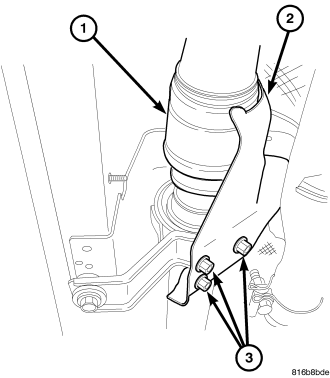
4. Remove the three bolts (3) from the center support heat shield (2).
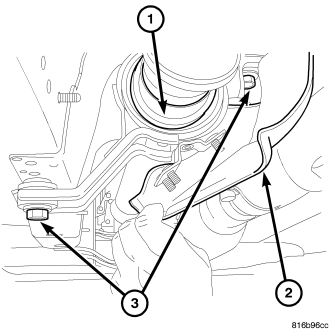
CAUTION: Propeller shaft removal. Never allow propeller shaft to hang while connected to Power Transfer Unit (PTU), rear driveline module flanges or center bearings. If propeller shaft section is hung unsupported, damage may occur to joint, boot and/or center bearing from over-angulation. This may result in vibration/balance issues. A helper may be needed.
5. Remove the heat shield (2).
6. Remove the two center support mounting bolts (3).
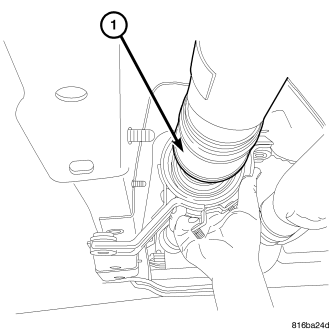
7. Remove the propeller shaft (1).
INSTALLATION
CAUTION: Propeller shaft installation. Never allow propeller shaft to hang while connected to Power Transfer Unit (PTU), rear driveline module flanges or center bearings. If propeller shaft section is hung unsupported, damage may occur to joint, boot and/or center bearing from over-angulation. This may result in vibration/balance issues. A helper may be needed.
1. Make sure transaxle is in Neutral (N) position.
2. Obtain a helper if needed and lift propeller shaft assembly into position. Install propeller shaft spline into PTU.
3. Align marks (2) on propeller shaft with marks on rear axle flange. Slide propeller shaft over studs on rear axle flange.
4. Install the four retaining nuts (2).
5. Raise the center support into position (1) .
6. Install center support bolts (3) and tighten to 41 N·m (30 lbs.ft.).
7. Install propeller shaft nuts (2) and tighten to 58 N·m (43 ft. lbs.).
8. Install heat shield (2) nuts and tighten to 21 N·m (15 ft. lbs.).
9. Check fluid levels starting with PTU.