CLEVIS BRACKET
REMOVAL
1. Raise and support the vehicle.
2. Remove the tire.
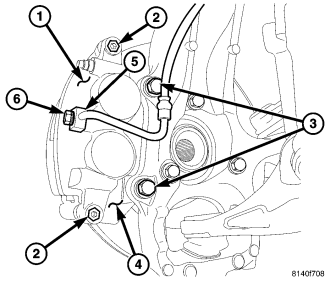
3. Remove the two brake caliper adapter bolts (3).
4. Support the brake caliper adaptor and caliper. Do not allow the caliper to hang by the brake hose.
5. Remove the disc brake rotor.
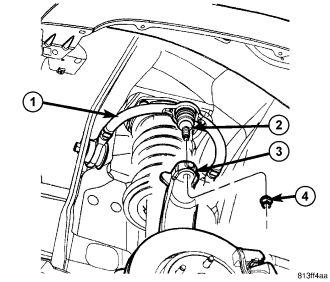
6. Remove the upper ball joint nut (4).
7. Separate the upper ball joint (2) from the knuckle (3) using special tool 8677.
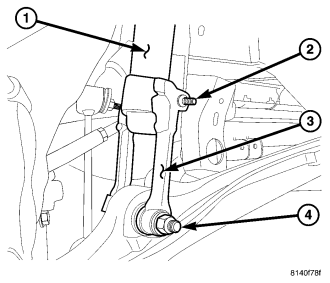
8. Remove the clevis bolt (2) at the shock (1).
9. Remove the lower clevis bolt/nut (4) at the lower control arm.
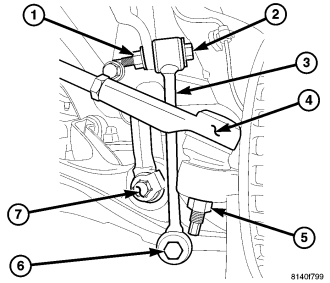
10. Remove the lower stabilizer link bolt (6).
11. Remove the clevis bracket (3).
INSTALLATION
1. Install the clevis bracket (3) to the shock (1) and tighten bolt (2) to 122 N·m (90 ft. lbs.).
NOTE: Orientation of the flag bolt is critical Flag and head of the bolt (7) must be installed on the forward side of the lower control arm.
2. Install the lower stabilizer link bolt (6) and tighten to 115 N·m (85 ft. lbs.).
3. Install the lower clevis bolt/nut (4) at the lower control arm and tighten to 169 N·m (125 ft. lbs.).
4. Install the upper ball joint (2) into the knuckle (3) and tighten the nut to 95N·m ( 70ft. lbs.).
5. Install the disc brake rotor.
6. Install the caliper adaptor mounting bolts (3) to 25 N·m ( 18 ft. lbs.).
7. Install the tire and wheel assembly.
8. Lower the vehicle.