DIFFERENTIAL
REMOVAL
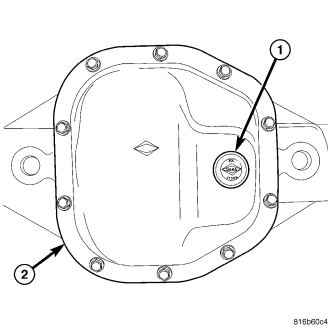
1. Remove drain plug (1) from differential cover (2) and drain lubricant.
2. Clean housing cavity with a flushing oil, light engine oil or lint free cloth.
3. Remove axle shafts.
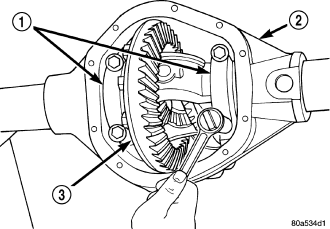
4. Loosen differential (3) bearing caps (1).
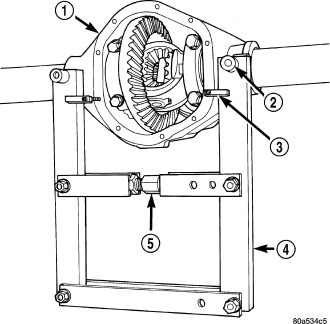
5. Position Spreader W-129-B (4) with tool dowel pins (2) seated in the locating holes. Install hold-down clamps (3) and tighten turnbuckle (5) finger-tight.
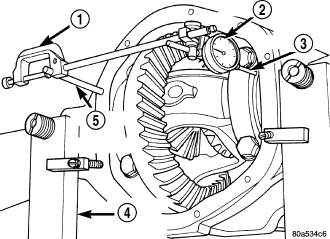
6. Install Pin C-3288-B (5) on left side of the housing and attach dial indicator (2) to the pilot stud. Load indicator plunger against the opposite side of the housing and zero indicator.
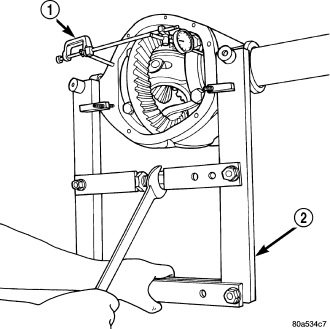
7. Spread housing with the spreader (2) to a maximum of 0.50 mm (0.020 in). Measure the distance with the dial indicator (1).
CAUTION: Failure to follow these instructions could distorted or damaged the housing.
8. Remove dial indicator.
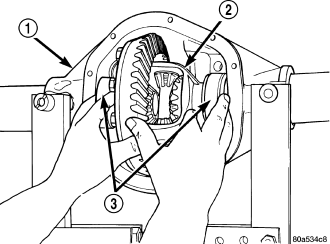
9. Hold differential case in position. Remove differential bearing caps and tag bearing cap locations.
10. Remove differential case (2) from housing (1) and tag bearing cups (3) and shims location.
11. Remove spreader.
DISASSEMBLY
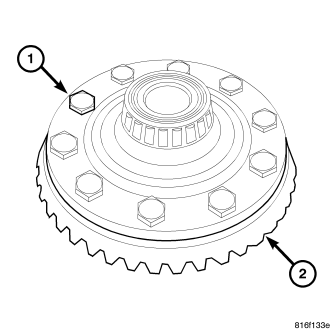
1. Remove ring gear bolts (1) and ring gear (2) from differential.
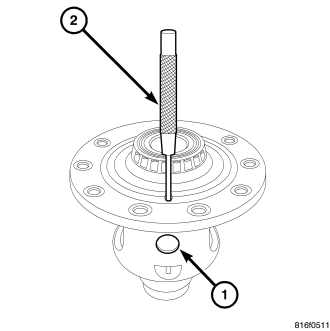
2. Remove pinion mate shaft (1) roll pin with a punch (2) and hammer.
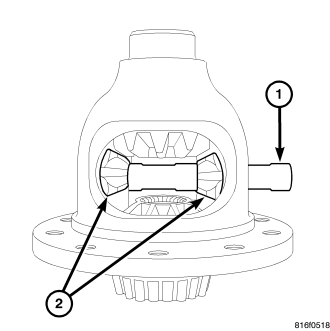
3. Remove pinion mate shaft (1) from differential and pinion gears (2).
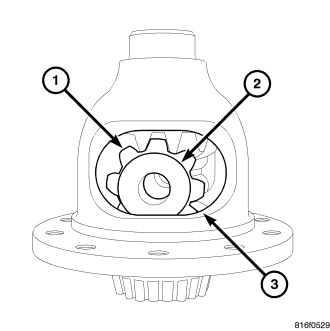
4. Rotate pinion gears (1) with thrust washers (2) to differential windows (3).
5. Remove pinion gears (1) with thrust washers (2) through differential windows (3).
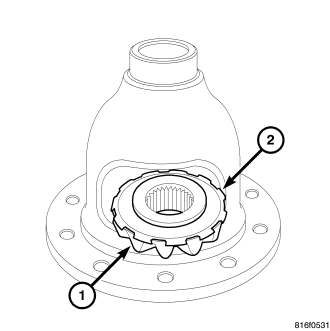
6. Remove first side gear (1) with thrust washer (2) through differential window.
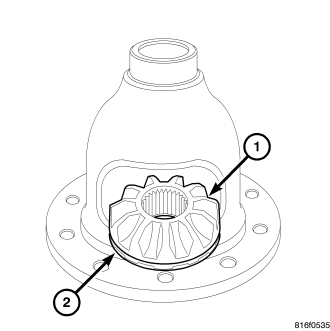
7. Remove second side gear (1) with thrust washer (2) through differential window.
ASSEMBLY
NOTE: If same gears and thrust washers are being used, install them into their original locations.
1. Lubricate all differential components with axle lubricant.
2. Install first side gear (1) with thrust washer (2) through differential window.
3. Install second side gear (1) with thrust washer (2) through differential window.
4. Install pinion gears (1) with thrust washers (2) through differential windows (3).
5. Rotate pinion gears (1) with thrust washers (2) and align gears to pinion mate shaft hole.
6. Install pinion mate shaft (1) in differential and pinion gears (2).
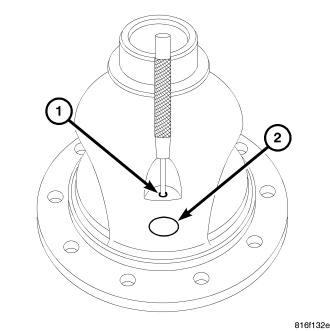
7. Install pinion mate shaft (2) roll pin (1).
8. Install ring gear (2) and bolts (1) on differential.
INSTALLATION
NOTE: If differential bearings or differential case are replaced, differential side bearing shim requirements may change.
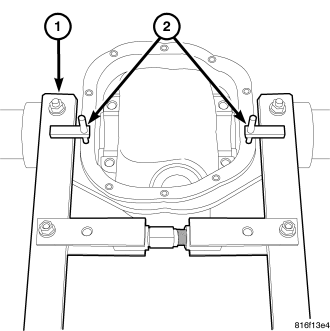
1. Position Spreader W-129-B (1) with tool dowel pins seated in the locating holes. Install Hold Downs W-129-1 (2) and tighten the tool turnbuckle finger-tight.
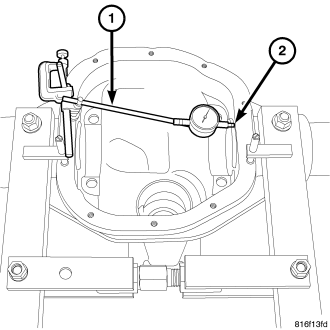
2. Install Pin C-3288-B on left side of the differential housing and attach Dial Indicator C-3339 (1) to the pilot stud. Load the indicator plunger (2) against the opposite side of the housing and zero dial indicator.
3. Spread housing with the spreader (2) to a maximum of 0.50 mm (0.020 in). Measure the distance with the dial indicator (1).
CAUTION: Failure to follow these instructions could distorted or damaged the housing.
4. Remove dial indicator.
5. Install differential (2) into the housing (1) with bearing cups (3) and shims.
6. Remove spreader.
7. Install bearing caps in their original locations and tighten bearing cap bolts in a criss-cross pattern to 108 N·m (80 ft. lbs.).
8. Install axle shafts.
9. Apply a bead of orange Mopar Axle RTV sealant or equivalent to the housing cover (2).
CAUTION: If housing cover is not installed within 3 to 5 minutes, the cover must be cleaned and new RTV applied. Failure to follow these instructions will result in a leak.
10. Install cover and tighten bolts in a criss-cross pattern to 48 N·m (35 ft. lbs.).
11. Fill differential lubricant to bottom of the fill plug hole.
12. Install fill hole plug (1).