LINKAGE
REMOVAL
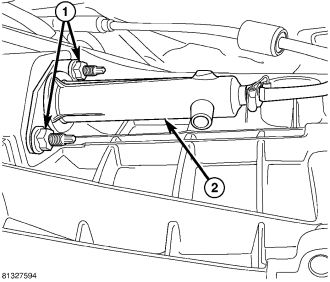
NOTE: The clutch master cylinder, slave cylinder and connecting line are serviced as an assembly only. The linkage components cannot be overhauled or serviced separately. The cylinders and connecting line are sealed units.
1. With vehicle in neutral, position vehicle on hoist.
2. Remove slave cylinder nuts (1) and remove slave cylinder (2) from clutch housing.
3. Disengage clutch fluid line from body clips, if applicable.
4. Lower vehicle.
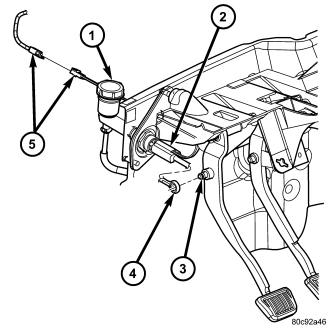
5. Tighten clutch master cylinder (1) reservoir cap to avoid spilling fluid.
6. Remove clutch master cylinder attaching nuts.
7. Disengage clutch master cylinder actuator (4) from pivot pin (3) on pedal arm.
8. Disconnect clutch interlock safety switch wires (5).
9. Remove clutch hydraulic linkage through engine compartment.
INSTALLATION
NOTE: The clutch master cylinder, slave cylinder and connecting line are serviced as an assembly only. The linkage components cannot be overhauled or serviced separately. The cylinders and connecting line are sealed units.
1. Tighten master cylinder reservoir cap to avoid spills.
2. Position clutch linkage components in vehicle. Work connecting line and slave cylinder downward past engine and adjacent to clutch housing.
3. Position clutch master cylinder (1) on dash panel.
4. Attach clutch master cylinder actuator (4) to pivot pin (3) on clutch pedal.
5. Install clutch master cylinder nuts and tighten to 38 N·m (28 ft. lbs.).
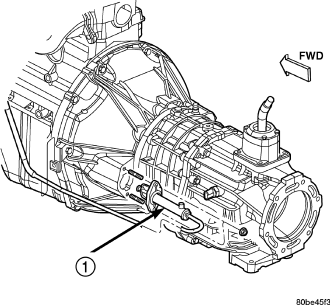
6. Install slave cylinder (1) push rod through clutch housing and securely engaged into release lever.
7. Install slave cylinder nuts and tighten to 23 N·m (17 ft. lbs.).
8. Secure clutch fluid line in body and transmission clips.
9. Connect clutch interlock safety switch wires (5).