COIL-IGNITION
DESCRIPTION
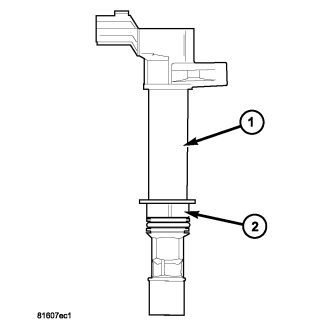
The 3.7L uses 6 dedicated, and individually fired coil (1) for each spark plug.
Each coil (1) is mounted directly into the cylinder head and onto the top of each spark plug.
OPERATION
Battery voltage is supplied to the 6 individual ignition coils from the ASD relay. The Powertrain Control Module (PCM) opens and closes each ignition coil ground circuit at a determined time for ignition coil operation.
Base ignition timing is not adjustable. By controlling the coil ground circuit, the PCM is able to set the base timing and adjust the ignition timing advance. This is done to meet changing engine operating conditions.
The ignition coil is not oil filled. The windings are embedded in an epoxy compound. This provides heat and vibration resistance that allows the ignition coil to be mounted on the engine.
Because of coil design, spark plug cables (secondary cables) are not used.
REMOVAL
An individual ignition coil (1) is used for each spark plug. The coil fits into machined holes in the cylinder head. A mounting stud/nut secures each coil to the top of the intake manifold. The bottom of the coil is equipped with a rubber boot to seal the spark plug to the coil. Inside each rubber boot is a spring. The spring is used for a mechanical contact between the coil and the top of the spark plug. These rubber boots and springs are a permanent part of the coil and are not serviced separately. An o-ring (2) is used to seal the coil at the opening into the cylinder head.
1. Depending on which coil is being removed, the throttle body air intake tube or intake box may need to be removed to gain access to coil.
2. Disconnect electrical connector from coil by pushing downward on release lock on top of connector and pull connector from coil.
3. Clean area at base of coil with compressed air before removal.
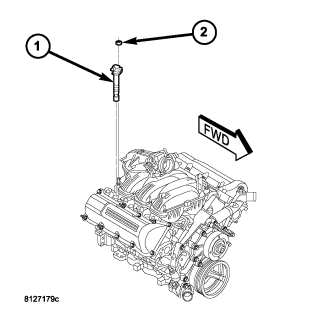
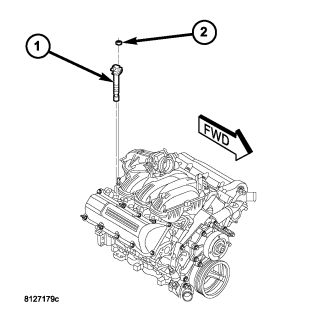
4. Remove coil mounting nut (2) from mounting stud.
5. Carefully pull up coil from cylinder head opening with a slight twisting action.
6. Remove coil from vehicle.
INSTALLATION
1. Using compressed air, blow out any dirt or contaminants from around top of spark plug.
2. Check condition of coil O-ring (2) and replace as necessary. To aid in coil installation, apply silicone to coil O-ring (2).
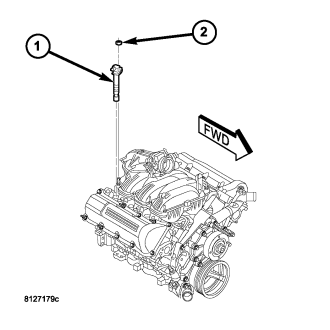
3. Position ignition coil (1) into cylinder head opening and push onto spark plug. Do this while guiding coil base over mounting stud.
4. Install coil mounting stud nut (2). Tighten to 8 N·m (70 in. lbs).
5. Connect electrical connector to coil by snapping into position.
6. If necessary, install throttle body air tube.