MANIFOLD-EXHAUST
DESCRIPTION
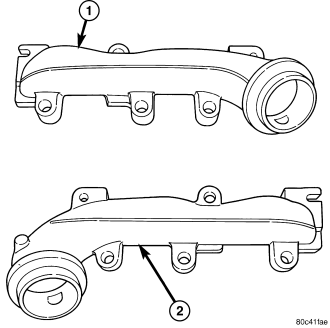
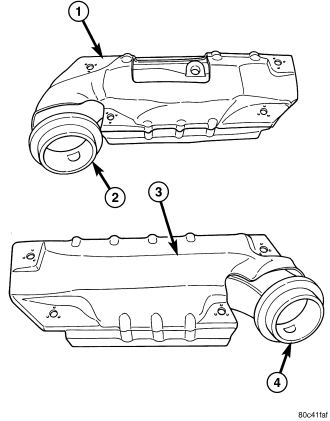
The exhaust manifolds (1,2) are log style with a patented flow enhancing design to maximize performance. The exhaust manifolds are made of high silicon molybdenum cast iron. A perforated core graphite exhaust manifold gasket is used to improve sealing to the cylinder head. The exhaust manifolds are covered by a three layer laminated heat shield (3) for thermal protection and noise reduction. The heat shields are fastened with a torque prevailing nut that is backed off slightly to allow for the thermal expansion of the exhaust manifold.
REMOVAL
RIGHT EXHAUST MANIFOLD
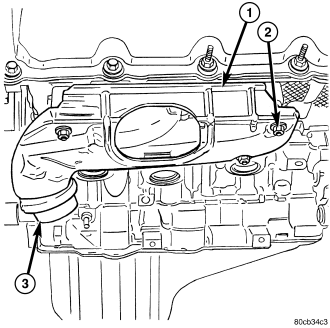
1. Disconnect the negative cable from the battery.
2. Raise and support the vehicle.
3. Remove the bolts and nuts attaching the exhaust pipe to the engine exhaust manifold.
4. Lower the vehicle.
5. Remove the exhaust heat shield (1).
6. Remove bolts, nuts and washers attaching manifold to cylinder head.
7. Remove manifold and gasket from the cylinder head.
LEFT EXHAUST MANIFOLD
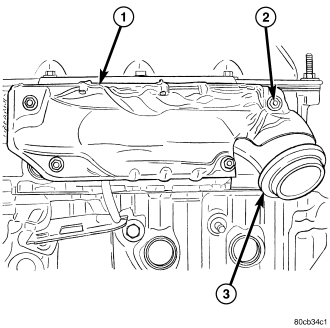
1. Disconnect the negative cable from the battery.
2. Raise and support the vehicle.
3. Remove the bolts and nuts attaching the exhaust pipe to the engine exhaust manifold.
4. Lower the vehicle.
5. Remove the exhaust heat shields (1).
6. Remove bolts, nuts and washers attaching manifold to cylinder head.
7. Remove manifold and gasket from the cylinder head.
INSTALLATION
RIGHT EXHAUST MANIFOLD
CAUTION: If the studs came out with the nuts when removing the engine exhaust manifold, install new studs. Apply sealer on the coarse thread ends. Water leaks may develop at the studs if this precaution is not taken.
1. Position the engine exhaust manifold and gasket on the two studs located on the cylinder head. Install conical washers and nuts on these studs .
2. Install remaining conical washers. Starting at the center arm and working outward, tighten the bolts and nuts to 25 N·m (18 ft. lbs.) torque.
3. Install the exhaust heat shields.
4. Raise and support the vehicle.
CAUTION: Over tightening heat shield fasteners, may cause shield to distort and/or crack.
5. Assemble exhaust pipe to manifold and secure with bolts, nuts and retainers. Tighten the bolts and nuts to 34 N·m (25 ft. lbs.) torque.
LEFT EXHAUST MANIFOLD
CAUTION: If the studs came out with the nuts when removing the engine exhaust manifold, install new studs. Apply sealer on the coarse thread ends. Water leaks may develop at the studs if this precaution is not taken.
1. Position the engine exhaust manifold and gasket on the two studs located on the cylinder head. Install conical washers and nuts on these studs .
2. Install remaining conical washers. Starting at the center arm and working outward, tighten the bolts and nuts to 25 N·m (18 ft. lbs.) torque.
3. Install the exhaust heat shields.
4. Raise and support the vehicle.
CAUTION: Over tightening heat shield fasteners, may cause shield to distort and/or crack.
5. Assemble exhaust pipe to manifold and secure with bolts, nuts and retainers. Tighten the bolts and nuts to 34 N·m (25 ft. lbs.) torque.