SOLENOID - FUEL QUANTITY
DESCRIPTION
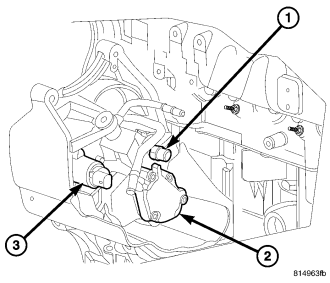
The fuel quantity solenoid is located in the back of the high pressure pump. The solenoid is pulse width modulated by the ECM and meters the amount of fuel that flows into the high pressure elements inside of the high pressure pump. The solenoid is also inactive during the first 30 seconds to allow maximum fuel pressure to the fuel rail during start up .
OPERATION
The fuel quantity solenoid is a pulse width modulated valve that controls the amount of fuel sent or delayed to the high pressure pump elements inside of the high pressure pump. The ECM determines the fuel pressure set point based on engine sensor inputs. If the actual fuel rail pressure is too low, the ECM commands the solenoid to allow more fuel to flow to the high pressure pump. This minimizes the difference between the actual fuel rail pressure reading and the set point. The ECM will also operate the solenoid, delaying fuel if the fuel rail pressure becomes to high.
The fuel quantity solenoid is commanded open by the ECM to allow the high pressure pump to build maximum pressure (1600 BAR, 23,200 PSI) (Refer to 14 - FUEL SYSTEM - WARNING). the solenoid also has fuel tank heat protection function that meters the exact amount of fuel to prevent excess heated fuel from returning to the fuel tank
REMOVAL
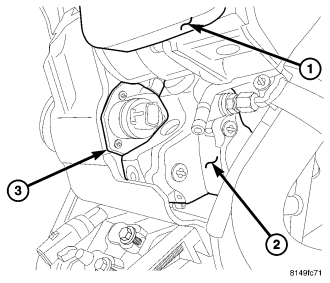
1. Disconnect the negative battery cable
2. Remove the charge air inlet hose.
3. Disconnect the fuel quantity solenoid wiring harness connector.
4. Remove the solenoid from the back of the high pressure pump .
NOTE: Inspect the fuel quantity solenoid and high pressure pump passage for contamination or corrosion. If contamination or corrosion is present replace the high pressure pump.
5. Inspect solenoid and pump for corrosion.
INSTALLATION
1. Review the high pressure fuel system warning (Refer to 14 - FUEL SYSTEM - WARNING).
2. Lubricate the fuel quantity solenoid and seal with clean diesel fuel.
3. Install the solenoid into the high pressure pump, hand tighten the fasteners .
4. Torque the solenoid fasteners to 10.8 N·m (96 in. lbs.).
5. Connect the wiring harness connector.
6. Install the charge air inlet hose.
7. Start engine, allow to warm, shut engine off and inspect for leaks.